If you are using Windows XP, you do not need to spend a lot of money for your back-up needs. XP has a very nice tool that nobody seems to notice. In this article, we take a look at one of the useful programs found in XP’s System Tools.
Introduction
In my articles, I often emphasize the importance of backing up your computer. Every time I try to stress why backing up is important, everyone, without exception, tells me that I am right. Then, people go their own ways and, after some time, ask me to fix their computer and help retrieve their files. Whether I succeed or not, they continue doing as they always have and ignore backing up.
I know that Bright Hub readers are more prudent and make back-ups regularly. In this article, we will look at how to use XP’s back-up utility to perform this task. We also have a bonus tip at the end.
XP’s Own Back-Up Tool
There are many tools available for back-up purposes. You can choose a free one or you can select a commercial one, such as the wonderful Acronis True Image. In our article, we will go with XP’s own back-up tool, and we will show how to back-up our data, step by step, to an external USB drive.
Windows XP Professional users will find the back-up tool installed by default and can access it by going to Start-> (All) Programs -> Accessories -> System Tools -> Back-up. Windows XP Home users do not have the tool installed, but it is present on the XP CD. Insert the CD to your CD/DVD drive, go into the ValueAdd folder and then double click ntback-up.msi. This will install the back-up tool.
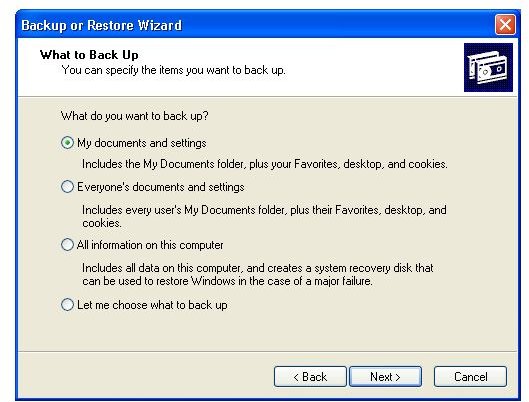
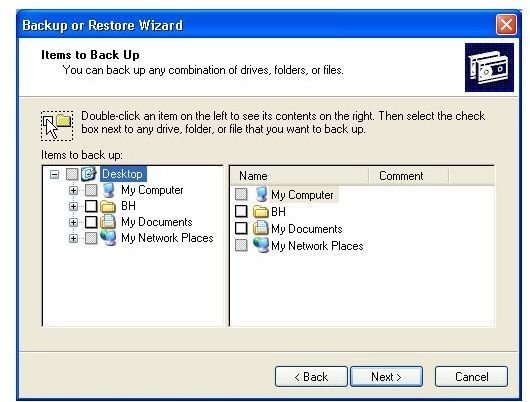
We start the tool from the Start Menu. The program will start in wizard mode. Click Next and leave the “back-up files and settings” options checked. Click Next again. In the opened window, you have the options to back-up “My documents and settings”, “Everyone’s documents and settings”, “All information on this computer” and “Let me choose what to back-up.” You can see what these options mean in the screenshot (or when you are running the back-up utility). The default option, which is to back-up My Documents and settings is fine, since it will also back-up your cookies, meaning that when you restore your back-up, you will not have to log on to each website to identify yourself. The “Let me choose what to back-up” option is also fine if you know which data you want to have backed up.
There is a special note for the “All information on this computer” option. If you select this and do a full back-up, then the program takes a complete image of your disk and, in case of any failure, you can restore it back to its original state. I suggest making this back-up to a CD/DVD or a thumb drive, depending on which drive your computer can boot from – if it can boot from a thumb drive, it is better to go with this option because the reading speed of thumb drives is higher than CD/DVDs, meaning that your recovery will be faster.
If this will be the first time that you are backing up your computer, first go with this option and keep your back-up safe. Then go back to the wizard and take an image of “My documents and settings”. In case of a serious system failure, you can first restore your entire computer from the CD/DVD or thumb drive, and then restore again with your documents and settings. That means that you have recovered from a crash, restored everything, and will be running where you left off.
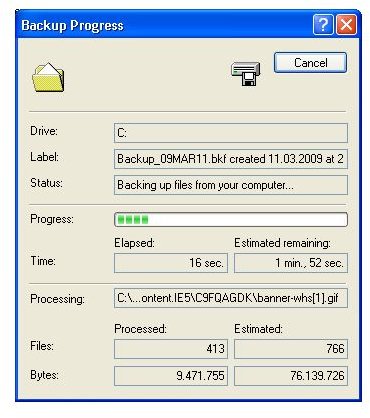
Finally, click Next and “Choose a place to save your backup” by clicking the “Browse” button. The default is your floppy disk drive, but a USB disk is a better option. Finally, rename your backup in the Backup_YYMMDD format, because this will help you easily figure out later which backup is the last one. Clicking Next starts the process. This is all it takes to make your data secure.
As I promised, I have a tip for Bright Hub readers. Go to Start-> (All) Programs -> Accessories -> System Tools -> Scheduled tasks and double click on “Add Scheduled Task”. Click Next in the wizard, and in the opened window select Backup. Click next, select “Daily”, click next and set the start time to a time that you are not using your computer but it is powered on. This can be lunch time or if you leave your computer running, it can be something like 05:00. Leave “Every Day” selected and set the start date to, preferably, today or tomorrow. Click Next, enter your password, tick the “Open advanced properties for this task when I click Finish” box, and Finish. Go through the wizard once again. When you have finished, you will be backing up your computer every day at the time that you specified in the wizard. In case of a failure, even with the worst case scenario, you will only lose, at most, one day’s work.
Of course there are commercial tools available for users who take backing up very seriously (the prudent people). As I mentioned, Acronis True Image is a perfect tool for this job. You can read about it in Steve Mallard’s review and/or go to its homepage for more information.


