Windows Live Calendar is a web-based time management application. Learn how to make one or multiple calendars to keep yourself - and others - on track.
Add Events
To start creating and using a Windows Live Calendar, head to WindowsLive.com/Online/Calendar . Click Go to Your Calendar and then sign in using your existing Windows Live ID. If you don’t have a Windows Live ID, click the Sign Up button and follow the steps to obtain one.
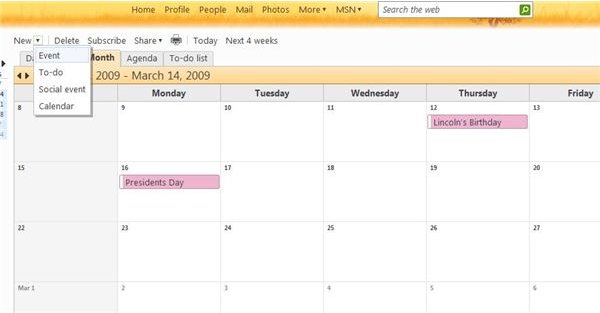
Begin adding events and appointments to your calendar. From the Windows Live Calendar main window, click the New drop down arrow. Select Event, and the Add an Event dialog will open. Enter the name, location, date and time. Click Save to add the event to your calendar. You can also click Add More Details, which allows you to add a “charm” to the date on the calendar, set a reminder, make the event recurring, invite others and more. When you are done, click Save and the event will be added to your Windows Live Calendar.
Click New and select To-Do for a similar calendar entry.
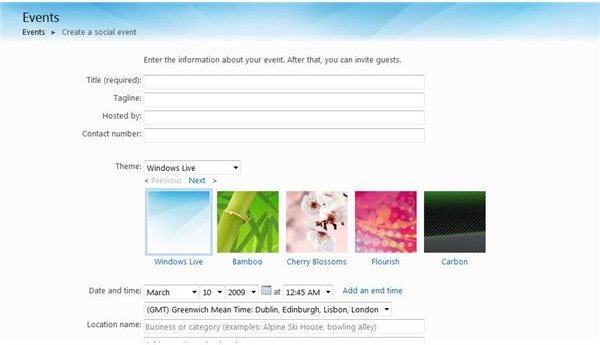
If you are hosting an event, you can add it to your Windows Live Calendar and invite others in just a few, easy steps. Click New and select Social Event. Enter the details of the event, select the theme (Birthday, Sports, and so on), and click Create. Click Invite Guests and follow the steps to let people know about the party.
Create New Calendars
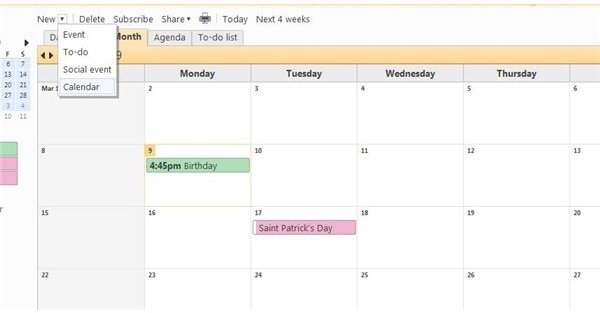
One option you might have noticed when creating an event or to-do is to which calendar you want to add it. This probably tipped you off to the fact that you can create several Windows Live Calendars. For example, you might want to create a home calendar and a work calendar. You could create a special calendar for your Girl Scout troop or your bowling league. The possibilities are nearly endless. To make a new calendar, click the New drop down and select Calendar.
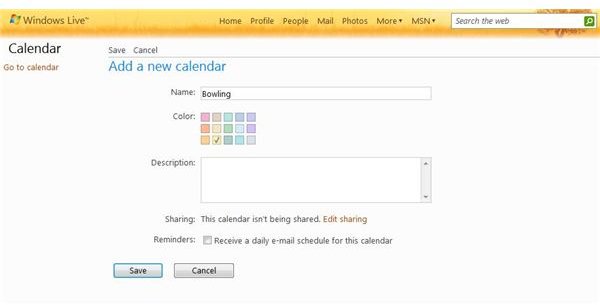
Give the new calendar a name, pick a color theme for it, and add a description. If you want to share this calendar with your bowling team, or anyone else, click Edit Sharing. Select the Reminders checkbox if you want daily emails reminding you of events on this calendar. When you are done, click Save.
In the Calendars task pane, you can select which calendar events you want in the current view. The event color will correspond with the calendar with which it is associated.
Share a Calendar
If at any time you want to share a Windows Live Calendar, click the Share drop down arrow and select the calendar to be shared. Select Share this Calendar. You will be given several sharing options.

Select Share Your Calendar with Friends and Family to select people with whom you want to share the calendar. Click the Add People button to enter names or email addresses, or select them from your contact list. In the drop down menu, choose whether they will be able to add to, edit or only view the calendar entries. Click Add People to send an invitation to the person or people you selected.

If you have friends who do not have and don’t want a Windows Live ID, but you still want them to be able to view your Windows Live Calendar, select Send Friends a View-Only Link to Your Calendar. They will not be able to edit it, but they will be able to view it as a webpage.
If you are really popular (or want to be!), you can choose Make Your Calendar Public. With this option, anyone can search for and view your Windows Live Calendar.


