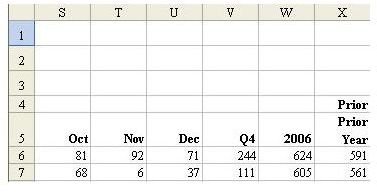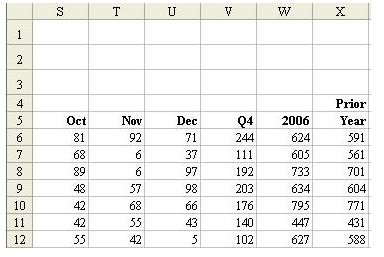
Problem: The problem on List Format indicated that your headings should occupy only one row to allow for easy sorting. Your manager requires that you format a report to have the heading “Prior Year” split with “Prior” in one row and “Year” in a second row, as shown in Fig. 616.
This is a very real problem, where form meets function. The right thing to do in Excel is to have “Prior Year” in one cell. But, I’ve also worked for obsessive managers who absolutely, positively want the formatting to be exactly as they specify. Luckily, there is a strategy that makes it possible to make the manager happy and to have the dataset set up correctly in Excel, too.
Strategy:
**
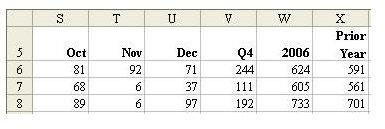
As shown in Fig. 617, in cell X5, type the word Prior. Hold down Alt while hitting Enter and type the word Year. The Alt+Enter combination adds a line feed character in the cell. Delete the heading in X4 by moving the cell pointer there and hitting the Delete key.
Result:
As shown in Fig. 618, you have a single cell that contains two lines of text. The cell will work as a heading in pivot tables, subtotals, and sorting, etc.
Additional Details:
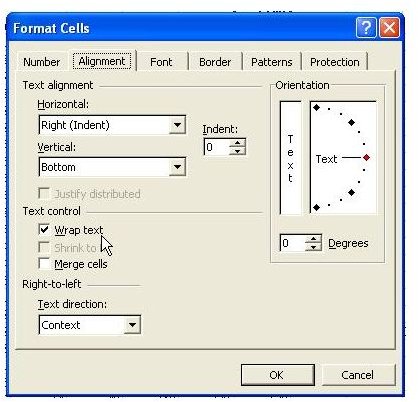
Using Alt+Enter automatically turns on the Wrap Text option for the cell. As shown in Fig. 619, you could also turn on the Wrap Text option by choosing Cells from the Format menu and then using the Alignment tab.
**
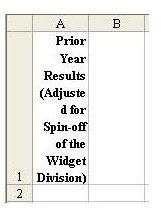
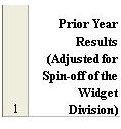
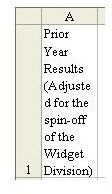
Turning on Wrap Text in this manner will probably work for a heading like “Prior Year”. However, if you want to have control over a long heading, such as “Prior Year Results (Adjusted for Spin-off of the Widget Division)”, then it is better to use Alt+Enter. Fig. 620 below shows the somewhat random splitting used by just turning on Wrap Text. As you make this column wider, you can get the results shown in Fig. 621 and Fig. 622.
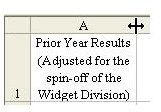
Instead, if you use Alt+Enter, you can have absolute control over where the heading breaks. Fig. 623 shows a cell where you typed Prior Year R esultsAlt+Enter(Adjusted for theAlt+EnterSpin-off of theAltEnterWidgetDivision). Make the column wider and center it for the perfect-looking cell shown in Fig. 624.
Gotcha:
**
If you set up a cell that looks like Fig. 620 and resize the column to look like Fig. 622, the row height will stay tall enough to accommodate Fig. 620. To correct, select the cell and from the menu, choose Format – Row – Autofit.
Gotcha:
Sometimes you will paste some cells and frustratingly find that many cells have Wrap Text. If you select all cells in the worksheet and globally turn off Wrap Text, the linefeeds where you hit Alt+Enter will show up as squares in the cell, as shown in Fig. 625. Reselect these cells, hit Ctrl+1 to display the Format Cells dialog, go to Alignment and turn on the Wrap Text feature. Then select the cell and choose Format – Row – AutoFit to see both lines of the cell again.
Summary:
Use Alt+Enter to make single cells that contain several rows of headings. This enables all of the commands on the Data menu to work properly.
Commands Discussed:
Format – Cells; Format – Row – AutoFit
**
Images