This tutorial demonstrates how to apply both default and custom formats to dates in Excel spreadsheets. With these tools, you have complete control over the appearance of all date values in a workbook.
Date Formats
There are a number of ways to express a date format in today’s world depending on personal preferences, the type of information you are presenting, and local geographic conventions. One nice feature in Excel is that you can literally format a date any way you want, either by using the built-in formats that you can apply with a couple of clicks or by creating your own custom date formats. We’ll begin by looking at the easiest of these two methods and show how to apply an existing format to a date in Excel.
Applying a Basic Date Format
To apply one of Excel’s built-in date formats, follow these steps.
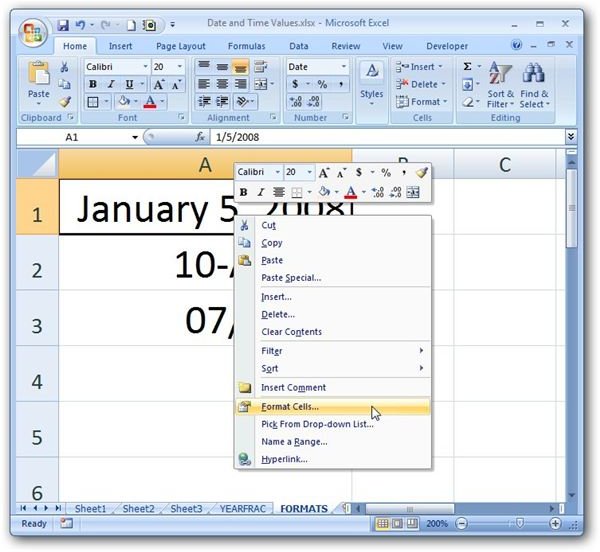
Step 1: Right-click on the cell that contains the date and select Format Cells. (Click any image for a larger view.)
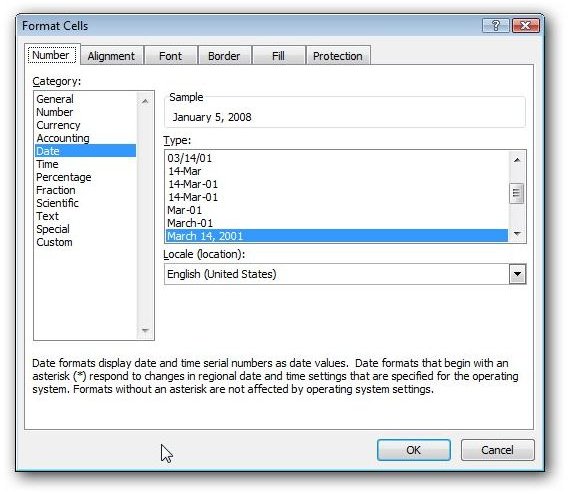
Step 2: In the Format Cells dialog box, click on the Number tab. Choose Date from the Category list.
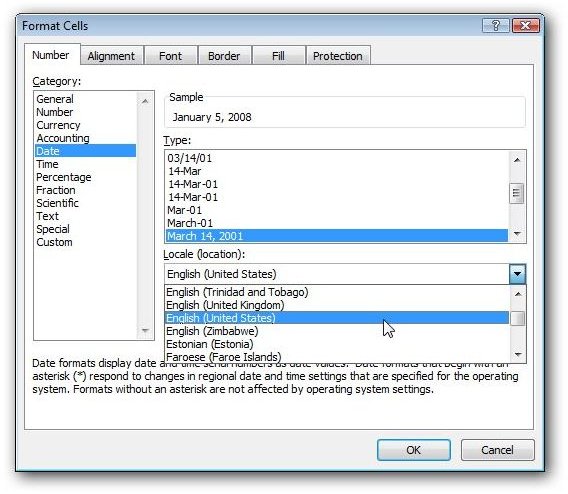
Step 3: Choose the proper location from the Locale drop down list. For example, if you want to use United States date conventions, pick this option from the list.
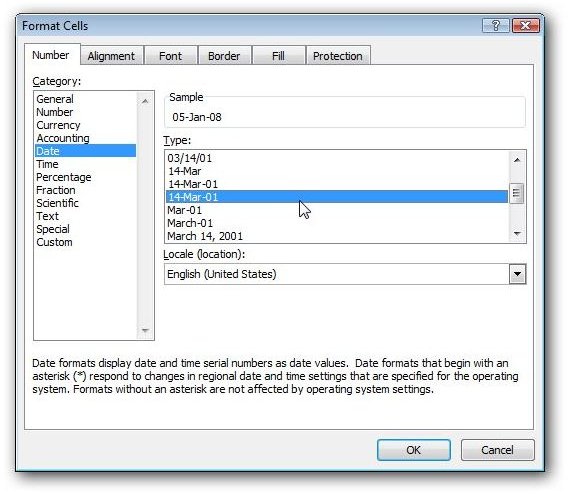
Step 4: Scroll through the list of formats available under Type. Clicking any of these formats will show a preview of how your chosen date will appear in the Sample box.
Once you’ve selected a format, click OK. This will close the Format Cells window and apply your chosen format to the date in your worksheet.
Creating a Custom Date Format
What if none of the formats in Excel’s list of built-in options looks like what you want? In this case, you can create your own custom format. To do this, access the Format Cells dialog box again, but this time, choose Custom from the Category list.
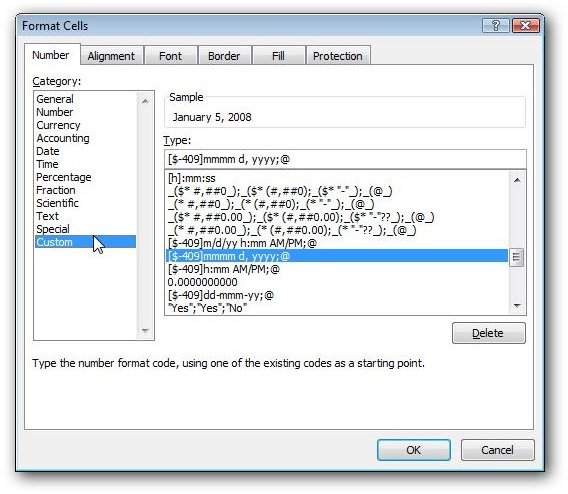
Place your cursor in the box underneath the word Type, and delete any characters appearing in that field.

Now you’re ready to enter the information to create your own date format. Here are some codes that you’ll need for creating the format.
-
d – This character will represent the “day” portion of the date. If you type a single d, all days in your format will appear in the least number of digits needed, such as 1, 11, or 23. If you type two of these characters together (dd), all days will have two digits, such as 19, 04, or 31.
Advertisement -
m – This character represents the “month” portion of the date. A single m will return the month in numeric form in the least number of digits needed to identify it, such as 1 for January and 12 for December. The character combination mm will also return the numeric form of the month, but each month will contain exactly two digits (01 for January and 12 for December). The combination mmm will return the three-character abbreviation for the month, such as Jan or Dec. Finally, the four-character combination mmmm will return the full name of the month (January or December).
-
y – This character represents the “year” portion of the date. The two-character combination yy will return years with two numeric digits (09 for 2009 or 98 for 1998). If you want the full year to be displayed, use the four-character combination yyyy.
Advertisement
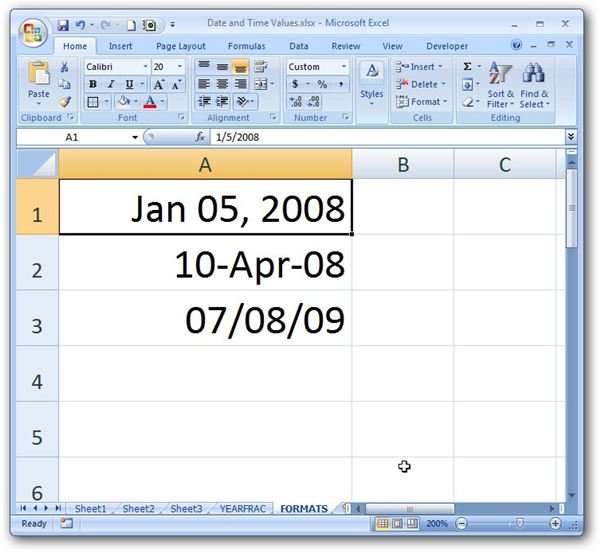
You can use these characters in combination with others such as commas, periods, spaces, and slashes to create any date format. For example, if you want your date to display as Jan 05, 2008, you would type the following.
mmm dd, yyyy
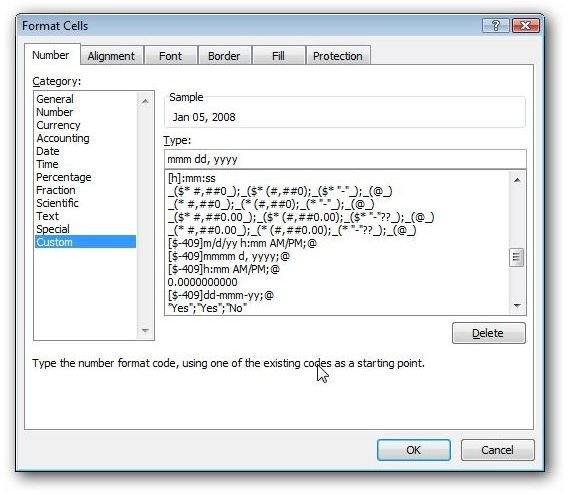
As the above screenshot demonstrates, you’ll be able to see a preview of your creation in the Sample area before you actually have to apply the format. This gives you a chance to experiment with different combinations until you find the precise one you want to use. When satisfied with your format, click OK to exit the Format Cells dialog box. You’ll be returned to your spreadsheet, and the new format will be applied to your date value.
For more tips and tricks, take a look at the other items in Bright Hub’s collection of Microsoft Excel user guides and tutorials. Find out how to use the various lookup and reference functions , learn about constructing charts and graphs , read up on data validation tools , and more. Additional items are being added on a regular basis, so be sure to check back often.


