Learn how to use Word’s AutoCorrect and AutoText features to save you time by creating shortcuts for frequently used names, words and phrases.
AutoCorrect vs. AutoText
AutoCorrect is best used for creating shortcuts for words, phrases, and even images. For example, if you often type Microsoft Word, you could create a shortcut such as “msw”. Then any time you typed “msw”, it would expand to Microsoft Word. AutoCorrect is also already setup to correct commonly misspelled words (for example, “teh” will change to “the”), but you can also enter your own words that you frequently misspell.
AutoText is best used for longer phrases or paragraphs (for example, “boilerplate” text for disclaimers or a standard closing for a letter). AutoText is also already setup with several standard AutoText entries. For example, start typing “to whom it may concern”, and you’ll see a pop-up box appear with the full phrase. To insert the full phrase, just press Enter.
Microsoft Word AutoCorrect
To Create an AutoCorrect Entry
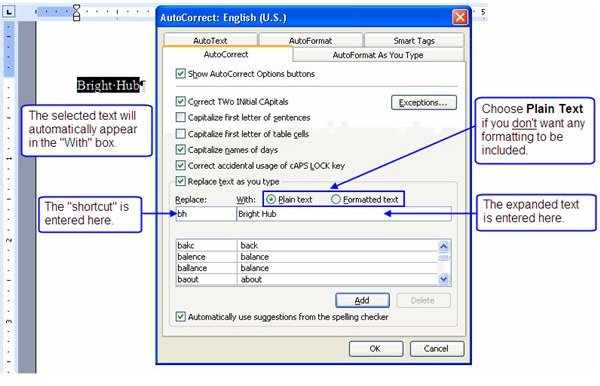
- Select the text from your Word document that you want to create an AutoCorrect entry for. (Alternatively, you can also just type it into the “With” box on the AutoCorrect screen.)
- Click Tools on the menu bar and choose AutoCorrect Options.
- The AutoCorrect dialog box opens. If you selected your text first, you will see that text automatically entered in the “With” box. Now just type your shortcut in the “Replace” box.
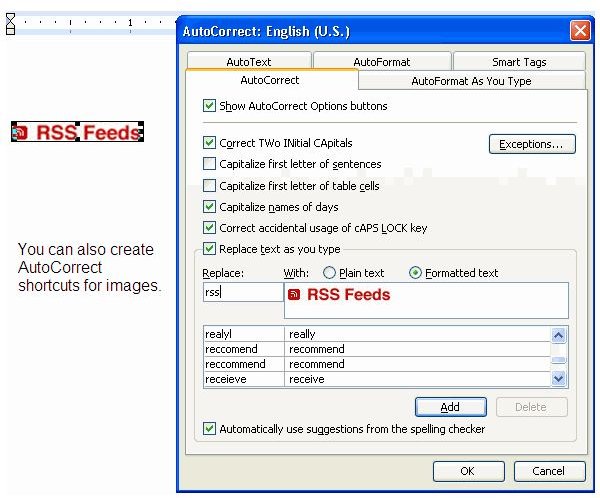
- If you selected text from your document, you have the option to choose Formatted Text. By selecting this option, the formatting (e.g., font and size) of the text you selected will also be saved with the shortcut. But, if you’d rather have your shortcut saved as plain text so that it picks up whatever formatting is in the document that you insert it into, then choose Plain Text.
- Click Add to create the AutoCorrect entry.
CAUTION: Don’t create AutoCorrect shortcuts using text that would commonly be used for other things. For example, you wouldn’t want to use “mr” as a shortcut for “medical records” because if you tried to type “Mr. Jones”, you would get “medical records” as soon as you typed the period at the end of “Mr”.
NOTE: The Plain Text and Formatted Text options are only available if you selected the text from your document, rather than typing it into the “With” box. Also, if you selected text to add to AutoCorrect, and it comes up with the Formatted Text already marked, then you should leave it as Formatted Text. If you change it to Plain Text, it may not work properly. (Unfortunately, this may involve some trial and error.)
You can also create AutoCorrects to insert images. Just select the image and follow the steps above.
To Use AutoCorrect
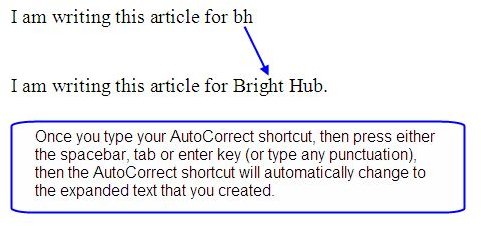
Just type the shortcut into your document. Then as soon as you hit the Spacebar, Tab, or Enter key, or type any punctuation, the shortcut will automatically expand to the full text that you created.
TIP: If you type your shortcut, but you don’t want it to be replaced by the expanded text, then as soon as it expands, immediately press Ctrl+Z to undo the change. (Or you can click the Undo button on your toolbar.) If this frequently happens to you, you may want to change your shortcut to something else.
To Edit AutoCorrect
- To edit an AutoCorrect entry, click Tools on the Menu bar and choose AutoCorrect Options.
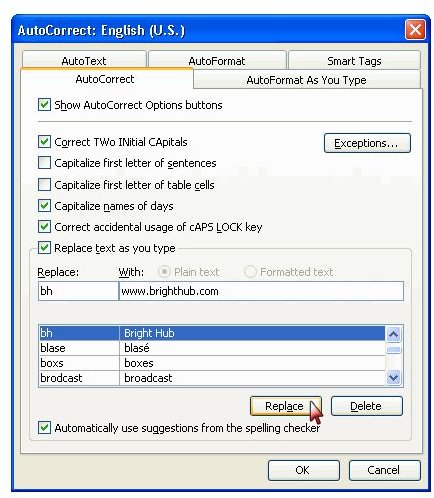
- On the AutoCorrect tab, locate the entry that you want to modify, and select it.
- Make your changes and click Replace.
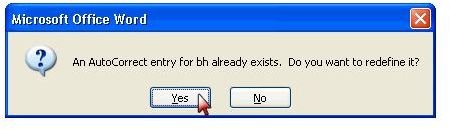
- You will get a message saying the ‘AutoCorrect entry already exists, do you want to replace it’ - click Yes.
To Delete AutoCorrect
- To delete an AutoCorrect entry, click Tools on the Menu bar and choose AutoCorrect Options.
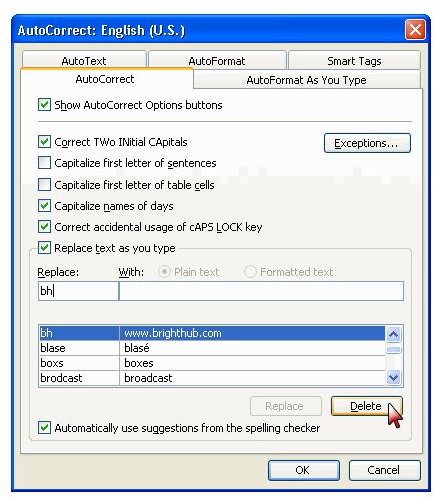
- On the AutoCorrect tab, locate the entry that you want to delete, and select it.
- Click the Delete button.
- Click OK to close the dialog box.
Microsoft Word AutoText
To Create an AutoText Entry
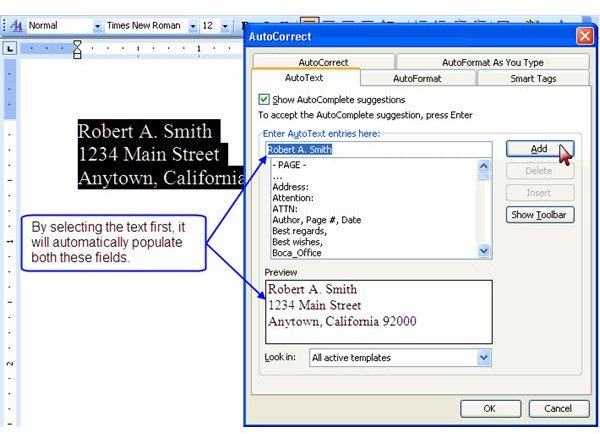
- Select the text from your Word document that you want to create an AutoText entry for.
- Click Tools on the menu bar and choose AutoCorrect Options.
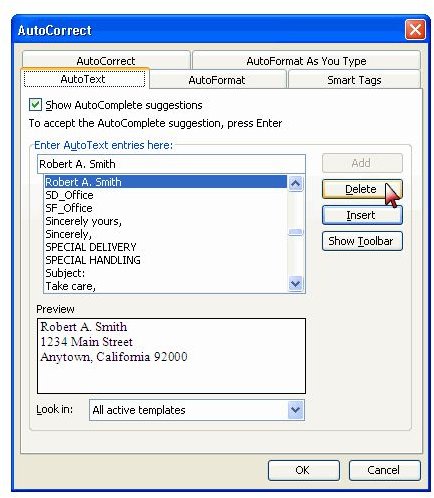
- The AutoCorrect dialog box opens. Click on the AutoText tab.
- You will see that the “Enter AutoText entries here” box is already filled in for you with the first few words of the phrase. You can leave this as it is, or change it to some other shortcut. The “Preview” box at the bottom will show you the expanded AutoText.
- Click Add to create the AutoText entry.
To Use AutoText
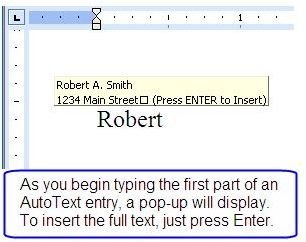
To use an AutoText shortcut, just start typing the beginning of the text, or type the shortcut that you gave it. A pop-up box will appear over the text that you typed. Once you see the pop-up box, just press Enter to insert it.
If you do not want to insert the AutoText, just ignore the pop-up box and continue typing your text. The AutoText will not insert unless you press Enter when the pop-up box is displayed.
To Edit AutoText
Unfortunately, you can’t actually go in and edit an AutoText entry. But here is a quick way to work around that nuisance:
- Insert the AutoText entry that you want to modify into your document (See ‘To Use AutoText’).
- When the AutoText is inserted into your document, make the necessary changes to it there.
- Then select the revised text and click Tools on the menu bar, choose AutoCorrect Options, and click on the AutoText tab.
- Look for the old name of the AutoText entry in the list, select it and click Add.
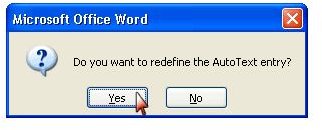
- A box will pop-up asking if you want to redefine the AutoText entry. Click Yes.
To Delete AutoText
- Click Tools on the menu bar, choose AutoCorrect Options, and click on the AutoText tab.
- Find the AutoText that you want to remove, select it and click Delete.
- Click OK to close the dialog box.
Conclusion
Because many of the same types of shortcuts can be created using both AutoCorrect and AutoText, it will be up to each user to determine which method works best for their needs. So play around with these Microsoft Word features to come up with clever ways to make document creation and editing a much more efficient and productive experience.


