It only takes moments to create a coloring page with any theme you like in Microsoft Word 2007, and there’s a wealth of images from which to choose. These instructions will walk you through the process.
Microsoft Word - Not Just for Work
Microsoft Word 2007 isn’t just for the office anymore. In addition to writing letters and research reports, you can also use this versatile software in a number of other ways, including making your own coloring pages. In the following steps, we’ll cover how to make coloring pages that you can print out, ready to use, on your own home printer. The process is quick and easy, and the variety of options is almost limitless.
How to Make Coloring Pages
Step 1: Open a new blank document in Microsoft Word.
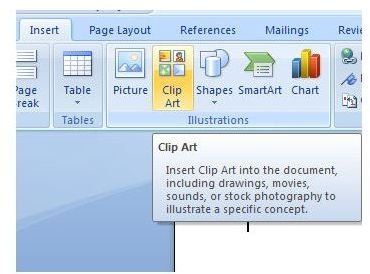
Step 2: From the Insert tab on the Word ribbon, click the Clip Art button.
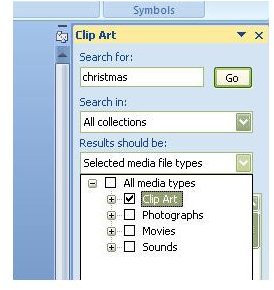
Step 3: The Clip Art panel should now be visible on the right side of the application. First, expand the dropdown box under Results should be and uncheck everything but Clip Art. Although this step isn’t completely necessary, it will speed up your search time a bit.
Step 4: Next, expand the Search in dropdown list and select which locations you want to include in your search. In this example, I am leaving Everything checked so that I can search as broad a range as possible. Note here, you will get far more results if your computer is connected to the Internet since you will also have access to all of the clip art available from Office Online.
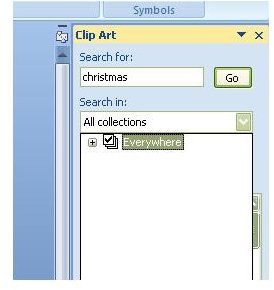
Step 5: Enter a description of what you want to search for in the Search box. Here, I’m just doing a general search for Christmas, but you can narrow this down if you’re only interested in images of reindeer, Christmas trees, or anything else, for that matter.
Step 6: Select an image you like, and click on it. It will appear in the main part of your document. Resize the image as needed either by dragging the borders of the picture to a new location or by using the resizing technique explained here .
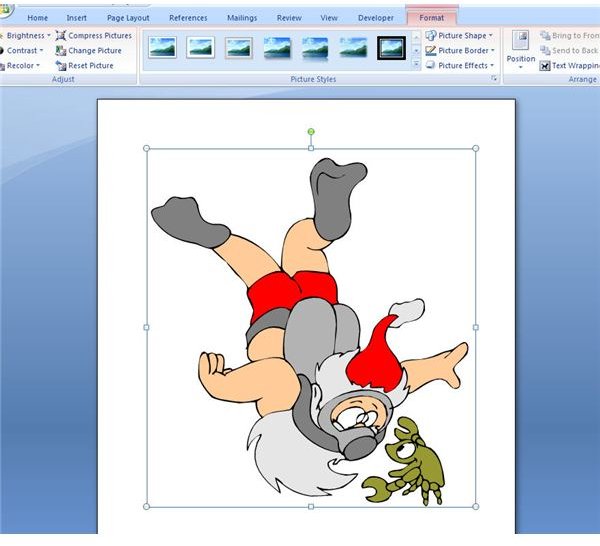
If the image you’ve chosen is a black and white outline, you’re done and can print the coloring page now. However, if you selected a graphic with color, we have a few more steps to go.
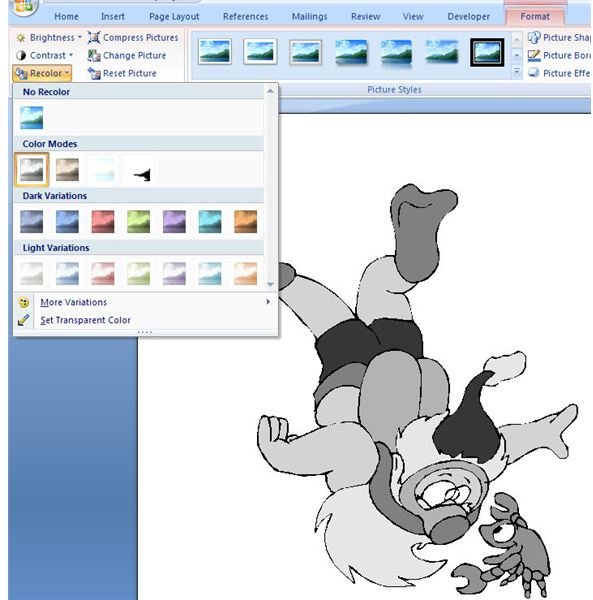
Step 7: With the image selected, open the Format tab under Picture Tools on the Word ribbon.
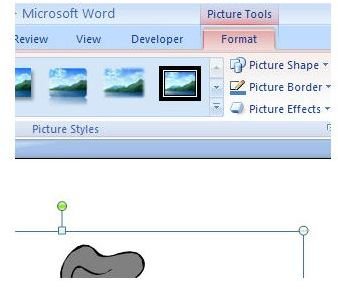
Step 8: Click on the down arrow next to Recolor to expand that menu, and choose the Grayscale option under Color Modes.
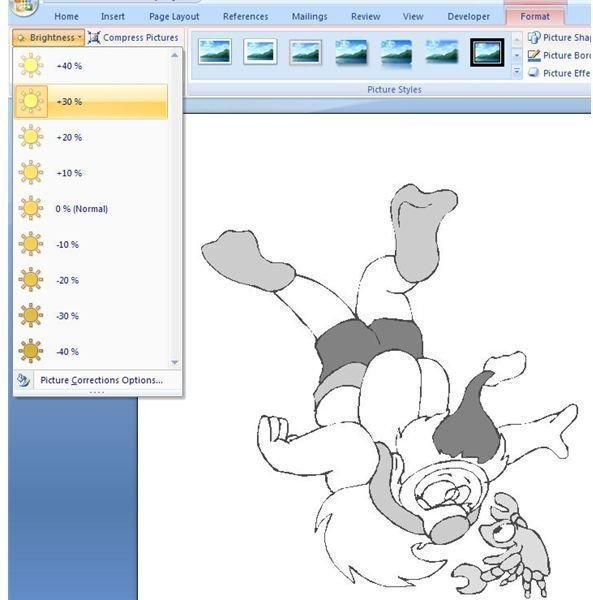
At this point, if you are happy with the appearance of your coloring page, you can stop and print it. However, sometimes the image may still be a little too dark. You can lighten it in the following step.
Step 9: Expand the Brightness menu, and adjust the brightness to your satisfaction. In this particular example, I chose to increase the brightness by 30%. The amount you choose will depend on the image you’re working with and your own personal preferences.
Now, the coloring page is finished and ready to print. If you want a little more variety, try adding several images to the same page. For some extra fun, print out the images on cardstock paper so that your hand-colored drawings can be sent out as holiday greeting cards, or use labels so that your kids can color their own stickers.
If you’re interested in more Microsoft Word tips and tricks , be sure to browse through the collection found here on Bright Hub’s Windows Channel. Learn where to find and how to use Word templates , discover new ways to work with tables , and more.


