By using Audacity and your PC’s stereo mix feature, you can create free ringtones for your iPhone, Smartphone, Droid, or Pre from iTunes, Winamp, or any other source of music that you can play on your Windows PC.
The cellular providers want to sell you ringtones for a couple of bucks. The Copyright Royalty Board ruled in 2007 that publishers and writers of music will continue to get 9.1 cents per song for both CDs and downloads. The royalty rate for ringtones, however, which had never been taxed before, became a whopping 24 cents each.
An open secret is that any Windows PC with a stereo mix feature, a way to play music that you already have on your PC, and the freeware Audacity sound-wave editor can make completely free ringtones from any music playable on the PC. There’s no reason to spend a lot of time trying to download free ringtones from the Internet when it’s so easy to make ringtones on your PC. And since they are made from actual recorded songs, they are in stereo and better than standard polyphonic ringtones.
A Vista Gotcha
But there’s something to check first if you have a Vista laptop. Many laptop manufacturers, in at least deference to or at most obedience to moldy old big content, have been removing the stereo mix function.
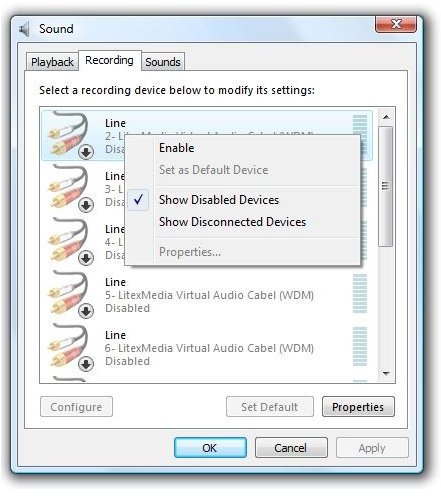
To see if it’s enabled on your laptop, do this: right click the speaker icon in the system tray and select “Recording Devices.” In the “Sound” dialog, right-click in the list area and select “Show disabled devices.”
Do you see “Stereo Mix” in the list? Does it say “Working?” If not, right-click it and select “Enable.”
Images
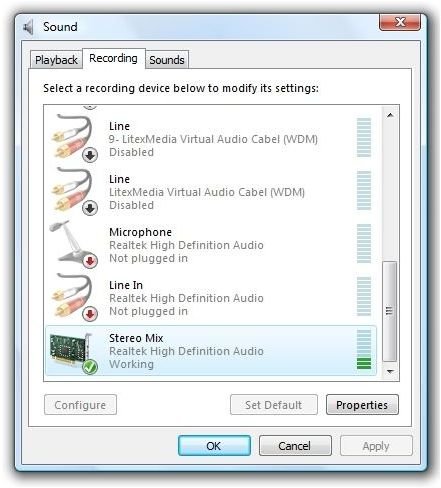
To confirm that it’s working, play a song in iTunes - or Winamp, or your favorite audio player. The sound-bars to the right of Stereo Mix in the Sound dialog should vary with the music.
If you don’t see Stereo Mix there, your laptop is not set up for recording multiple sources, and this procedure will not work for you. I could write a disparaging article about how timid and anti-consumer some of the laptop manufacturers have become, but that’s another story.
Let’s continue.
Update: I never did write that disparaging article, but I did find an application called “Virtual Audio Cable” that can restore the lost stereo mix functionality on a laptop in which it was disabled.
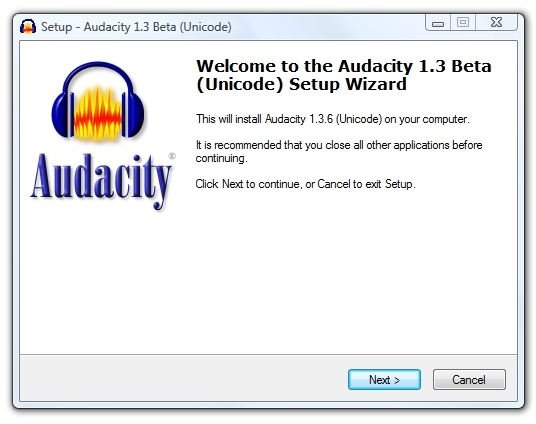
Install Audacity
To start creating your own ringtone, download Audacity from the sourceforge website .
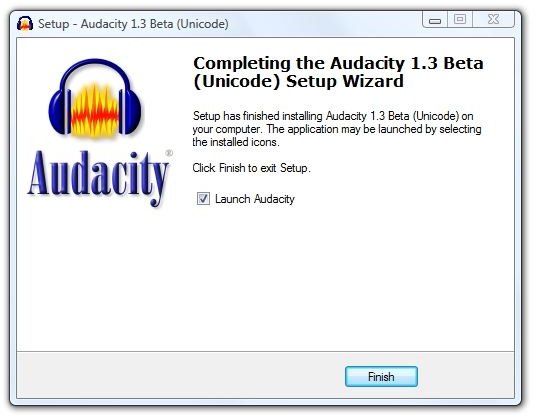
It’s about a 4 MB download. Save it to a folder you’ll remember, and when it arrives, double-click the file to run the installer.
Images
What Sound File Format?
The next thing to find out is which file formats for sounds are supported on your phone. On a Windows Mobile phone, .wav, .wma, and .mp3 formats are supported. On a Palm OS Treo or WebOS Pre, MIDI and .wav formats are supported. The documentation for newer phones, such as the Droid, Google Phone, and others should be available in the documentation.
To make sure that we’re covering all the bases, let’s try making one of each – an MP3 ringtone, a .wav ringtone, and a .wma ringtone - in Audacity.
Set Up Audacity for MP3 Format
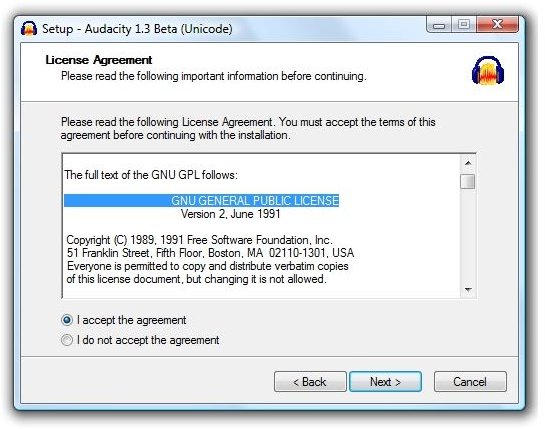
When you grabbed Audacity, did you get the stable version or the beta version? If you got the beta version, you can skip this section.
If you got the stable version, you need to add more software in order to support creating MP3 files in Audacity. Fortunately, the free LAME encoder does the job just fine.
The LAME encoder is distributed as a zip file. Save it to a folder you’ll remember. When it arrives, right-click it and select “Extract All” to unzip it.
Images
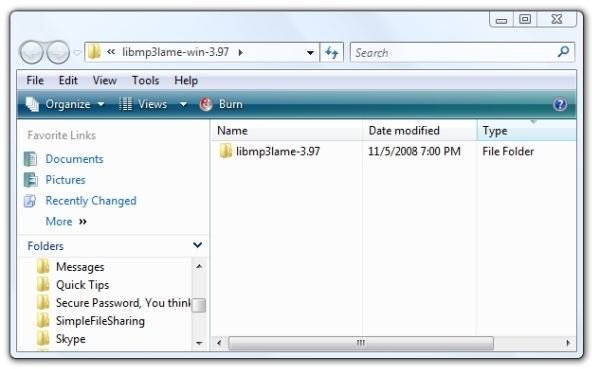
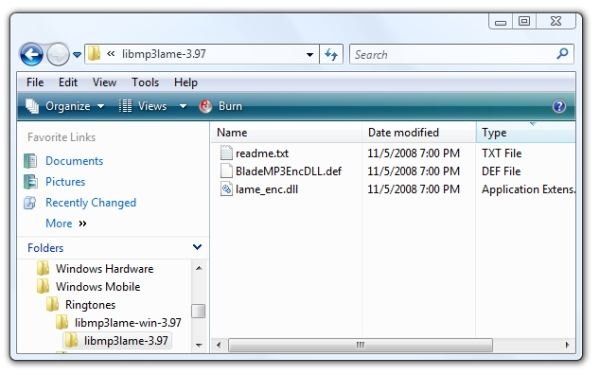
The single “lame_enc.dll” file should be copied to your C:/Program Files/Audacity folder. You’ll need this capability if your target is an iPhone, too.
Set Up Audacity for .WMA Format
To save as .wma, one additional download is involved. You need to get the FFmpeg library .
This downloads as a self-extracting executable (.exe) file. When you run it, it will create a number of other files, so I suggest that you save it to an empty folder. Double-click the file to run it. This will create eight files in the resulting folder. You want to copy the eight files and paste them into the
C:/Program Files/Audacity
or
C:/Program Files/Audacity 1.3 Beta (Unicode)
program folder.
Then in Audacity, go to Edit, then Preferences. On the Import/Export tab, on the right, above “FFmpeg Library,” do you see some text showing the library version numbers?
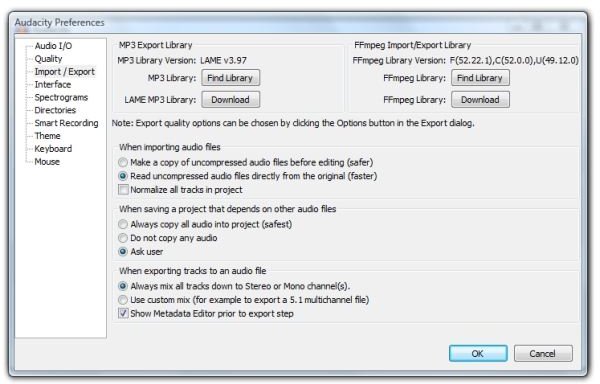
If not, click the “Find Library” button. If it says that Audacity has automatically detected valid FFmpeg libraries, you’re good to go.
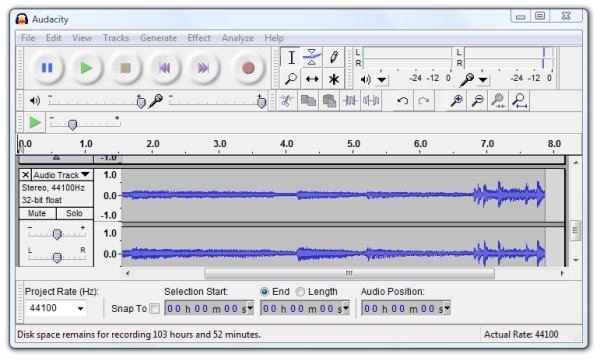
Making a Recording
Now we’re ready to try recording a snippet to create a ringtone. The idea here is that Audacity will record whatever we choose to listen to.
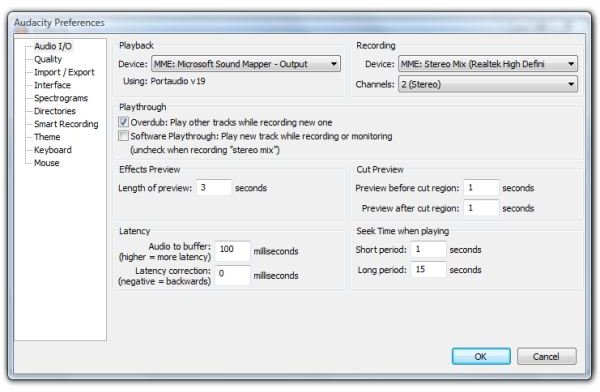
There’s only one more thing to check. Start Audacity and select Edit, then Preferences. On the “Audio/IO” tab, see what device is showing under the “Recording” block on the right. It should be set to Stereo Mix and two channel (stereo). In general, if your phone has two speakers, it should support stereo ringtones. If it does not, it should not refuse to play a stereo ringtone, even if the output is monaural, so try the stereo setting first.
With Audacity already started, start up your favorite music player and locate the song you want to play.
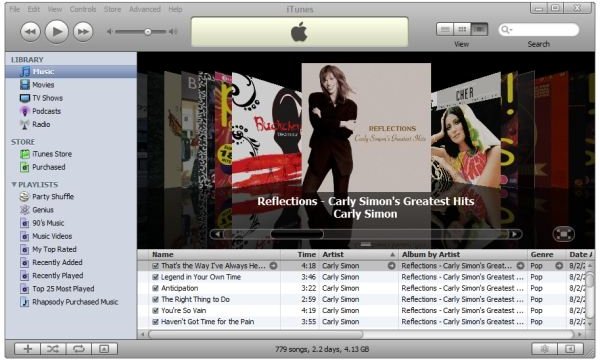
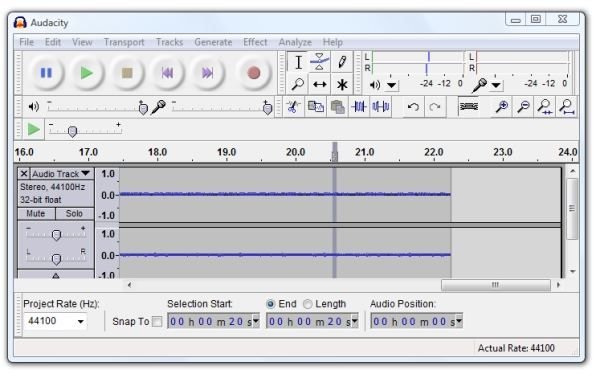
Audacity will let you edit the waveform to get exactly the section of music that you want to include in your ringtone. Some phones limit the size of a ringtone, but ten to twenty seconds of music will make a compact file size that should work on most phones.
You may want to listen to the song all the way through first to decide which part you want to snip. Then play it again, and when that segment approaches, click the red Record button in Audacity. Continue recording until slightly past the section you want to use. In iTunes or WinAmp, you can use the time display to roughly mark the start and end of the part you want.
After recording your snippet, stop your music player and click the green Play button in Audacity to review your recording. In my case, I was happy with the starting position, but there were about two or three seconds at the end that I didn’t need.
Next: Deleting an Unwanted Segment, Saving Your Ringtone, Troubleshooting, Conclusion, and Further Reading
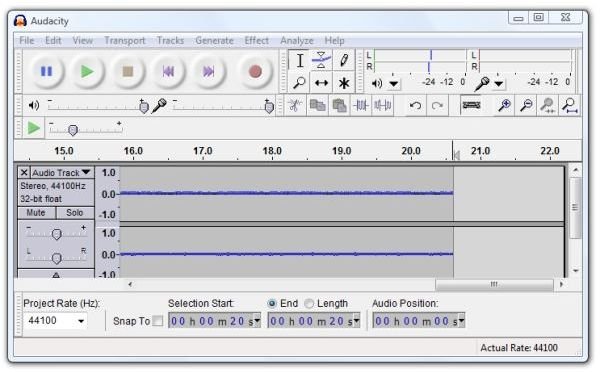
To delete an unwanted section, click the time-line and drag the “hand” cursor to the position that you want to stop at. This was easy for me because it was at the end of the snippet. All I had to do was high-light the last few seconds and press Delete on my keyboard.
Note at this point you need to click near the beginning of the timeline in order to play the recording again.
Images

Saving Your Ringtone
As a precaution, it’s a good idea to save your first effort at capturing a snippet as an Audacity project. This is easy. Select File and then Save Project As . . . This is handy because we may want to come back and reopen the original file in case we have problems.
To save the ringtone as an MP3, select File, then Export . . . Save file type as MP3, and select your name for the ringtone.
To save the ringtone in .wma format, select File and then Export . . .
To save the ringtone in .wav format, select File and then Export . . .
Saving Your Ringtones for the iPhone
Regular Apple AAC files have the extension .m4a.
Troubleshooting
The most likely bit of troubleshooting needed will be finding that the recording was made at two low a volume for the phone. Here’s where it’s handy to open the Audacity project file saved when creating the snippet.
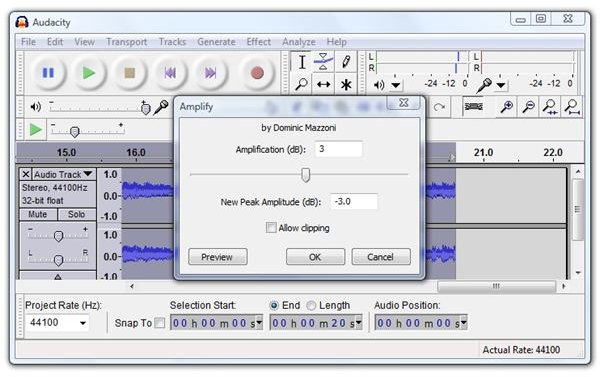
Open the project file, if you have it, or the saved audio file directly. Click on Effect, Amplifier, then Amplify.
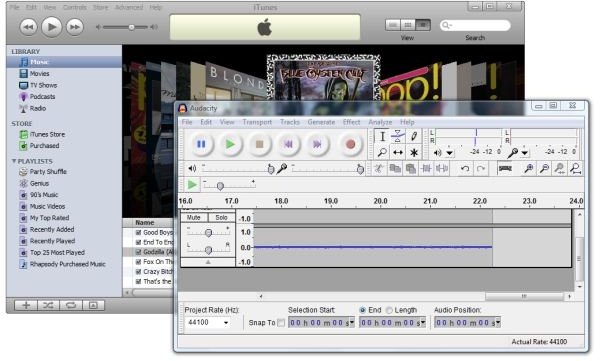
At the top of the dialog, you’ll see “Amplification” and a value beside it. Increasing this number makes the snippet louder. Increasing this number too much causes “clipping,” which causes distortion. You want to avoid clipping. Fortunately, the dialog has its own form of feedback. If you select too large a value, the “OK” button won’t appear unless you click “Allow clipping.”
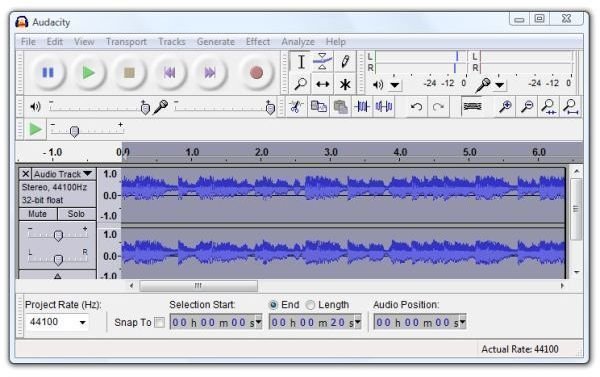
As you can see in the images below, amplifying our snippet by three decibels increased the size of the waveform and made the snippet louder.
Images
Conclusion
So there you have it – your own custom, free ringtone created from music that you already own.
This only touches upon the capabilities of Audacity. For example, you can set the recording levels while doing a test recording. This will work well after you’ve learned what levels your phone likes. You can also zoom in on your recording to make fine adjustments.
About Sharing . . .
You really shouldn’t share the ringtones you create. They were created from MP3 or iTunes music that you already own, but moldy old big content still owns the copyrights. They won’t mind what you do with your legally purchased music for your own use, but they take a decidedly dim view of sharing.
And if you’re wondering what music I made my snippet from, it was “Call Me” by Blondie .
Further Reading:
How to Block Third-Part Tracking Cookies in Internet Explorer and Firefox - Are you leaving tracks everywhere you go online? If your browser is sharing cookies with a website you’re not even (knowingly) visiting, you’ve got third-party tracking cookies on your PC. This article defines cookies and looks at blocking a certain type.
How to Track a Stolen Laptop - It’s a jungle out there. According to a recent report, 672,000 notebooks are lost in airports every year in the US and more than half are never recovered. It makes sense to assume eventual loss and take precautions before the loss or theft happens. Free tracking application Adeona can help.
Turn Your Vista Laptop into a Mobile Hotspot - Need to share your wireless Internet connection with your friends or colleagues? If they’ve got WIFI, the solution is easy and free. This article tells you how.
Is Using Vista’s Hybrid Sleep Good for My Notebook - Curious about whether the new power saving modes in Vista are actually better for use on the desktop than on your laptop? Here we look at Vista’s hybrid sleep mode and how hibernation and sleep are different from Windows XP.
How to Deauthorize ALL Computers in iTunes - If you go through computers the way I do, you’ve probably encountered the problem of running out of authorizations in iTunes.It’s no longer the hassle it once was. Now it is possible to de-authorize ALL the computers at once, instead of doing them one at a time.


