No matter what the reason you have for putting together a mailing list in Microsoft Outlook is, it’s important to understand techniques for printing that list. Learn how to compile a group of names, why you should confirm contact information and how to print your mailing list from Outlook.
Creating Your List
Whenever you want to do a mailing to a group of people - whether that mailing is a traditional “snail mail” method or via email - the task is accomplished much more easily if you put together a list of those whom you’d like to mail. When you group people together into a mailing list, in Microsoft Outlook, what you’re really doing is putting together what outlook calls a “distribution list.” Creating distribution lists can be a great timesaver once you’ve completed the task.
Before you start putting together your list, you’ll want to consider the following points:
- Do you have a specific purpose in mind for creating this particular distribution list?
- Who do you want to include in your mailing list?
- Do you have up-to-date contact information for all those listed in your Outlook contacts application ?
Once you’ve prepared your contacts for the list, and have given the purpose of the list some thought, then you’re ready to start putting together the list for your usage.
Making Your List
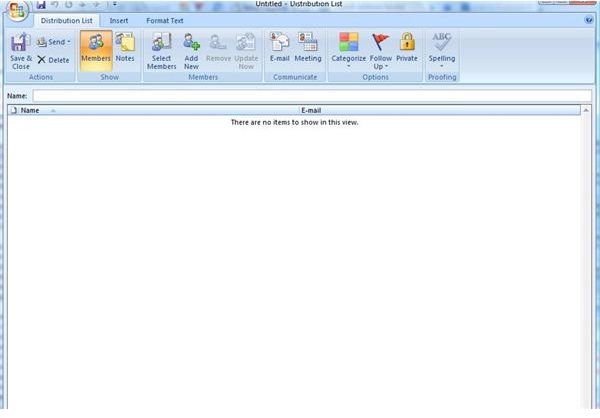
To create the list, start in the Outlook window and select the dropdown menu for “New” on your toolbar. You will see a screen with a blank box for entering the name of your distribution list, and then a large white space (as you can see in the image to the right). Remember how I asked you to think of the purpose for your distribution list? Life will be much easier if you title the Outlook mailing list you are now creating with the purpose of that list. If you’re creating a list of newsletter subscribers, then title the list “Newsletter Subscribers.” If you’re creating a list of writers, “Writers” would be the list title.
There are two methods for adding individuals to your list. You can either add already-entered contacts in your contacts file to the list by double-clicking each name, or you can add contacts individually if you need to add new contacts to your list.
Once you’ve put the new list together, you can then either send your contacts an email or a meeting request. Additionally, you will be able to add notes to your list (dates of contact, for example) or send your list to a recipient.
One note: Your recipients will not see your list notes or the name of your list, but they will be able to see one another’s names and email addresses unless you type the name of your distribution list into the BCC form in your email (and not in the regular “to” space).
Printing Your List
Outlook mailing list printing isn’t too difficult. To print the list, save and close your distribution list, then select the list in the contacts view of Outlook. You’ll now open that list. When you open the list, click on the Windows symbol in the upper left-hand corner, then select print. You’ll have a few different options for the type of view you want to print, and then you’ll be able to print the list.
Sometimes you’ll want full information when printing a mailing list from Microsoft Outlook. For this purpose, you’ll want to do something a little bit different. You can create categories for your contacts. Say you want to print a full list of those who you’d like to mail postcards to in order to promote your services. You can categorize each person you’d like to include in that mailing list. Then, once you’ve categorized your contacts, you can click on “View” then “Current View” then “Category.” This will then organize your list by category. Make sure that any field you want to include in your list has been selected. Once you designate the fields you want to print, make sure that you’re highlighting the name of the category you want to print the list for.
Select “only selected rows” on the print screen. This will ensure only those contacts in that part of the list print. Before you print, make sure you print preview. In the print preview, select the “landscape” view. Now, you can print your list!
Editing Your List
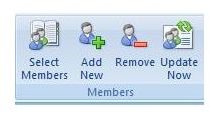
The time will come when you’ll need to update or edit your list. People move, change phone numbers, and you meet new people and add them to the team. To add or remove people from your distribution list, you can proceed as you had before - open your distribution list and add or delete individuals from the list. To update information on the list, you’ll notice a button that says “Update Now” on your toolbar ribbon. When you click on this button, it will sync the information on your distribution list with the information in your individual contact files.
It’s important to make sure your list is updated. You should schedule time each week to ensure your distribution and mailing lists are up-to-date - especially if you’re using these lists for business purposes. Nothing is more embarrassing than sending an email or a letter to an address that no longer exists or more frustrating than having your sent email bounce.
By using distribution and mailing lists to organize your contacts, you will greatly cut down the amount of time it takes to send out newsletters, feeler emails and letters to your business and personal contacts.
References:
Microsoft Outlook, https://office.microsoft.com/en-us/outlook-help/?CTT=97
Screenshots courtesy of author.
Ronda Roberts organizes all of her contacts, tasks, projects, appointments, emails and time-tracking activities using Microsoft Outlook.


