Setting Your Microsoft Outlook Web Access Options
Options, Options Everywhere!
These days, we all love to have options. You can’t order a coffee
anymore without at least a handful of options: cream, sugar, large, small, hazelnut, french vanilla, mocha, pumpkin, etc. People make jokes about it all the time, but if we didn’t all love it, it wouldn’t exist.These options are what makes our decisions personal. We want what we want, and we want to be able to get it whenever we want it.
Software is no different. We want to be able to control every aspect of our programs, even if it’s not under the best circumstances or not entirely convenient. Exchange 2010 with Outlook Web Access (or OWA) lets us do exactly that.
Logging In To Outlook Web Access
The URL to access OWA will differ from one organization to another. Typically, if your email address is something like “username@domain.com” you can try to browse to https://mail.domain.com/exchange. If this does not get you there, try https:// instead of http. If these don’t work, contact your I.T. department.
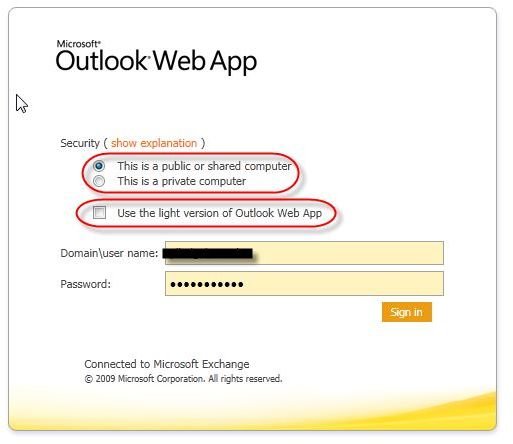
Once you’re at the login screen, you’re already presented with options. First, you can select one of two security options.
If you’re sitting at a library or at someone else’s computer, you want to select “This is a public or shared computer”. This option makes it so that if you’re inactive at the computer for a small amount of time, your session is disconnected, and you’ll be prompted for login credentials again.This is to prevent someone who gets on the computer after you from reading your mail if you accidentally left the session open.
If you’re at your personal computer, and you’re less worried about someone sitting down to an active OWA session of yours, select “This is a private computer”. This will allow for longer periods of inactivity before automatically logging you out.
The third option is just a check box that allows you to use the “light version of Outlook web app”. This version is has fewer options, but tends to load more quickly and is more responsive on machines with slower connections.
If you’re unable to log in, It’s possible that there’s a firewall blocking your access.
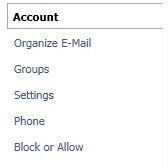
Account
Once you’re logged into OWA, over on the right side at the top of the page is a link to the Microsoft Outlook Web Access options page. The options page has a number of menu items on the left column. As you click through them, the contents on the right will change, much the way it does when you click through the menu items on the left in Outlook, i.e. “Mail”, “Calendar”, “Contacts”, etc.
The account page has two columns. The left column displays some of your basic account information, including name, display name, and email address. You can also add your location address, and your various contact numbers.
The right column has a link to the Auto-Reply feature, previously known as the out of office assistant. Click this link to compose a message that will automatically reply to incoming emails, letting anyone who emails you know that you’re on vacation.
You can also set two messages, one that sends to folks within your organization, and one that sends to external contacts. This could be handy if you want clients to know you’re on vacation, but you want co-workers to know you’re on vacation, and the keys to the server room or financial records are with the receptionist, for example.
Organize Email
The next option is the “Organize E-Mail” page is “inbox rules”. This is where you go to create rules that you’d like to have process on email as it comes in. For example, if you get regular emails from news sources that you read, but don’t want them cluttering your inbox, you can create a rule that delivers these messages to a different folder, just like you can in Outlook.
Second is “Automatic Replies”, which we went over in the “Account” page. The link on the “Account” page brings you to the same place. It’s just an added convenience.
The third and final option is “Delivery Reports”, where you can search for delivery information on email that you’ve sent or received from specific users, or search for email with specific keywords on them.
Groups
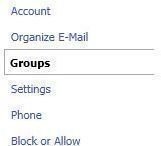
User accounts are sometimes organized into distribution groups. This makes it far more convenient to email all members of a particular team, rather than having to pick through all the available contacts. This also eliminates to possibility of accidentally omitting someone in the department. If you’ve got an email that has to go to six or seven people, see if those people all belong to a distribution group.
You can see here what groups to which you belong, and depending on the way your organization is configured, you can even join new groups or leave groups you don’t want to receive mail from anymore.
You can also review the details of a particular group and find out who else is a member.
Settings
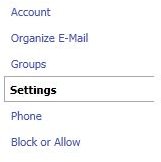
The settings tab is, as you might have imagined, where most of the general Microsoft Outlook Web Access options are found. There are several tabs here, including “Mail”, “Spelling”, “Calendar”, “General”, “Regional”, and “Password”. The options available in the settings page are many, too many to list completely, but suffice it to say, if you’re looking for an option and you’re not sure where to find it, chances are it’s here on the settings page.
Among the many options here is the place to set up your email signature, what to do with read receipts, change your current time zone, and change your domain account’s password.
Phone
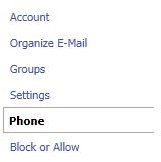
The “Phone” page has two tabs, “mobile phones” and “text messaging”.
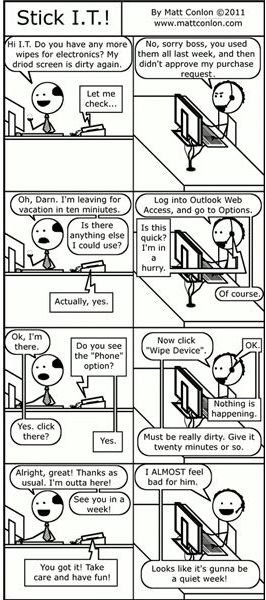
The mobile phones tab has information pertaining the relationship between the email server and your mobile phone, if there is one. You can find out the last time your phone was contacted, and what the status is. If you’ve recently lost your mobile device, you can come to this page and select “Wipe Device” to protect your contacts and information from falling into the wrong hands.
In the “Text messaging” area, you can set up exchange to send text message notifications to your phone, if you don’t want to or are unable to receive full emails. You can set up notifications for email and for calendar items as well.
Block or Allow
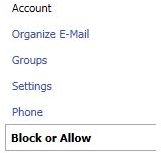
Who hasn’t gotten an email or two from someone or somewhere unsavory? Here, you can access both your blocked senders, and your safe senders list.
Unless the mail is stopped in a spam filter somewhere between the sender and the recipient’s email server, mail from a safe sender will always be allowed. Email from safe senders that have HTML embedded pictures will automatically be downloaded, like with emails from department stores or newsletters.
Email from senders who are listed in the block list will be delivered to your junk email folder.
Both the safe senders and blocked senders lists allow you to add specific email addresses, or entire email domains if you don’t want to receive mail from any address at a particular domain.
For more information on OWA check out this Brighthub article: Guide to Using Microsoft Outlook Web Access.
References
All information in this article is from the writer’s own experience.
The web comic “Stick I.T.!” is written and illustrated by Matt Conlon. All views an opinions expressed in this comic are the author’s own, and do not necessarily represent the views of Brighthub.com.