How to Set Up Custom Windows 7 Boot Screens
How Can You Change the Startup Screen
Manually changing the boot screens is no easy task. You have to edit the registry, edit the pictures for different screen sizes or different screen resolutions. The easier and simpler way is to use an application. Here are two great software solutions to do just that. The first one is Tune-Up Utilities that does a lot more than just change the boot screen, and the second one is Windows 7 Boot Updater which is built just for customizing of the startup screen and best of all its easy to use and its free. Read on how you can use these applications to change the look of your Windows 7.
The Tune-Up Utilities Method
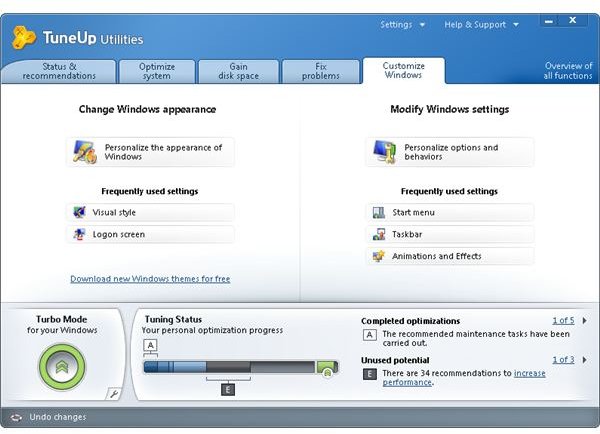
This software solution offers much more than just changing the boot screen. After installing this program you can change the way your boot up screen looks by clicking on the Customize Windows tab and then on the Personalize the appearance of Windows button. This will enable you to choose you custom Windows 7 boot screens. This is a great application that can help you speed-up, customize and optimize your Windows, but it comes at a price of $49,95. This is a bargain if you want all of those options, but if you only want to set up your own custom boot screen then there is the second free option described below. If you want to find out more and buy this application follow this link to https://www.tune-up.com/.
Using the Windows 7 Boot Updater

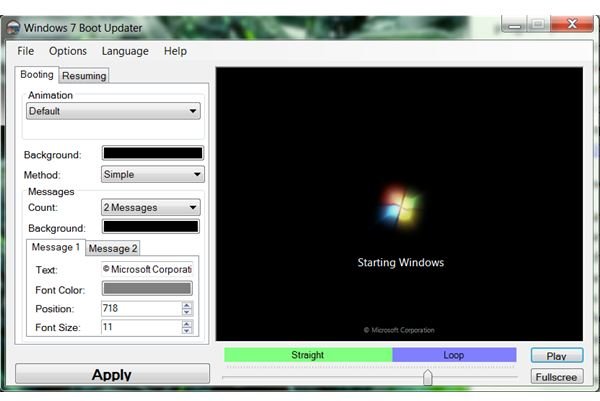
Using this application is easier and more straightforward and you don’t even have to install it. There are options to change the animation of the boot screen whit another animation or static image, and also options for changing the “Starting Windows” text and the lower “Microsoft Corporation” text. You can even change the color of the windows background. The background can be replaced with 1024x768 images but then the animation and the text won’t show.
Setting your own animation is little bit tricky. The animation should have 105 frames (if there are less frames the last frame will be repeated), the size of the frames should be 200x200 pixels and the speed of the frames should be 15 frames per second. The frames needs to be saved in folder as single files in PNG, TIF, BMP, GIF or JPEG format named as 001 for the first, 002 for the second frame and so on. The animation can also be a single BMP file named “activity.bmp” with 200x21000 pixels. There are a lot of software solutions for creating and editing these kinds of animations. Setting up custom Windows 7 boot screens with this app is easy as long as you follow the instructions for the animation to the letter. For more information, download location and how to reverse the customization follow this link to the Windows 7 Boot Updater.
References
All information gathered from developer’s website.
Application images from screenshots made by author.
