Gain more control over your Gmail account by accessing it through Microsoft Outlook!
Benefits of Accessing Gmail in Microsoft Outlook
Gmail is probably the world’s most popular browser-based email solution, offering users the means to easily manage their emails, sort them into folders, add labels and generally stay on top of things It also offers a good quality spam filter, and is flexible enough that you can access it via other mail clients.
For instance you might want to access Gmail in Outlook because you forward a lot of emails. One of the drawbacks of Gmail is that it will only allow you to forward single emails, but if you use Outlook to access your Gmail account this can be overcome.
To setup access to Gmail from Outlook, you will require the right Gmail settings…
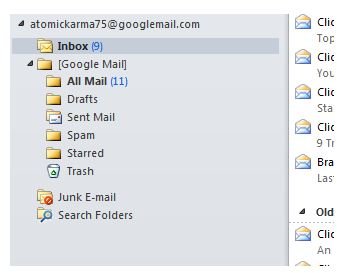
Screenshot by author
Setting Up Gmail in Outlook
Depending on your version of Outlook, adding a Gmail account should be pretty simple. Thanks to the streamlined email setup functionality available in Outlook 2010 , for instance, all you will need to do is go to File > Add account and input your name, Gmail address and password. Outlook will do the rest, retrieving your email account server settings and basically doing all of the hard work.
However there are various reasons why you might want (or need) to setup your Gmail account manually.
For instance, you might be using a hosted Gmail account – one that is associated with a private domain name but uses Gmail to manage the emails. Alternatively you might have made a change to your Gmail account (switching from POP to IMAP, for instance) which will require the addition of manual settings.
As there are two Gmail account types, POP3 and IMAP, we’ll take a look at these in turn.
Setting up a POP3 Gmail Account in Outlook
In order to manually configure Outlook to connect to a POP3 Gmail account, go to File > Add account to begin a new account and select Manually configure server settings or additional server types. Click Next to continue, and then select Internet E-mail before again clicking Next.
You will then see the Internet E-mail Settings screen. Start off by entering your name and email address, then at the bottom of the screen add your Logon Information. This might mean adding your email address again, along with your password – don’t forget to check Remember password if you don’t want to type it in each time Outlook checks for emails!
Then move your attention up a few lines, and ensure that you have the following settings:
Account Type: POP3
Incoming mail server: pop.gmail.com
Outgoing mail server (SMTP): smtp.gmail.com
Next, click More Settings… and on the Outgoing Server tab, check My outgoing server (SMTP) requires authentication and select the Use same settings as my incoming mail server option.
Finally on the Advanced tab check that the Incoming server port is set to 995 and the Outgoing server port is set to 587. Then click OK and confirm it all works by pressing Test Account Settings…. If the test fails, check your settings and try again!
Gmail IMAP Settings for Outlook
The procedure for adding an IMAP Gmail account into Outlook is pretty similar, with only the Internet E-mail Settings screen being any different. Note that for this to work, the Gmail account must be configured for IMAP .
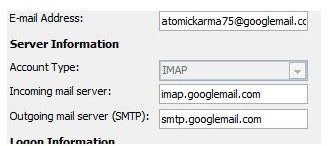
After adding your personal details and username and password, setup the account type and servers as follows:
Account Type: IMAP
Incoming mail server: imap.gmail.com
Outgoing mail server (SMTP): smtp.gmail.com
Click More Settings… and find the Outgoing Server tab and set the My outgoing server (SMTP) requires authentication and select the Use same settings as my incoming mail server option. Next, head to the Advanced tab – here, the ports should be as follows:
Incoming server port: 993 SSL
Outgoing server port 587 TLS
Click OK and then Test Account Settings…. Any failures should be addressed by checking for errors.
Screenshot by author
References
Source: author’s own experience
Support IMAP Client list, https://mail.google.com/support/bin/answer.py?answer=75726


