If you’re having a difficult time locating important hidden files, or even if you’re just curious and want to find them nonetheless, this guide is for you.
Important to Note
Without a doubt you’ll see warning messages from Windows about what can happen if you choose to modify hidden files. These files could be crucial to certain programs, or even the operating system as a whole. Unless you know what you’re doing, do not modify, move or re-name these files. Making any changes to these files can cause programs and/or the operating system to malfunction. From that point on the only way to restore your settings would be to re-install Windows completely.
This guide will only show you how to make hidden files and folders appear, and nothing more. This alone will not harm anything.
Step 1
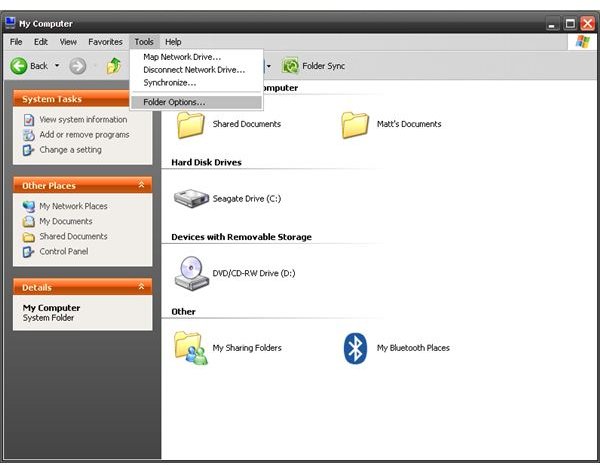
Open up “My Computer.” From there, click “Tools” and then “Folder Options.”
Step 2
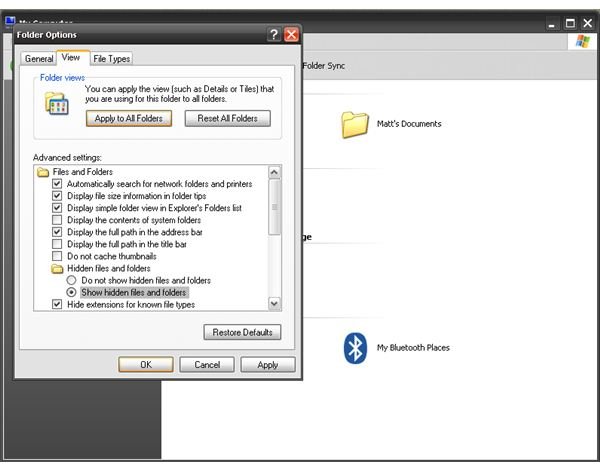
Click the second tab listed, which reads “View.” In the list of advanced settings, look for a folder that says “Hidden Files and Folders.” If you don’t see any options under that folder, double-click it. Now you should see two options: a checked one that reads “Do not show hidden files and folders.” Click on the other option that says, “Show hidden files and folders.”
Click “OK.”
Free to Browse
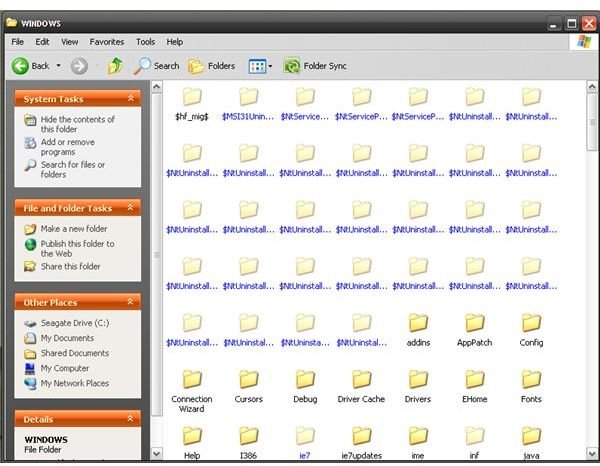
What you’ll now start to notice while going through folders of specific programs, or even Windows itself is the difference between standard files, and hidden files. The hidden files look a little bit faded, while the text under the folders is coloured differently (blue instead of black). As mentioned before, it’s not recommended that you make any specific changes to these files or folders unless you know exactly what you’re doing.
If you want to revert to the original settings by not displaying hidden files and folders, then follow the same steps as indicated above. When you get to the settings screen choose “Do not show hidden files and folders.”


