It’s important to craft a strong password policy in order to protect your computer from compromise. This article will describe configuring the local Windows Vista password policy to adjust settings such as minimum password length and complexity requirements.
Overview
Even if you are just using your computer on your home network, it is still important to protect your computer with a password – even a strong password at that. Assuming your computer has internet access, if someone was able to gain access to your network remotely and you had a weak password set on your PC, it could be compromised very quickly. For these reasons I will make some recommendations for setting up a proper Vista password policy and how to implement such a policy.
Options and Best Practice
As mentioned above, you have several options for configuring your password policy. Below is an explanation for each setting and the recommended setting for most environments:
- Enforce Password History – this setting lets you have Windows keep track of previous passwords and will not allow you to reuse the last “n” passwords. It’s generally good to set this to three or more.
- Maximum Password Age – this is just a fancy way of saying when you’ll be forced to change your password. For normal home users, 3-6 months (90-180 days) is appropriate. Business users should consider a shorter span – 60-90 days.
- Minimum Password Age – this is the opposite of the above setting – this forces you to wait “n” days before changing your password. This ensures users don’t cycle through passwords in order to defeat the Password History setting. Depending on your circumstances, I would recommend setting this to 5. If you want to disable this setting, set to 0.
- Minimum Password Length – This forces the user’s password to be “n” characters or longer. The recommended value is 8.
- Password Must Meet Complexity Requirements – This setting forces users to meet specific complexity requirements – specifically, password length and meeting three of the following four categories – upper case, lower case, numbers or symbols. I highly recommend turning this setting on.
Changing the Password Policy
Changing the policy settings is relatively easy -
- Go to Start, Settings, Control Panel.
- Double click Administrative Tools and then Local Security Policy.
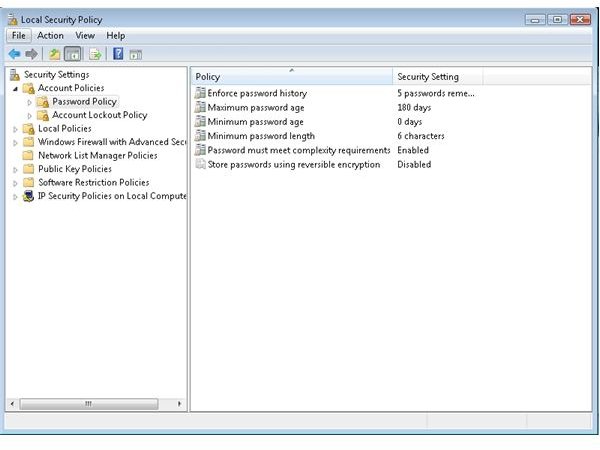
- In the Local Security Policy window, browse to Security Settings, Account Policies, Password Policy (Figure 1).
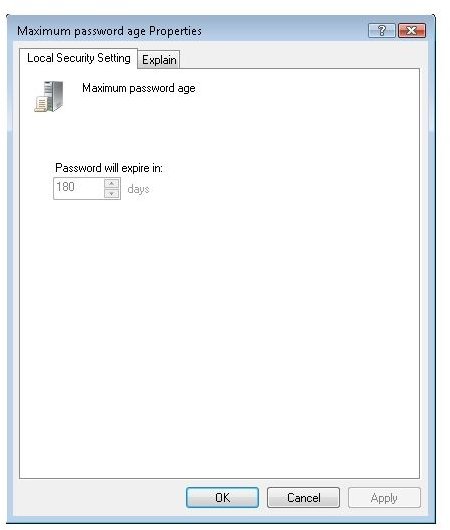
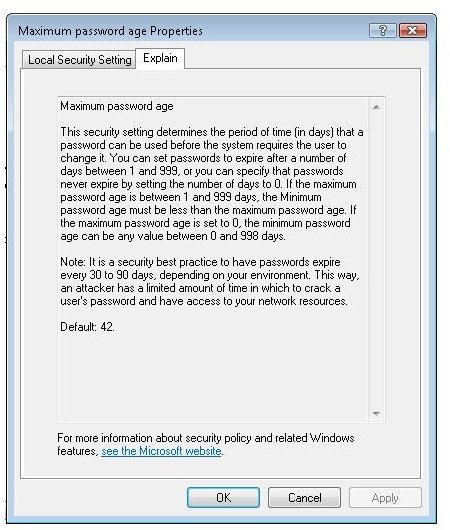
- Double click on the policy setting you wish to change. The first tab will allow you to change the setting – either entering a number or enabling a feature (Figure 2). The second tab called “Explain” will give you details about the policy setting (Figure 3).
- Once you are done making your changes, close the Security Policy window.
Images