Looking for a way to rip your favourite DVD to your hard drive? This guide will show you how to do it with a superb free app, Handbrake!
Rip DVDs on Your Mac
Ripping content from DVDs isn’t something that operating systems include as a native utility, and Mac OS X is no different. If you want to copy the DVD, you will need to rip it with a third party application.
Several such apps are available and can be quite expensive. HandBrake for Mac OS X, however, is an open source, GPL-licenced multithreaded video transcoder – which basically means it can rip the content from the source disc quickly and efficiently (although this of course depends upon your Mac’s system specs).
Despite the seeming complexity of this software, it is a remarkably easy application to both install and use.
Downloading HandBrake for Mac
To use this tool, you first need to download it. Visit handbrake.fr in order to access the download page.
Here you can choose your version – you can either have the old fashioned PowerPC Mac download, or a standard Intel Mac download for 32 bit Apples. There is also a version available for Mac OS X 10.5/10.6 computers equipped with Intel 64bit processors
Once you have made your choice, download the appropriate .dmg file and mount it. Double-click the HandBrake ripper icon to launch the application.
Note that you will also require a copy of the VLC media player in order to read encrypted DVDs with HandBrake.
Ripping a DVD with HandBrake for Mac
In order to rip a DVD, you will need to insert the disc you intend to copy information from into your Mac’s DVD driver.
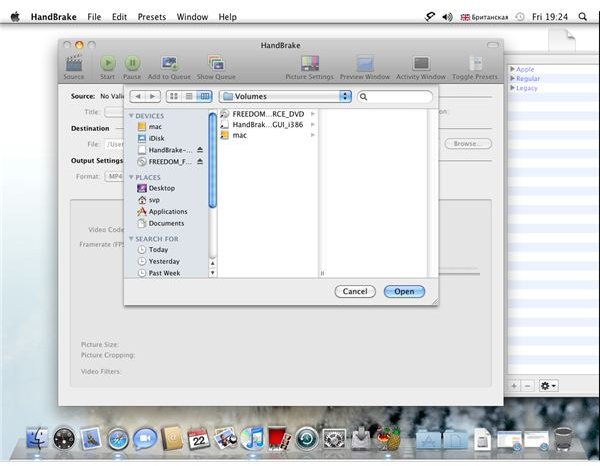
To rip a DVD using HandBrake for Mac, go to the Sources button in the top-left of the screen, and from here, browse for the DVD you just inserted, and click Open.
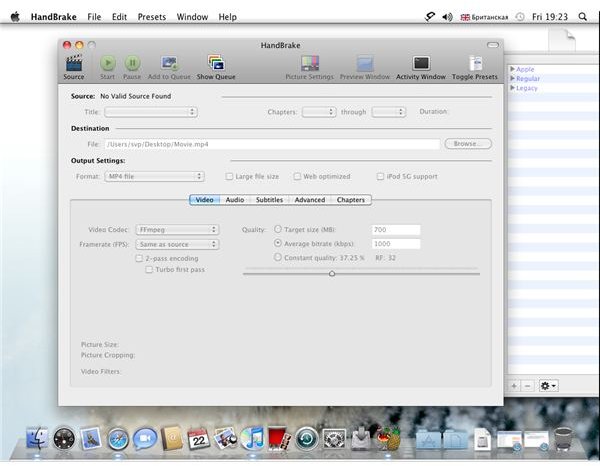
On the main HandBrake ripper window, the Source section will inform you of information about the disc. Output Settings can be changed, with a variety of Format options as well as the ability to optimise the output file for the web or iPod devices .
Finally, select your Destination for the ripped DVD data – this will take the form of TS files, as seen listed when you browsed the disc.
When you have set the destination and any changes to the output settings, click on the Play button on the toolbar to begin ripping your DVD.
Uses for Ripped Data and Copyright
Once you have ripped your data, you will be ready to use it in new ways. You might opt to save it as a disc image on your Mac, and certainly from a copyright point of view, this would be the safest choice if you don’t have permission to take a copy of the disc.
If the DVD copyright is yours, however, then you can carry on and make the content available for distribution, either via the web or by making copies of the disc for other interested parties.


