Copying your iTunes music and movies between computers is easy if you know how, but there’s more to it than just copying folders. If you first understand how iTunes works you’ll find it easier to move the contents of your library without losing anything.
Introduction
The hardest thing about switching to a new laptop is moving all of your stuff over in a way such that it all works and you can find your files easily. Email and work documents are important, but your music library is your most treasured possession. iTunes is a great application for managing your library but it does have its own way of working that you need be know about before you try and move all your tunes to another machine. The last thing you want when migrating your digital life to a new computer is to lose your most treasured playlist or have everything by your favourite artist mysteriously disappear. Follow these simple steps and your iTunes library will slide gracefully into its new home like Cinderella’s foot into the slipper.
This how-to is in five parts:
- Choice of copy method (we’re going to choose an external hard drive)
- Tips for buying an external drive
- iTunes quirks and how to get around them
- How to do the migration
- Mopping up operations
1. Choice of Copy Method
If you’re a typical iTunes user you’ll have a large amount of music, movies, and apps in your library that you will have built up over some time. A large library could occupy hundreds of Gigabytes of disk space, and copying all that data is not a trivial task. There are lots of ways to copy files between computers: you could set up a peer to peer network connection, or use removable storage media such as DVDs or USB memory sticks. This article is going to cover using an external hard drive as the go-between.
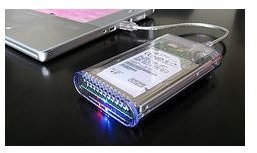
2. Tips for Buying an External Drive
Today’s external hard drives are small, light, and cheap, but they’re also faster and have greater capacity than ever before. This makes them a great solution for backing up your main hard disk, as well as for migration jobs like this. Get the fastest, biggest capacity drive you can afford. Drives are great value at the moment so you should be able to pick up a whizzy performer for a very reasonable price. To give you an example, the bestselling drive on amazon.com at time of writing is the Western Digital WS Elements 1TB USB 2.0 , at just under $80.
Whether you go for 500Gb, 1Tb or more is up to you. Just make sure the drive is at least as big as your laptop’s own hard disk otherwise you won’t be able to use for full system backups after you’ve migrated your data.I would recommend going with USB 2.0 as the connection type. While possibly not the fastest option out there, it is fast enough and the most widely supported, so in choosing USB 2.0 you’ll be giving yourself lots of options for using your new disk by ensuring it will work with any computer you want to plug it into. Some prefer another connection type called Firewire, but relatively few computers are equipped with that so USB 2.0 is the safest bet.
3. iTunes Quirks and How to get around Them
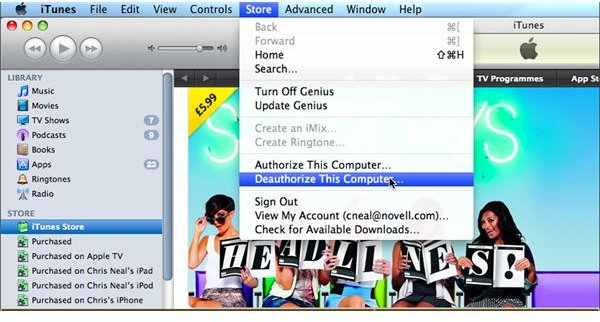
Now let’s talk about the difference between moving iTunes content and regular data files like documents, etc. Firstly, if you buy content on the iTunes store you’ll need to have your Apple ID and password ready so you can login to the store from your new computer, and you’ll also need to consider whether you want the old computer to remain authorized. Remember that you are limited to a maximum of five computers that can be authorized to play content associated with your account, so if you don’t want your old computer to remain one of those five, then you should de-authorize it (Click the Store menu, then “De-authorize computer.”)
Your choice here will depend on what fate you have in store for the old computer and whether you plan to leave a copy of your library there.
The iTunes Library is actually a database containing metadata (information about information) about your collection of albums, songs, and movies. The database includes things like artist, album title, genre, album artwork, and the location of the actual mp3 files. It’s this combination of your actual music files combined with the library’s metadata that makes iTunes such a rich experience, but it also brings some complications that you need to be aware of when considering moving it to a new home. Accidentally break the links between the database and the files and your iTunes experience will turn bad.
The primary consideration is making sure that iTunes knows where the files are after the move. If the path to the folder containing your music changes, then iTunes will no longer be able to find it. How can the path change? Let’s look at a couple of examples:
- Joe is switching from a Windows XP laptop to a Mac. Because the two use different file systems Joe’s home folder on the PC is in “C:\Documents and Settings\joe”, but on the Mac it would be in “/Users/joe”. So the path to the track Dancing Queen by ABBA would change from “C:\Documents and Settings\joe\My Music\iTunes\iTunes Music\ABBA\Dancing Queen.m4a” to “/Users/joe/Music/iTunes/iTunes/iTunes Music/ABBA/Dancing Queen.m4a”
(The folder “iTunes Music” became “iTunes Media” in iTunes v9.)
If you were to copy your iTunes library database files over as-is, then iTunes on the Mac would still expect the track to be on the old path, and when you tried to play it you’d get an error saying the track couldn’t be found.
- Joe is upgrading from a MacBook to a MacBook Pro. His username on the old machine was “joseph,” but now he goes by “joe.” Again the iTunes library links would get broken because the path to the files would change from “/Users/joseph/etc…” to “/Users/joe/etc…”
As you can see it’s quite easy to break links with the iTunes library, but fortunately it’s also easy to fix.
4. How to do the Migration
(Steps 1 and 2 are done on the old computer and the rest on the new one.)
Step 1: get all your music in one place
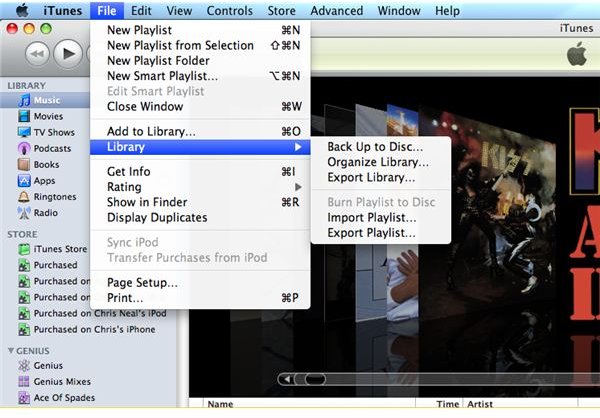
You may have all your music files in the default location on your old computer, in which case you can skip this step. But most people have at least some albums in a different folder. To fix this, in iTunes click File, Library, Organize Library, and check the “Consolidate Files” option. This will locate any music files that are in the library but stored outside the default folder and will copy them into the default folder.
Step 2: Copy the iTunes folder to the external disk. That’s the iTunes folder that contains “iTunes Music.” This is important because all the library database files are in the parent folder.
Step 3: Install iTunes on the new computer, accepting the default options but tell it not to search for music at this point (because you haven’t copied it on yet).
Step 4: Quit iTunes
Step 5: Connect the external disk to the new computer, and then copy the iTunes folder to the default location (e.g. /Users/joe/Music on Mac OS X).
Step 6: Launch iTunes while holding down the Option key (Mac) or the Shift key (Windows). You will be asked to choose an existing iTunes library or create a new one. If your OS and username (therefore path) are the same as before then select your existing library by browsing to your iTunes folder (where you just copied your backup) and select it. iTunes should then ‘see’ your previous library and use it. If your path has changed (because of either an OS or username change) then select Create Library and point to your newly copied iTunes Music folder. iTunes will then re-create your database.
Step 7: By now your library should look right, but before you start playing content you’ll need to sign into the iTunes store and authorize the new computer to play your purchases.
5. Mopping up operations
Even if you take the right precautions and understand how to avoid the risks, it is likely that there’ll be one or two things you’ll need to fix. The most common ones are album artwork and podcast subscriptions. Select Album view and see if any albums have their artwork missing, then right-click that album and choose “Download Album Artwork”. Also check your podcasts (if you use them), and you might need to re-subscribe to some by clicking the Subscribe button next to the title.
That’s it. Following this procedure will avoid most of the common problems with iTunes library migration, but a couple of small errors are common so don’t feel bad if it doesn’t work 100%. Remember any errors you get just mean that the library can’t find your files, NOT that the files aren’t there. You just have to reconnect them. Another easy way to fix individual songs or albums is to delete them from the library (NOT from the file system), then import them again by clicking “File, Add to Library.”


