Give new life to your photos with the various editing tools found in iPhoto.
iPhoto Editing Tools
Any time you import pictures from your camera or iPhone , they will automatically bring up iPhoto to import the photos from your photo taking device onto your computer. Once you import these photos into iPhoto, you are ready to use your creative skills to fix, enhance or customize your photos to your liking. I will describe what some of these features in iPhoto do, and how they can help make your photos better.
Once the photo you have imported is in your iPhoto library, simply click on the edit button below the photo. You will see the icon for the edit option as a pencil. Make sure before you click edit that the photo you wish to edit is selected.
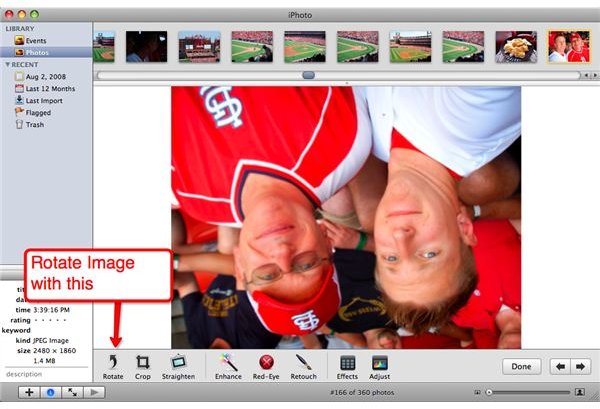
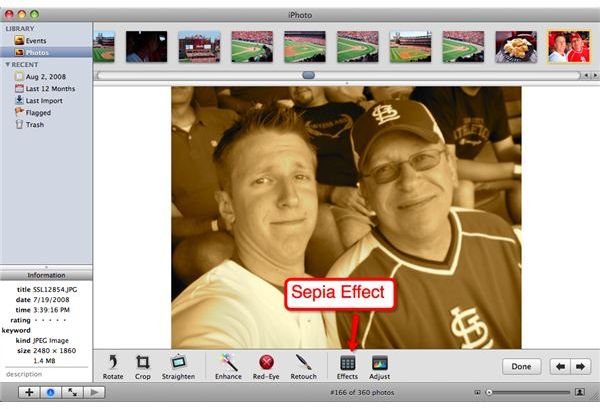
When the edit option is selected, then you will see eight new icons show up below the photo, each with their own unique ability. The options are as follows, rotate, crop, straighten, enhance, red-eye, retouch, effects, and adjust.
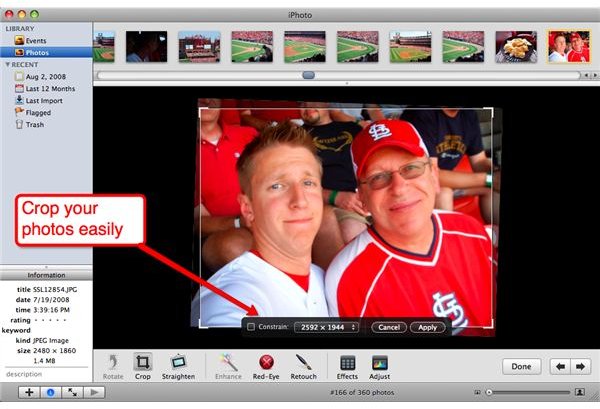
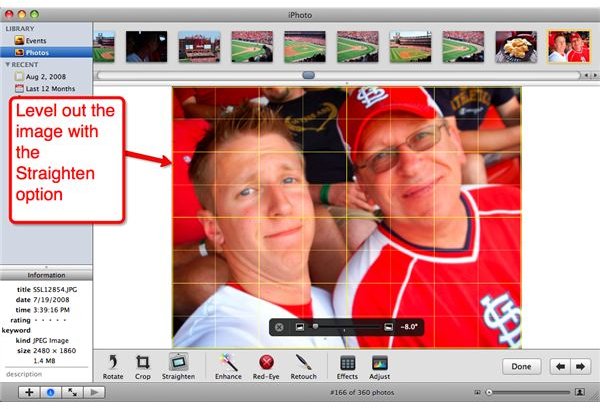
Let’s start with the first three options as they are the most basic editing options. The rotating option, when clicked on, will rotate your photo 90 degrees counter clock wise. This is a great feature if the camera was held long ways or side ways and your photo appeared sideways or upside down. Simply click this button a few times, until the photo is corrected. The next option is crop. This utility can be excellent if your photo has a lot of unwanted space around the main characters in the photo. You have a variety of options within this for cropping. You can select certain proportions for your photo to make it big enough for your desktop(1680x1050) or as a 4x6 postcard size. You can also manually crop the photo by dragging the corners in or out to remove unwanted space in the picture. The third option for the direction of your photo is straighten. This is a very nice photo if the angle you took the picture is slightly crooked. You can level out the photo so the object in the photo looks perfectly straight and not tilted.
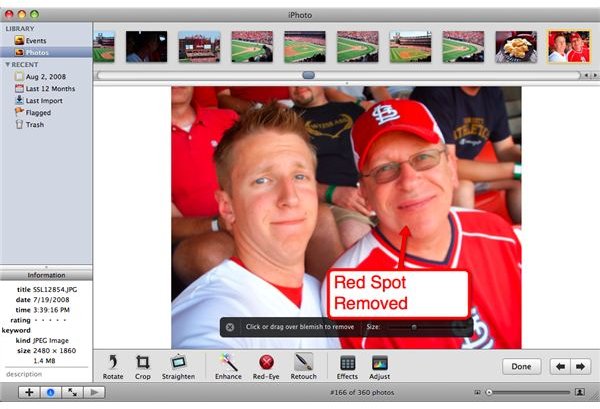
The next three editing, enhance, red-eye, and retouch, are all used to fix discrepancies in the photo itself. Enhancing the photo will automatically adjust the brightness, color and shade. If a picture is very bright, the enhance button will attempt to automatically fix it. If you click it and do not like the outcome, then you can press apple>z to undo the edit. One of the best editing tools in iPhoto is the red-eye tool. Many times when pictures are taken, individuals will get the dreaded red-eye result. Choosing the red-eye allows you to click your pointer in the pupil of the person and it will remove the red-eye from photo. The retouch button is a great tool if you would like to remove small blemishes. Let’s say there’s a mole that you are not particularly in favor of. You can click on it and it will automatically remove it and blend in the area to make it look very natural. If you try to retouch too much of an area, say a person’s entire face, you will get the result of blurriness.
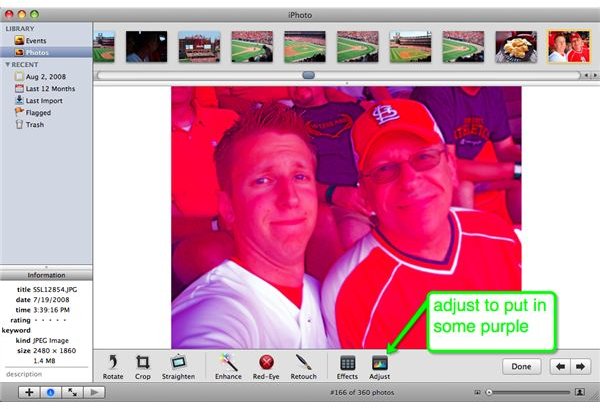
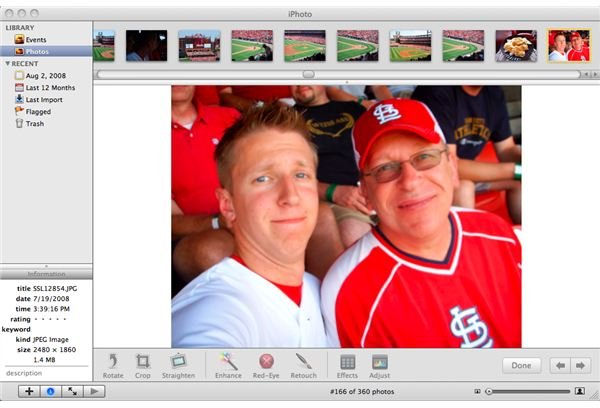
The final two editing devices are effects and adjust. Effects are just like what they sound like. You can add effects to your photo. Things like making the photo sepia, black and white or boosting the color can all be done under this option. There are 8 different choices to choose from, and if you don’t see something you like then you can just click on normal. Some pictures just turn out more romantic or special when they are put in black and white. The adjust option is going to be your most detailed edit. Here is where you can do a variety of manual changes. You are able to increase or decrease things like exposure, brightness, contrast, saturation, and tint. Messing with these features can give a special look to your photos, or you could go crazy and make your picture a mixture of blue and greens. It’s up to you and how crazy or specific you would like to get.
iPhoto’s editing section is definitely not nearly as detailed as something such as Adobe’s Photoshop . It does however allow basic changes in a very simple and easy to maneuver way. Take some photos and try out iPhoto, it may be all you need to make those slight changes to your photos and make them look perfect.
Images