It’s good for broadcasting, pod casting, and recording voice and instruments; Garageband can provide hours of fun for beginning, intermediate and even professional musicians. Get to know this easy-to-use yet powerful software program.
About Garageband
Garageband may very well be the four-track of the digital era. Many amateur and professional electronic musicians are finding this software both easy-to-use and powerful. Hobbyists and even professional broadcasters use it to make pod casts. The Mac equipment has risen in quality while lowering in price. This is good news for anyone who enjoys producing recordings, broadcasts, or other sound editing and mixing. Are you a multi-instrumental one-person-band who likes to compose and mix tracks from scratch? Then give Garageband a try.
Where to Find Garageband
One of the best ways to get this software for free is to find an older Mac (say from 2003-2008) that already has either iLife or an edition of Garageband already installed on its hard drive. I found two separate editions of this software on these refashioned eMacs from 2006, Garageband 2 and Garageband 3. I installed the later edition on my other Mac with no problem so now both machines have Garageband 3. Obviously, each new edition has more options and usually has fewer bugs. Among Garageband 3’s improvements is the ability to make a soundtrack directly to a video clip. Later editions of Garageband include music lessons from the likes of John Mayer and Ben Folds.
Basic Functions
First you want to locate Garageband on your computer. It should be in your Applications folder. Double click on it and it will open in your dock.
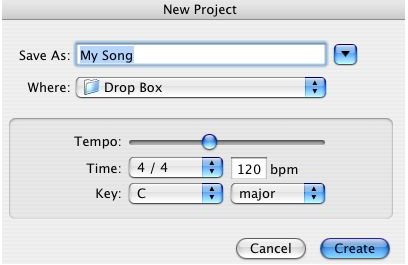
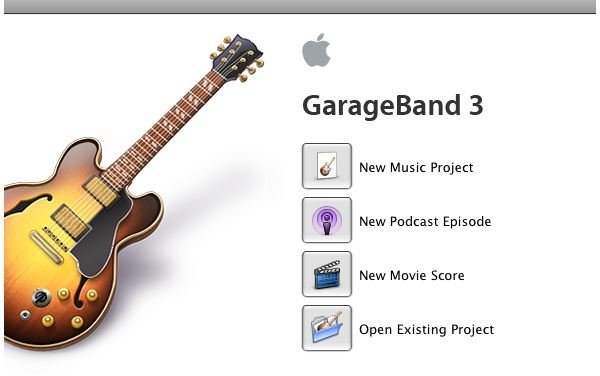
As you can see, the opening window prompts you to choose one of four options: New Music Project, New Podcast Episode, New Movie Score, Open Existing Project. While these options are very user-friendly and typical of most Mac software programs, some guidance will get your recordings underway more quickly. New Projects will open a default 4/4 time at 120 tempo that can be changed to anything you like.
Here is the user-friendly way of making a recording. All you have to do is Add a Track, Press the Red Record button at the bottom

and hit a few keys on your keyboard. Whatever instrument you’ve chosen, drums, piano and a variety of others will make
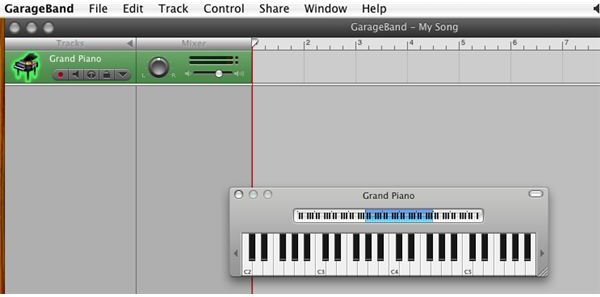
a recording. If you are rhythmically and musically inclined, you will obviously have more luck. In the most basic mode you can drag your mouse across the default piano keyboard and create a music recording. You will know the track is recording when the live track glows green and the red recording button at the bottom also glows red.
You will start to see how powerful this software is when you notice the world of options: loops, notation editing, instrumentation and filter functions that are all available and ready to modify.
More Basic Functions
If you enjoy singing, or talking, most Macs have a built-in microphone to where you can speak
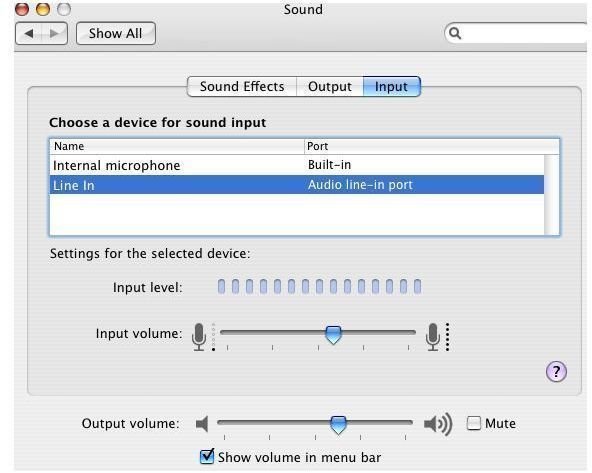
or sing right into your Mac and record it. You can make a radio voice Podcast or you can try a three-part harmony with yourself. Make sure you choose the “Internal Microphone” option in your Sound Preferences panel.
The “Line-In” is also important though.
Using “Line-In” will give you higher quality sound options with less background noise. You can plug in a microphone, keyboard or MIDI controller, or even a guitar (via a 1/8" line-in, USB interface line-in or even Firewire 400/800 line-in). In fact the Mac OS X includes several amplifier and filter effects to where you can plug right into it and use it as a recording studio or practice amp.
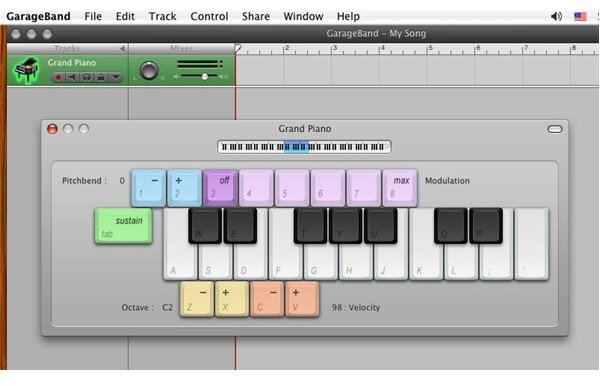
Of course any music theory knowledge and the ability to play some type of instrument will certainly add to this. Handily, even if you don’t have access to a MIDI controller or guitar, you can still make sounds using just your typewriter keyboard. It’s called musical typing. The other basic skill you will need is to be able to find and open your Sound controls in your Preferences panel. I’ve included some screenshots to show you what these basic functions look like. Note: both Keyboard and Musical Typing are under the Window menu.
There you have it. You should now have enough basic knowledge to get started recording tracks of music and voice to Garageband! Garageband will amaze you with its versatility and power once you become acquainted with its controls.
*special note: if you’re plugging in a guitar (via 1/4" plug, USB interface, or what have you) you’ll want to switch to MONO 2 for best results. It’s a sort of quirk with the program, later editions make it easier to find this by clicking on the virtual amplifier though it is still somewhat hidden.


