Mac Tips and Tricks: How to Use Japanese on Your Mac
Macs come with a large variety of languages to choose from. You can write in almost any language from Russian to Thai to Chinese. Japanese is also available, which is good since it is such a popular language to learn nowadays. If you want to learn how to write in Japanese on your Mac, you first need to know the three different writing systems in Japanese: hiragana, katakana and kanji. As long as you know those (and can read them) you can write in Japanese on your Mac very easily.
Step 1
Change the language on your Mac from English (or whatever the language is set to) to Japanese. It is in the upper right hand corner of your Mac, near the time. You need to choose from either Romanji, Hiragana or Katakana. It will change the icon from the US flag to a letter of Romanji, Hiragana or Katakana, depending on which you chose.
Step 2
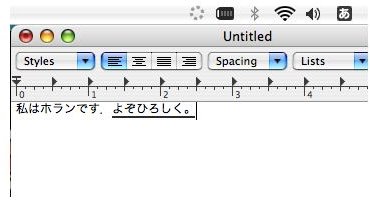
Open a text editing program, like Word or Text Edit. Both will allow you to write in Japanese.
Step 3
Type. You must type in Romanji and the Mac will convert it to hiragana, katakana or kanji for you. For example: type watashi and it will turn into 私 or type desu and it will turn into です. Be sure to remember that wa (the particle) is spelled ha.
Step 4
Convert what you can to kanji. If you know kanji well enough you can convert your hiragana to kanji quite easily, the Mac will even do it for you in some cases. To convert, press the space bar after the word you want converted. The Mac will convert it, or if there is more than one kanji that matches that sound it will give you a list of kanji to choose from. But be sure to know what kanji you are using since many are the same sound but have very different meanings when read.
Step 5
Save your file. That is all. Once you save it you can go back and edit it or print it. Now you can write in Japanese on your Mac! Won’t your teacher be impressed?