Installing Multiple Hard Drives on a Mac Pro Desktop
Is This Going to be Too Hard For Me?
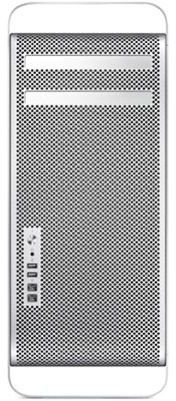
On a lot of their computing products (such as the iPhone, iPad, and Macbook), Apple makes it very hard to modify, alter, or otherwise change the original structure of the device. This makes sense from a business perspective, because it means they’ll get more money when people need to come to them for repairs, but on the consumer level it’s a pain to be unable to fix things yourself when they go wrong. Thankfully, Apple has remedied this fault with the release of the Mac Pro, a desktop computer that is the end-all see-all for desktop computers, and a device that is built for ease of customization- which includes the installation of more internal hard drives.
So if you have the ability to read, an ounce of common sense, and the right tools, you will be able to add a new hard drive to your Mac Pro with ease, and it shouldn’t take you more than twenty or thirty minutes.
Gather Your Materials
Before we actually begin the process of taking the thing apart and tossing a new drive in (it sounds scarier than it is, trust me) we’ll need to make sure have all of the necessary materials:
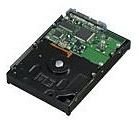
- A hard drive. It can technically be SATA or PATA, but since Mac Pros are newer and more sophisticated computers, SATA 1 or 3 will do you a lot better than the ancient PATA drives.
- Phillips head screwdriver. It should be fairly small (#1 or #2 will work best) and it would be very useful for it to have a magnetic tip; though that’s not entirely required.
- A screw tray. Though this one is optional, it will very much come in handy when you get down to the nitty gritty of unscrewing things.
- A clean workspace. If you don’t have a clean space and you lose some screws, you may not be able to put the computer back together!
Remove All Cords
Now that you have all your materials, you’ll need to unplug all the cords that are plugged intothe back of your computer, including the power cord. Make sure you shut down the computer first, and if you so desire, ground and extra electricity (while it’s plugged in) by touching the metal plates on the back of the computer. This isn’t totally necessary, but a lot of people recommend doing it to avoid electric shock.
After you’ve removed the cords and gotten them out of the way, proceed onto the next step!
Open It Up
The best thing about desktop Apple products is that to get into the innards of the computer, you don’t need anything except your hands. To access the insides of your Mac Pro, turn it so the Apple logo is facing towards you and grab the access lever. Pull it out gently, unlatch the pansl, and gently lean it down onto the ground- preferably a carpet, but if you don’t care much about the metallic finish on the device, it shouldn’t really matter.
Attach Your New Hard Drive

Each Mac Pro is outfitted with four hard drive containers that slide out for you to use. You’ll see them just below where the disk drive is, looking like four clothing drawers set side-by-side, such as on an office desk or a sideways dresser. Choose one of the drawers that doesn’t already have a hard drive in it and gently pull it completely out of the base.
Next take your hard drive and slide it into the case, followed by tightening the placement screws to make sure your drive doesn’t get up and leave while you’re putting it back in. Once you’ve tightened them enough, wiggle it around to make sure nothing is loose, and then feel free to gently slide it back into place within the Mac Pro. This should feel fair normal, and if you’re noticing an unusual amount of resistance from the computer, pull the drawer back out and look around it to make sure the screws are aligned perfectly and there are no parts of pieces loose on top that could prevent it from sliding in.
If you don’t notice anything, but still can’t get the drawer to go back in, remove the hard drive, check to see if it’s the right kind of hard drive (again, SATA 1 or SATA 3 will work) and then reinstall it and try again.
Start Up and Check
That’s it! The last thing you need to do is start your computer back up (as if you were turning it on in the morning) and then check to see if your drive has appeared on the desktop. It should be labeled something boring and generic like “Mac HDD” or “ok’s HDD”, but you can right click on select “Get Info” to change it to whatever you want.
I’d personally recommend “Super Awesome Hard Drive YEA”.
Happy hard drive installing!
References
- [Image] Mac Pro, http://store.apple.com/us/browse/home/shop_mac/family/mac_pro?afid=p219|GOUS&cid=AOS-US-KWG
- [Image] Mac Pro Hard Drive, http://store.apple.com/us/product/MC437ZM/A?afid=p210|frgl&cid=AOS-US-SHOP-Froogle
- [Information] Author Knowledge
- [Information] eHow, Install and Internal Hard Drive On Your Mac Pro, http://macs.about.com/od/diyguidesprojects/ss/hdinstallmacpro_5.htm
