Have you purchased a new Mac and are setting everything up? While new Macs usually include the most recent version of Mac OS X, Apple releases updates that improve the performance and security of the operating system and applications. Read on to learn how to set up automatic updates for Mac OS X.
Configuring Your Update Settings
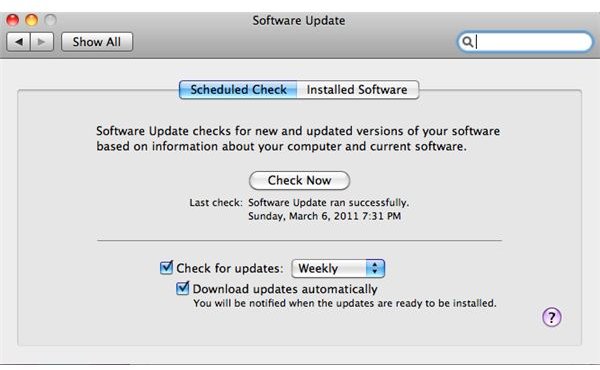
Mac OS X includes a utility called Software Update that manages and installs updates on your computer. If you don’t want to manually download and install updates, you can configure the utility to search for and install updates at a specific frequency. In addition, you can choose if you want to just download the updates and install them at a later time. This can be a useful option when others use your computer and do not want to be interrupted by a system reboot that is required by some firmware updates. To access the settings for Software Update, click “System Preferences” in the Mac OS X Dock and select “Software Update” under the “System” section on the window.
The first tab on the Software Update window is for scheduling updates. This page also has a button to manually check for updates and also displays the date and time of the last successful update. Below this section is an option for selecting the frequency to check for updates. You can choose from checking daily, weekly or monthly and can also choose to automatically download the updates or just gather a list of what is available. If you want to only download and install critical updates for the operating system and are not too concerned about third-party updates, you may want to disable the automatic downloading of updates. This can also help save hard drive space since the downloaded updates take up space even if you don’t install them.
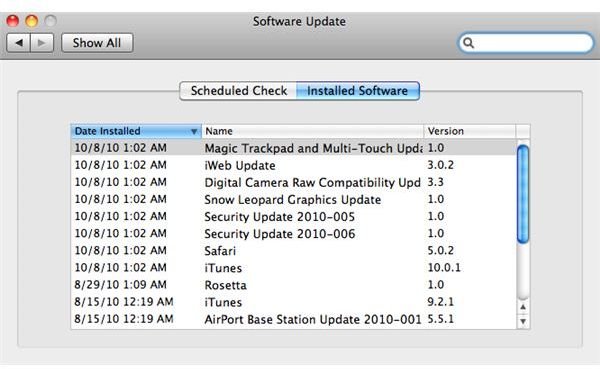
The second tab lets you view all of the installed software on your computer and is helpful when you are having a system problem. Sometimes when you view a help document on the Apple website, it may reference a specific update that solves a problem you’re having. If that’s the case, you can come to this tab and see if the update is already installed.
Manually Downloading and Installing Updates
Even if you configure automatic updates, you can still manually download and install updates . Click the Apple logo on the Mac OS X toolbar and select “Software Update.” The program will automatically search for updates and display a prompt asking if you want to install all updates now or view what’s available. Select “Get Details” to view a list of the updates available so that you can select the updates you want to install.
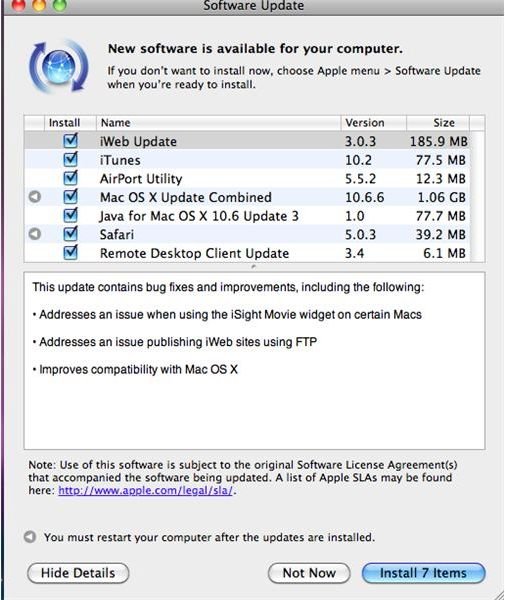
Select the box next to each update you want to install or click an updates name to view more information on what it is. When you’re finished, click “Install” to start installing updates. You may have to enter your administrator password to continue. Click “Not Now” if you don’t want to install any updates at this time. Depending on the types of updates you’re installing, Mac OS X may prompt you to reboot your computer to finish the installation process.
References
- All screenshots made by author and all references taken from Mac OS X Snow Leopard Version 10.6.6
- Mac OS X Snow Leopard’s official manufacturer website: https://www.apple.com/macosx/


