With the right virtual machine software and the right options, you can setup Fedora 12 within the hour.
Try Linux Live Discs
If you’ve never used a Linux operating system before, one great way to try it out is to download the ISO file, burn it to disc with a free image burning tool and then run it. Almost all Linux distros have a “Live ” boot option, meaning that you can try out the operating system without installing it.
However, you might like the operating system but not enough to sacrifice Windows; similarly, you might not be interested in a dual boot installation because of the issues that this brings with work continuity and even gaming.
Using a virtual machine however, you can set up a Linux installation like Fedora 12 within Windows and attain almost full functionality and compatibility.
Before You Start
We’re going to go through the process of setting up a Fedora 12 virtual machine using the VMWare application on a Windows 7 PC – however although the steps are slightly different, the same results can be reached using VirtualBox. Note that Virtual PC is largely unsuitable for running non-Microsoft operating systems.
To get your copy of Fedora, head to fedoraproject.org and download a copy. Your PC should have at least 512MB of RAM and a minimum of 10GB hard disk space available for this virtual machine.
Once downloaded, burn your ISO file to CD; it is possible to install directly from the ISO, but this isn’t an exact science and using a physical disc will speed up the process.
How to Setup a Fedora 12 Virtual Machine
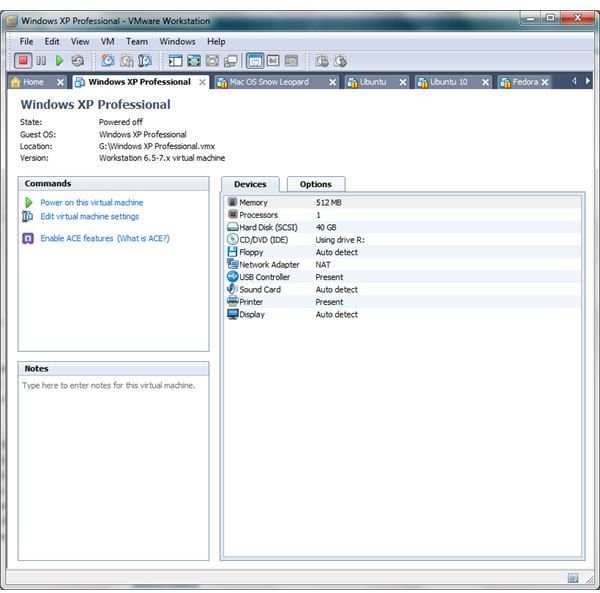
In VMWare Workstation, go to File > New… > Virtual Machine. As a non-standard configuration is required with Fedora, use the Custom option. Take the default option on the next screen and click Next.
You can now choose to use the physical installer disc or the downloaded ISO file, available via the Browse button. Either choice will result in VMWare Workstation informing you that it cannot detect the operating system that is going to be installed, so click Next to proceed and configure your hardware. Click Next through these configuration options, unless you have a specific requirement.
The most common alteration is to increase or decrease RAM, easily altered by selecting Memory and adjusting the slider on the right pane. Not that your virtual hardware is correctly setup, you can click OK and Finish for the virtual machine to power up.
Continue until you come to Select a Disk, and choose the Use a physical disk (for advanced users) option. This is done to overcome the problem Fedora has with virtual disks.
The Next button will then let you select a physical device and a partition, once you have made your choice here continue clicking Next until you come to Finish. Unless you clear the check box, the VM will boot up and detect your CD ROM.
Setup a Fedora 12 Virtual Machine – Customizing Hardware
Over the next few minutes, Fedora will run as a “Live” operating system from the CD ROM. You can begin full installation from the Install to Hard Drive icon on the desktop, which will begin the Fedora installer. You will need to select your language and storage device type (Basic is the default) as well as name your virtual computer on the network, set your location and set a root password.
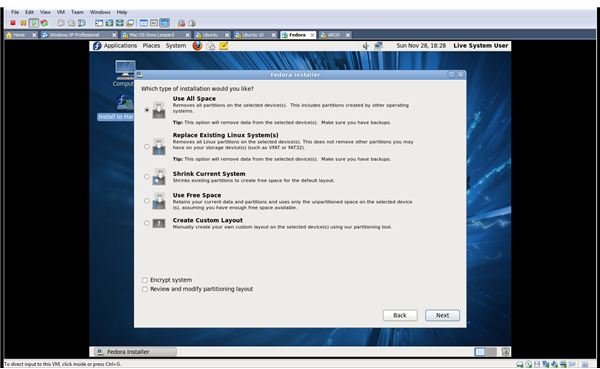
Finally you select the type of installation that Fedora will use. This might involve deleting any previous Linux partitions on the device, so make sure you make the right selection. Remember that although a virtual machine is about to be installed it is using a physical disk or partition.
Fedora will then automatically install with the minimum of input from you thanks to the specified settings in VMWare Workstation. Installation is pretty quick for this distro, and you should be using the virtual machine within an hour.


