In this article, I am going to go through two easy methods of backup and recovery in the Linux system. A Linux backup can be performed in many ways, but in this article I will show you how to do it using Simple Backup Suite and dd from the terminal.
Introduction
Today I am going to show you how easy it is too perform a Linux system backup, and recover from what could be catastrophic data loss. A Linux system backup can be performed in many ways. In Ubuntu it is quite easy to backup the important folders by using the backup tool, which I will show you later. You can also choose to do a full system backup and make an easy backup of the entire system bit-by-bit with just one terminal command.
I will also show you how to perform a recovery even if you do not have a backup on the system, as usually everything is still there and has not yet been overwritten.
Ubuntu Backup and Recovery Method
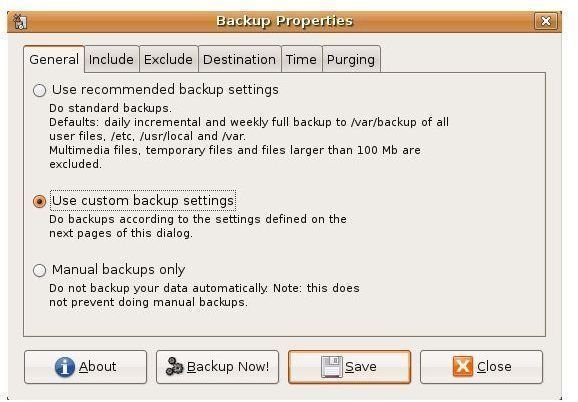
Since the majority of Linux users use Ubuntu, I thought it might be best to show you an easy backup method that saves you the hassle of running advance terminal commands. Simple Backup Suite is the program we are going to use and it has a helpful GUI interface as you can see from the picture on the right. To install the Simple Backup Suite, either search for it in the Software Center or type into a terminal window: sudo apt-get install sbackup and let it install.
Once you have installed it, you can access it by clicking “System” then “Administration” and finally “Simple Backup Suite”, which will open up a window allowing you to choose what to backup.
If you later want to restore the backup in an easy way, just click “System” and then “Administration” and finally “Simple Backup Restore”, which will allow you to go find the backed up file and begin the restoration process.
Using the terminal to perform a Linux backup
You can also use the terminal to perform a Linux backup. This will work on all Linux systems as long as you have root access because the command is in the kernel itself. The dd command will backup your entire system bit-by-bit, and is good for backing up, cloning to a new hard drive, or archiving your data.
Typing: dd if=/dev/sdx of=file.tar.gz bs=512 into your terminal would back the device /dev/sdx to the file file.tar.gz. If you do not know your device name (the /dev/sdx part), then run fdisk -l as root to find out. If it displays more than one device, try to work out by sizes and partitions which one is the primary hard drive. Remember to store the backup file somewhere separate to the operating system for easy access if it is needed.
Performing An Easy Linux Recovery
In order to perform a recovery from a dd backup, boot into a LiveCD and go to where you have stored the backup file. Once you are in the directory run the following command as root: dd if=file.tar.gz of=/dev/sdx bs=512
Again, replace /dev/sdx with your drive’s actual name which you can find by running fdisk -l, and double check that you have it right as you will overwrite something else if you don’t.
Once you are sure you have it right and run the command, it will begin the process of restoring the ‘clone’ you took earlier back to the hard drive. It may give you some time discrepancy errors when you first boot up which you can safely ignore.


