Although there’s no common “undelete” command for a Linux EXT3 file system, you can recover many types of accidentally erased files, including documents, graphics, and system files using the “Foremost” console application. Here we’ll look at installing it in Ubuntu and giving it a test run.
Introduction
Foremost is a Linux tool originally developed by the Air Force Office of Special Investigations and the Center for Information Systems Security Studies and Research. Primarily thought of a data forensics tool for law enforcement, the program has been released to the public. Here we’ll try using it for a specific purpose. Rather than explore all its capabilities, we’ll look at one area particularly helpful to Linux users - file undeletion in Ubuntu.
Many new users of Linux are surprised to learn that no “undelete” application is part of a distribution. If they research the problem a little, they’ll find that specialized hard drive searches using Grep or the Linux write command can be used to “dump” part of the contents of the hard drive into a file or folder. This is an inconvenient and lengthy process best done soon after the deletion and run from a Live CD instead of from an active partition.
Technically, the EXT3 file system does not support an undelete method itself, but fortunately, using Foremost works very much like the method using the Grep process, except that it shields us from some of the complexity.
Foremost can do file recovery for many types of files. It’s very handy for when realization hits you soon after the event.
Since we tested on an Ubuntu box, we were able to download Foremost from a repository using
sudo apt-get install foremost
Other distributions should have something similar, or Foremost can be downloaded from the project pages at SourceForge .
How Foremost Works
Foremost works by scanning for and recognizing the file structure of certain types of files. For example, the file structure of a certain file may begin
47 49 46 38 39 61
if you viewed it in a hex editor. (The right side pane of the hex editor would show this as “GIF89a.”) Most .gif image files start this way, so Foremost will know what it is when it finds it. Foremost will then try to “carve out” the data to the end of the file and write it to another location. This is how we can use Foremost to recover accidentally deleted files.
In the terminal, you tell Foremost which type of file you want to search for using the -t switch. Supported file types are avi, bmp, dll, doc, exe, gif, htm, jar, jpg, mbd, mov, mpg, pdf, png, ppt, rar, rif, sdw, sx, sxc, sxi, sxw, vis, wav, wmv, xls, zip, and all, which tells it to look for all supported file types. Additionally, the switch “ole” can be used to find all Windows programs that use object linking and embedding, such as Word, Excel, etc.
Other switches include -h show a help screen and quit, -t file types to include, -v show version and quit, -d use indirect block detection,- T timestamp the output directory, -v be verbose in output, -q quick mode, -Q quiet mode, -w write audit only mode, -a write all headers without error detection, -b number for block sizes, -k number for chunk size, -i the input file, block, or partition, -o specify directory to write to, -c set configuration file, and -s number of blocks to skip in the input file.
There are a couple of caveats. One is that Foremost should not be run from the partition that the files to be undeleted are on. If you followed the usual Linux practice of installing the root and home folders on separate partitions, this is not a problem, as you can change to the root directory to run Foremost. The other caveat is that the recovered files should also not be written to the same partition from which they are being undeleted.
Next: Formatting a flash drive to EXT3 to write the recovered files to, the exact command to use to run Foremost in the console, doing a couple of test runs, and showing the results. (It works!)
Format a Flash Drive to EXT3
For testing purposes, we’ll “cd” to the root directory to run the recovery and format an 8 GB flash-based thumb drive to have an EXT3 file system and direct the output of the recovery there.
Typing “df” into a terminal shows that the flash drive is mounted on /dev/sb1. In Ubuntu, the command
umount /dev/sdb1
informs me that, according to mtab, the flash drive is not mounted. However, it’s still showing the icon on the desktop. The answer here is to right-click the icon and select “Unmount volume.” When the icon disappears, the drive can be formatted.
To create a Linux file system on the flash drive, the command is
sudo mkfs /dev/sdb1
Running the Scan with Foremost
When the command completes, removing and reinserting the drive mounts it, and we find that it now has a “lost+found” folder just like a proper Linux file system.
I placed .doc, docx, and .pdf files in my home/user/Documents folder and a few .jpg and .gif files in my Pictures folder, deleted them all, and rebooted the PC just for good measure.
Upon restart, I opened a terminal and entered
cd /
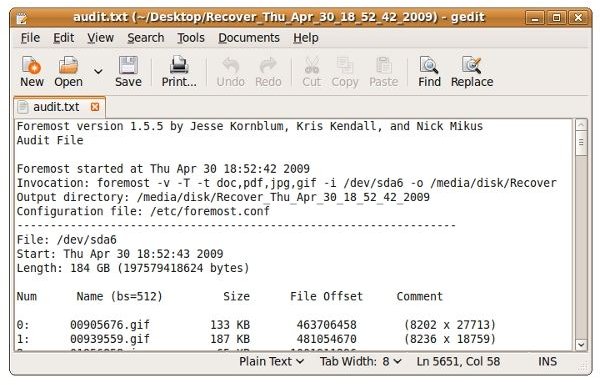
sudo foremost -v -T -t doc,pdf,jpg,gif -i /dev/sda6 -o /media/disk/Recover
That translates into foremost be verbose, put a time stamp on the output directory (in case I want to run it more than once), look for types .doc, .jpg, and .gif, read in from /dev/sda6 (/home) and write out to /media/disk/Recover (on the flash drive).
For a reason that I’m not sure of at all, Foremost scanned /dev/sda6 and found the files I’d deliberately deleted, and then it continued onto the Windows 7 partition that was on the same drive. I had actually taken 100 GB from the /home partition to create the new partition for Windows 7, but this will take some further study.
The important thing is that Foremest DID find the files I deleted and recovered them.
The first time I ran it, I did not specify which files to look for, and it returned over 30,000 different files, most of them the temporary and now deleted files from the Windows 7 installation and Windows Update and from files, I presume help files, deleted during package management. The next time I ran it, I made doubly sure to specify the file types that I wanted.
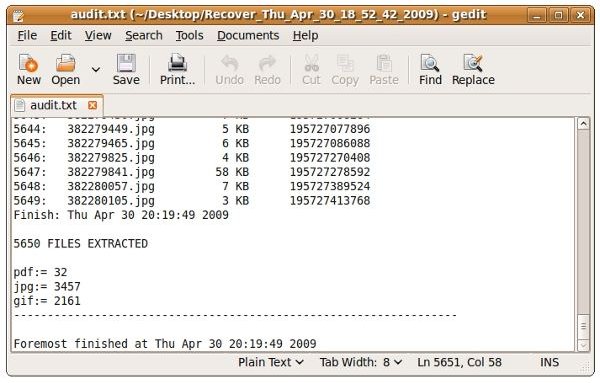
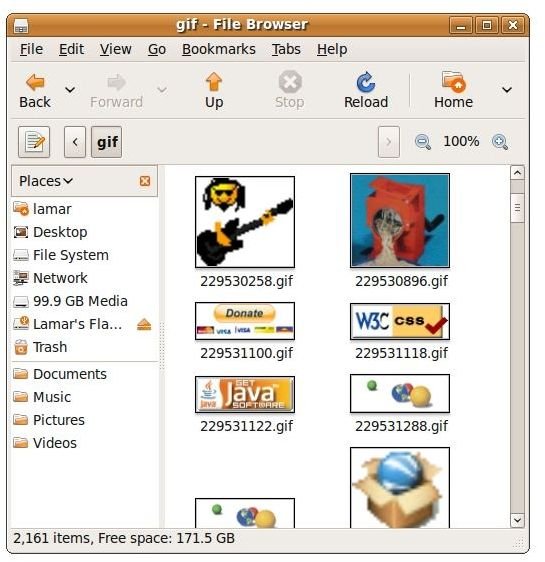
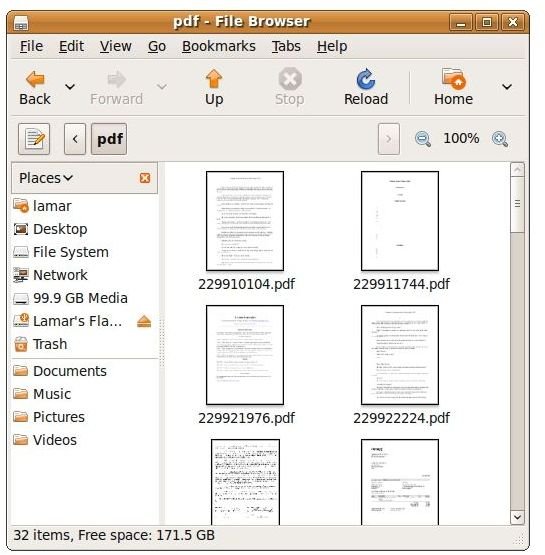
And the second time, using the command above, I successfully found the files that I’d deleted, as well as 32 .pdf files, 3,457 .jpg files, and 2161 .gif files.
Obtaining the Results
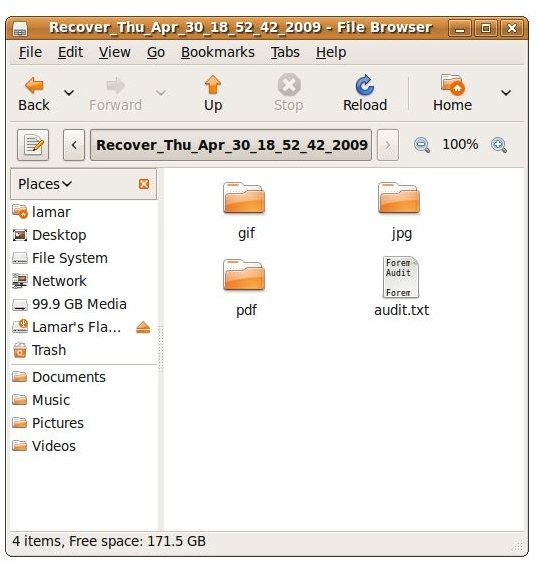
Foremost ran for about 100 minutes. When finished, the Recover folder on the flash drive contained directories named gif, jpg, and pdf, and there was a file called “audit.txt.” The file turned out to contain the text that had displayed in the terminal, effectively creating a log of the program’s (verbose) output.
Since root had issued the command, the folder containing the results was also owned by root. To make it easier to work with, I issued
sudo chown lamar -R /media/disk
to give myself normal access. Then I copied the Recovery folder to my Ubuntu desktop, put the flash drive in my Vista PC, and formatted it back to NTFS, which both Windows and Ubuntu handle equally well.
Conclusion
So Foremost definitely works. Not only did it find what I needed, it also found some stuff that I’d forgotten about and stuff that I had no idea was there. That it recovered far more than I’d expected was pause for thought. Deleted in an EXT3 file system does not mean gone. Now, some of us might have material that we really want gone from time to time, so we need some means of secure, multi-pass erasure for files that doesn’t involve wiping or overwriting a partition. I’ll look into that for a possible future article or blog post.
And what if you didn’t install your /home and /root directories on separate partitions? Then you’ll need to run Foremost from a bootable Linux system disc. In fact, that’s planned as the next article - how to edit an .ISO file to add applications to a disc image in Linux.
I hope this article helped you recover your accidentally deleted files. Thank you for reading this, and thank you for visiting Bright Hub.


