Did you know your computer has a name? Occasionally you may need to rename your computer for security or personal reasons. Ubuntu makes it easy to rename your computer, so you can spend more time doing creative things – Like choosing a name!
There are several practical reasons you may need to rename your computer system:
- Maybe you’re using your personal laptop for work. Some networks will require all computers on the network to be named using specific guidelines.
- Or, perhaps you’ve purchased a used computer, and the computer name is not to your liking.
- It’s even possible several members of your household gave their computers similar names. This could get confusing when you network them together.
Whatever your reason, renaming your computer in Ubuntu is a simple process.
These instructions have been tested on Ubuntu 8.04, also known as Hardy Heron.
Instructions for other releases of Ubuntu may be slightly different.
Using GUI
GUI stand for Graphical User Interface. This is the desktop interface Windows users are intimately familiar with.
-
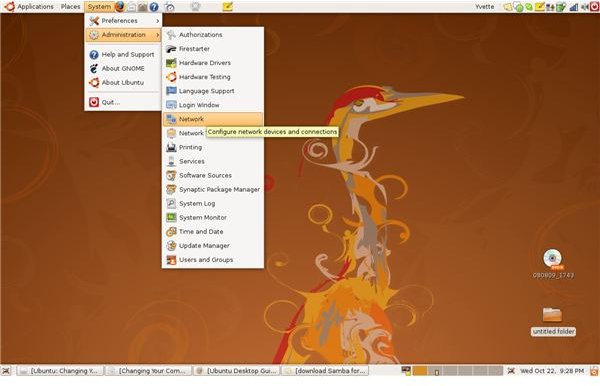
From your toolbar, select System ->Administration -> **Network
Advertisement -
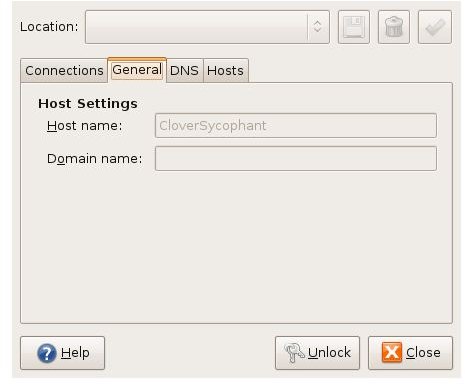
Select the General tab.
-
If you are not logged in as Root, select Unlock.
Advertisement -
A window will open, asking you to verify you have permission to access this part of the system. Type your password into the textbox, and click **Authenticate.
 Advertisement
**
-
Type your desired computer name in the text box labeled Host Name.
Advertisement -
Click Close
Restart your system to ensure the changes take effect.
Congratulations! You’re computer now has a brand new name.
Using Command Terminal
The Command Terminal allows you to control your computer by typing a series of commands in the box.
- Open your command terminal by selecting Applications - > Accessories - > Terminal.
- Type gksudo gedit /etc/hostname into the command terminal, and press Enter on your keyboard.
- Enter your administrative password in the text box. Click OK
- A window will open titled hostname (/etc) – gedit. Replace your system’s current name with the new one.
- Select Save from the tool panel at the top of the window.
- Close the Command Terminal.
- Restart your system.


