Are your computer system, printer, and network a mess of mysterious cables and wires? Here we’ll look at a mid-range commercial labeler that would be at home on the factory floor or assembly room, but that is also reasonable in helping manage a computer, network, or audiovisual system.
This is a review of the Brother Industries, Ltd. P-touch PT-1400 label printing system. Why call it a “printing system?” Because it represents idea to fact, or need to actualization, right in the palm of your hand - without needing a computer or another accessory to set things up. In fact, versatility is a large part of the PT-1400’s appeal.
Here’s what the PT-1400 looks like.
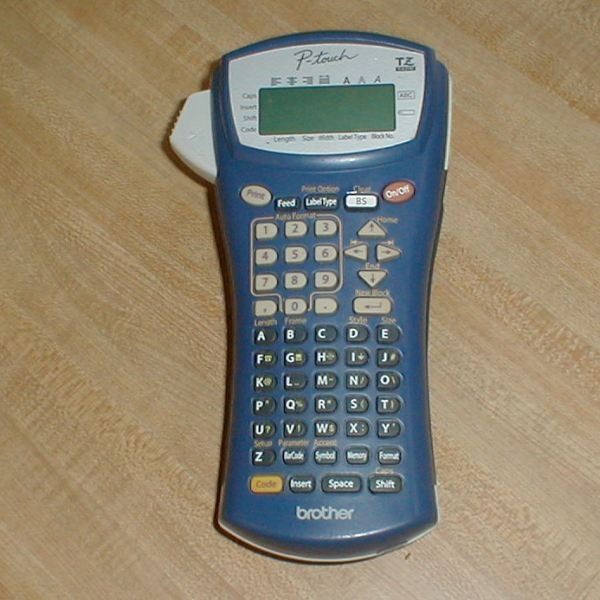
Quality of Construction and Design (5 out of 5)
The P-touch PT-1400 is a handful. Made of thick impact-resistant plastic, it’s 3.1" x 4.5" x 9.3" and weighs 1.19 lbs. It uses 6 AA batteries and can print on tape up to an inch wide. It can print plain labels, name tags, small tubing wrap, and wire flags. It can even print bar-codes.
Around the office and the computers, we were particularly interested in the wire flags for cables and plain, durable labels for components such as accessory wall warts or power supplies, synchronization cables for smartphones and tablets, and for labeling little things that might make us wonder what they were for a year from now.
The keys are rubberized to help seal the unit, and three plastic ridges on the side help one hold the device. The screen is a clear 2 lines by 15 characters. The unit has a good feel, but with some creaking when one wraps fingers around it. This is mainly from the back of the unit and does not make it seem any less structurally sound.
Here’s what it looks like with the rear cover removed.
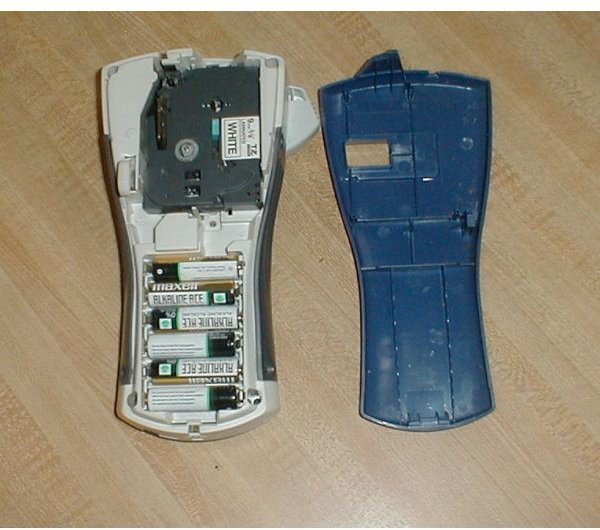
The white lever to the left is the cassette release. It pops up when the cover is removed for easy access to the cassette and re-engages when the cover is replaced. The open slot in the back cover allows one to see which cassette is installed. This is a pleasing bit of industrial design. The battery compartment and cartridge area are in an off-white shade that makes the areas look clean and neat. There is no stray adhesive or lubricant present to ruin the effect. The cassette is very easy to remove and replace.
We tested with two cassettes. One was 3/8" laminated white and the other was a 1/2" white “strong adhesive” tape. We found that name to be quite accurate, too. If using the strong adhesive cassette, don’t let the ends of the label come into contact with each other after you’ve removed the protective covering.
Removing the covering, by the way, is done by flexing the tape gently sideways. There’s an invisible split down the middle that you can get a fingernail under to peel off the backing.
Brother sells a variety of replacement tapes, including a blue-on-white iron-on fabric tape.
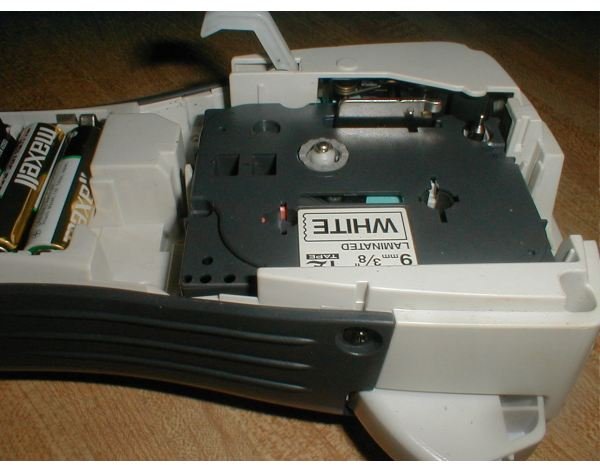
Here’s a close-up of the cassette installed in the PT-1400.
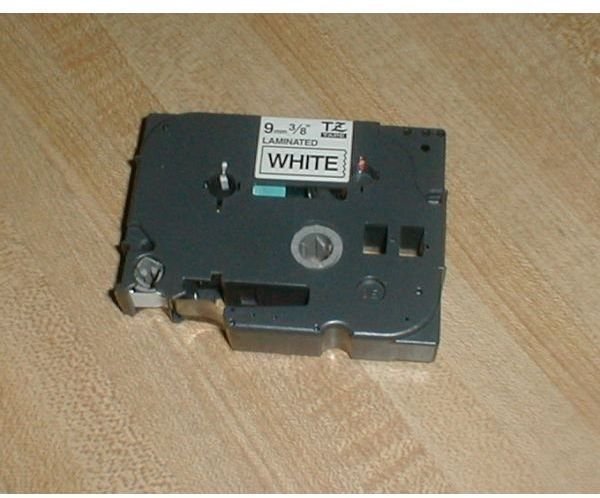
And a closeup of the cassette itself.
Setup and Use (4 out of 5)
Before digging in with the P-touch PT-1400, one should spend some time consulting the user’s guide. This is not because the device is so complicated, but because there are features on the machine that you’re not likely to discover on your own.
Designing and printing one’s label starts by selecting a “Label Type” mode. This is done by pressing the On/Off power switch and then pressing the “Label Type” button. Several modes are offered.
Normal/Vertical is for normal printing lengthwise or vertically. Rotate Mode and Rotate & Repeat are cable and wire-wrapping modes. The text is printed sideways with a specific length either once at the beginning or with the text repeating for the entire length. Flag Mode is another cable or wire wrapping mode. The text is printed near each end of the tape with a center mark between them. The center of the tape is pressed against the wire and then the ends, which bear the labels, are pressed together to create a flaglike effect. Port and Panel Mode are related. Port prints individual labels for items that may be irregularly spaced, such as the different ports on the back of a PC. Panel modes prints several equally spaced labels on the same tape and is useful for something like a row of switches or fuses.
The various modes have various properties or options. For example, for Flag Mode, one can also select flag diameter, flag length, label frame (none, outline rectangle, thick rectangle, thin oval, thick oval), and rotation. (To access these properties, press the Enter key after you’ve selected the mode.)
In the area of text formatting, the default is to try to print in the maximum width for the size of the tape and the number of lines desired. However, much more custom control is offered. You can set things like character size, width, or style.
The PT-1400 has a 2,000 character memory for your saved labels. These are lost if the batteries are completely depleted, so one might consider purchasing the optional AC adapter if the P-touch is going to be extremely programmed and customized. The manual calls these saved labels “files.” When created, they are given a number that you’ll need to remember when recalling them.
Several custom symbols are built into the PT-1400. These have a strong slant toward electrical symbols, but international symbols, mathematical symbols, and more are also included. There are also a number of “auto-label” templates stored in the PT-1400. These include name badges, file labels, simple signs, and bin and box labels with or without bar-codes.
Print Quality and Documentation (5 out of 5)
The user’s manual is excellent. It has 51 pages in English and another 51 in Spanish. Every menu and settings item on the PT-1400 is shown with the steps involved in accessing it and what the setting does.
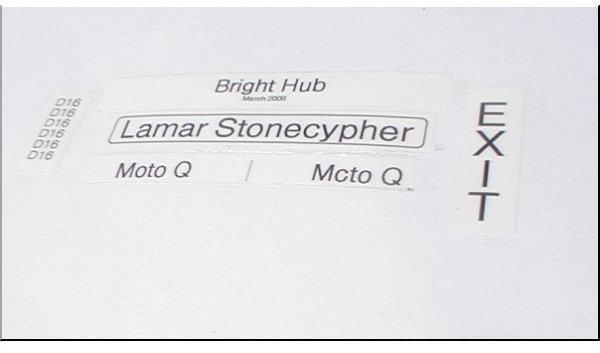
The printing itself is also excellent. The photo below shows a rotate and repeat wire-wrap label, a simple label, a vertical label, and a wire-flag label. The Bright Hub/March 2009 label was created using the file folder auto-label template.
Value and Suitability to Purpose (5 out of 5)
It would be hard to fault the P-touch PT-1400 for being more than suitable to purpose. I started this review process with the thought that I could see what a really powerful P-touch could do. It’s absolutely great for doing things like labeling audio and computer cables, battery chargers, notes and reminders like laptop battery install dates, network passwords, garden shed keys, and synchronization cables for phones. After one uses a P-touch for a while, one begins imagining labels all over the place, and those will be customized labels, too.
But is it overkill? The ESP (estimated street price, which companies that are too cool to say MSRP use now) is $99.95. Unless your home or office is very different from mine, you won’t have much use for the bar-code writer.
Yes, it may be overkill, but for the money one gets a solid piece of industrial/commercial gear that can withstand a few drops and with which one can really get fancy. Too, there’s the very good chance that this may be the last labeler one will ever need to buy. (Parts availability shouldn’t be a problem just because it is a commercial model.)
The P-touch PT-1400 has reignited my interest in labeling all sorts of things. I can’t say that I actually need this P-touch, but now that I’ve played with it, I want it. (I may find that I need the carrying case and AC adapter, too, before this is over.)
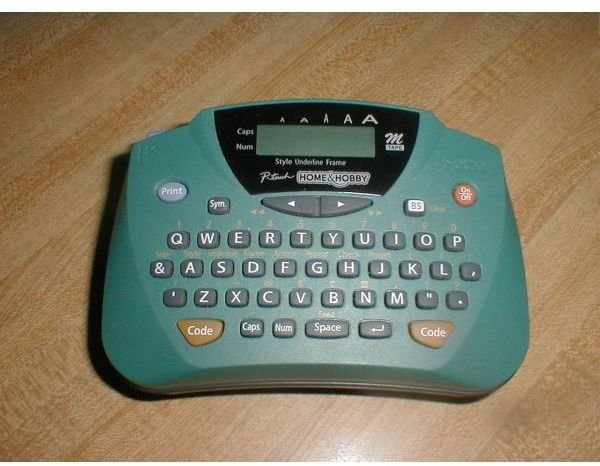
And, oh, my trusty old “Home and Hobby” P-touch 65 has been so good to me. Now he just looks like a friendly little tyke.
References
- All photos by author


