Installing a CPU into a motherboard is easy - if you know how. With different processors in use these days errors can sometimes occur to compatibility issues. Check out this guide to installing an AM3 Phenom II CPU
Installing a New CPU? Be Prepared!
With a range of CPUs, motherboards and heatsinks and fans available on the market, it can be difficult to work out exactly how to install your hardware.
Installing an AMD CPU should be as easy as slotting a RAM module into place – but if the instructions aren’t clear (if you even received any) then you might run into problems.
And when dealing with a new computer system that you’ve just paid $$$s for, problems are the last thing you need.
We’re going to go through the steps required to successfully fit an AM3 processor into a suitable motherboard, from preparation to connecting the heatsink. Before starting, we’ll assume that you have chosen your motherboard and AMD CPU correctly so that they are compatible.
What You Need
Before starting, make sure that you have the following:
• Suitable motherboard and AM3 processor
• Heatsink, fan and tube of thermal grease (should be supplied with CPU)
• Small Philips flat-edged screwdriver
If you’re ready to start, begin by discharging any static on or around you. Ensure you are wearing shoes if in a carpeted room; remove watches, rings and bracelets, and discharge yourself by taking the screwdriver and holding it against a radiator or any domestic copper piping you might have.
This should only take a couple of seconds, but prevents damaging your equipment before it has even been used.
Preparing the Motherboard
If you haven’t already done so, remove your motherboard from its packaging. At this stage, you should be looking at confirming that all of the components you have work – so mounting the motherboard in your case is not required.
Instead, you can remove the motherboard from its box and the antistatic bag and place it on a flat surface; the lid of the box itself is a good place.
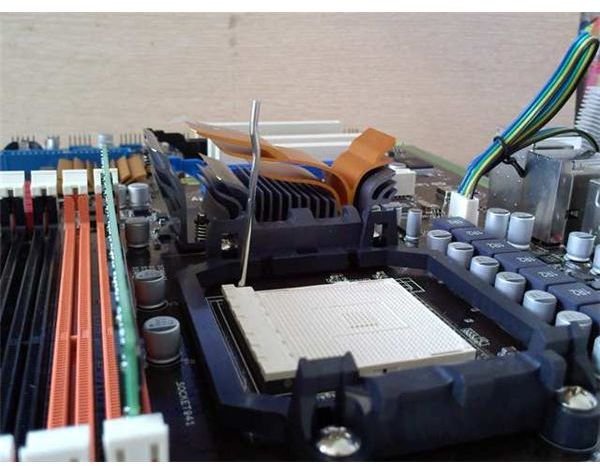
Next, check the motherboard for any pieces of cardboard that have been placed in PCI slots, RAM slots or over the CPU slot, and remove these. Finally, on the CPU slot gently push the lever slightly to the side, and then allow it to naturally raise.
Preparing and Installing the AM3 AMD CPU
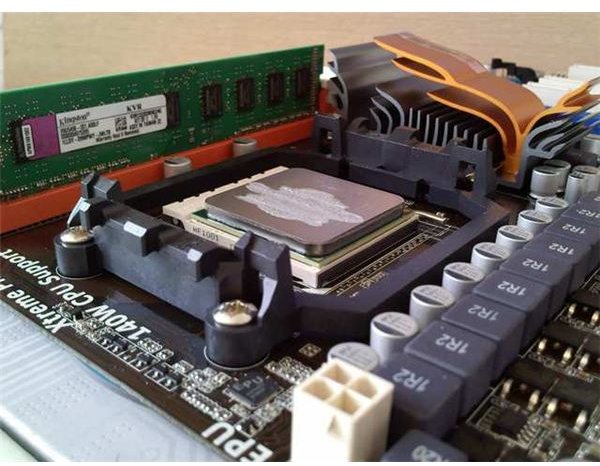
Your AMD AM3 CPU should now be removed from its packaging. In the examples here I’m specifically using a Phenom II 965 x4 “Black”, which comes with its own heatsink and fan, and it is up to you whether you use the included cooling devices or your own.
On the motherboard, take a look at the CPU slot – this will be designed for AM3 processors (as well as a few other types of AMD CPU) and on one corner there should be a gold or white triangle printed on the motherboard.
With your AM3 processor removed from the packaging and held between two fingers, check each corner for a similar printed triangle – you will need to line each of these up when you slot the CPU in place.
When you have done this, and the CPU pins are sitting on the motherboard slot, gently lower the lever, locking it into place. You will hear the pins connecting with the motherboard.
Installing the Heatsink and Fan
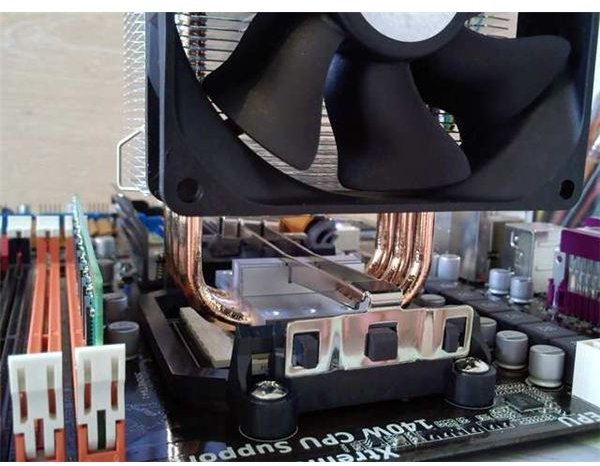
Continuing, you next need to install the heatsink. This is a metal radiator that directs heat away from the CPU – in conjunction with a fan – and ensures that the processor operates at a suitable temperature. This it does in conjunction with the thermal paste.
With your CPU locked into place on the motherboard, open the tube of thermal paste and squirt a small amount – around the size of a grain of rice – onto your CPU. Next, take your heatsink, which should be equipped with a large clip, and position it into place. The clip should run through the middle of the fan, and connect to either side of the CPU housing on the motherboard.
Once this is complete, you’re ready to continue adding components and testing your new motherboard with your chosen power supply before finally mounting into your PC tower!
(Images by author)


