Fixing Motherboard Problems - How to Remove a Motherboard
Motherboard Problems
If you spend enough time working with computers, you will eventually have to deal with a bad motherboard that needs replacement. There are things to consider before buying because there are many different types of motherboards that support different processors, RAM, drive connections, and much more. In this article, we’ll cover the basics that you need to know before buying a replacement motherboard.
OEM Motherboards
Many PC manufacturers such as Dell and HP use proprietary hardware in their computers. This means that if the motherboard goes out, you will have to buy a Dell or HP motherboard replacement, and you bet it will cost extra. The reason for this is that the hardware is all designed to work together with the operating system. If you try to put another brand motherboard in a Dell PC, for example, the Windows operating system will throw an error and not boot because the hardware doesn’t match. It’s really annoying when you run into this problem, but that’s part of how the PC makers cut deals with both Microsoft and other hardware component manufacturers to keep their production costs down. This is also why so many people prefer to build their own machines once they learn how.
You can still put another type motherboard in a branded PC case, but you will also have to reinstall Windows. The catch is that you’ll probably have to buy a new version of Windows since the one that came with your brand name PC will no longer work since the hardware won’t be the same. By the time you do all that, you might as well go buy a new computer or build one with the parts scrapped from your brand name PC.
How to Remove a Motherboard

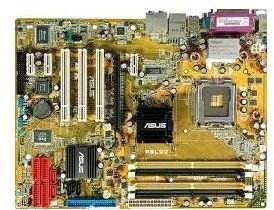
Removing the whole motherboard from the inside of a desktop computer is not difficult. It’s mainly just held in by a half dozen or more screws, but you have to be very careful that you disconnect all the connections before trying to take the board out. Follow these steps to safely remove your motherboard in order to install a replacement:
- Unplug the power cable from the back of the PC and disconnect all other devices so that nothing is plugged into the front or pack of the computer.
- Remove any cards from the PCI, PCI Express, or AGP slots.
- Disconnect the cables running from the power supply to the motherboard. Most of the time there will be one wide connector and one smaller one.
- Disconnect the SATA or IDE drive cables from the motherboard. These are what connect your drives.
- Disconnect the case and CPU fan cables from the motherboard. They use very small connectors.
- Disconnect the front panel cables from the motherboard. These usually consist of one or two connectors that come from the front of the case.
- Remove the RAM.
- Remove the connectors holding down the cooling supply for the CPU and then carefully remove the CPU.
- Remove the motherboard screws that connect it to the inside of the case.
- Visually inspect to make sure everything is disconnected, and then slowly lift the motherboard out of the case. Be sure to hold it by the edges and not lift by any of the capacitors or other components of the main board.
If you are unable to lift the motherboard out of place, you may need to remove the power supply or internal hard drive, depending on how they are mounted inside the PC case. Sometimes in smaller cases, they will get in the way. Just be careful not to force the board out, otherwise you will have to force the new board in and could damage your new motherboard.
(Image credit: Tomshardware.com)
Installing the New Motherboard
Once you have safely removed your old motherboard, you are ready to install the new one. Depending on the brand and design, you may have to adjust the position of your motherboard standoffs according to where the holes are on the board. Be very vareful when handling the components of your new board and take your time to align everything properly before you starting tightening the motherboard screws. Be sure to check out my article on how to install a new motherboard for more help.
