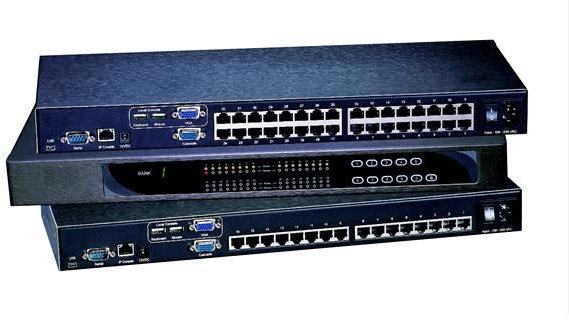
How to Configure KVM Switches for Home or Business
Benefits of KVM
KVM switches are attractive because they allow a user to operate on more than one computer without requiring that user to have more than one set of input devices and displays on the desk.
People have multiple computers at home for a variety of reasons. Perhaps you have a Web server, a Linux box, and a Windows computer. Having three keyboards, three mice, and three monitors is impractical and expensive, making a KVM switch a desirable choice.
Small business might have a file server, a phone server, and an email server, making a KVM switch an ideal option to make access easy, neat, and inexpensive.
Companies with large server rooms and server farms require KVM switches from the standpoint of space constraints and efficiency. From a few IT workstations, hundreds of servers can be managed, regardless of where they are located over an IP connection. Multi-user KVMs allow more than one person to participate in the configuration and troubleshooting of machines.
Configuring KVM Switches
Because so many types and brands of KVMs exist, it’s impossible to list every model and a step-by-step process for setup and configuration. When learning how to configure a KVM switch you will need to consider the way the switch will be connected, how the KVM will be accessed, and how many users will be using it to access remote machines.
Connecting KVM Swithces
Every KVM needs a way to connect the remote computer to your keyboard, mouse and monitor. This can be done with physical connections using PS2 or USB cables as with most home KVM switches, Cat 5 cabling for extended distances, or encrypted IP data through the network.
Most inexpensive KVM switches are connected to all the switched computers via local cables. Older models will require connection from the PS2 Keyboard, mouse, and video ports on each computer to be controlled to the PS2 Keyboard and mouse ports on the KVM switch. Newer models connect with USB cables and also can connect the microphone and speakers. The physical keyboard, mouse and video are in turn connected to the KVM switch.
When using a Cat5 KVM switch, a remote box connects to each computer’s keyboard, mouse and video connectors. A Cat5 cable then is routed back to the KVM switch and connected. Although these can be run through patch panels, it’s important to keep in mind that the cables are not Ethernet compatible, so it’s important not to connect them to your network switch. It is also important to avoid connecting an Ethernet cable to the KVM switch. These switches usually come with a software utility used to select available machines. Most of the Cat5 KVM switches have separate ports for the servers and the users. Each user has a box (different from the module for each server) that connects it to the KVM. The keyboard, mouse, and video at the user station connect to the user controller box. Most of the time, a local computer can also be connected to the KVM’s user station as well.
IP KVMs can connect to computers in two different ways. Some use a hardware device (usually PCI or mCard) to be installed into remote machines. This captures the keyboard, mouse, and video connections and converts it to an IP connection with the KVM box. Another method connects an external transponder to the keyboard, mouse, and video connectors to the machine. In either case, keyboard, mouse, and video data is encrypted between it and the KVM switch. Users can log in to the KVM via a Web browser interface that allows them to choose which computer to control.
Controlling KVM Switches
For smaller KVM switches, each connection on the back of the KVM switch has a number corresponding to a button on the front. The user selects which computer to control by pushing the appropriate button. An alternative method of using the KVM switch is by utilizing the unit’s programmable hot keys to select the computer to control from the keyboard. Many KVMs have a separate hotkey that access an internal menu that can be used to label each port.
Cat5 Remote KVMs, are controlled by the keyboard connected to each user station. When the station is powered on, the user enters a login name and password to gain access to the system. A hotkey is used to get a menu of available servers. Once the server is selected, the keyboard, mouse and monitor behave as they were physically connected to the server.
KVM over IP provides for control of remote servers or remote KVM switches via a browser-based client. From the client, users can browse through the hierarchy of servers and KVM switches to find the server that needs to be controlled. KVM switches can be configured in tiers making the control of extremely large numbers of servers from all over the world possible from one Web browser.
KVM Switch Users
KVM switches allow users to take control of a remote server using a local keyboard, mouse, and monitor. While most low-end KVMs are designed for one user at one workstation to switch between a few computers, modern enterprise KVMs allow multiple users to access a lot of servers and share that access with other users. This means different users in the system can team up to deploy new applications on a server or troubleshoot a server’s configuration. How to configure a KVM switch can depend on how many users are needed to maintain all the servers in use within the enterprise. The number of user ports and/or licenses required needs to be taken into account.
