Networking is the connection of several computers into one area where they can communicate with one another. In general there are two different kinds of networks, Microsoft or Local networks and Cisco or Internet networks. The Microsoft Networks use servers, whereas the Cisco networks use routers.
What is the difference between a Microsoft Network and a Cisco Network?
Consider a parking lot with one hundred parking slots and a booth that manages the cars in the lot. Suppose it gets full, but the lot attendant tells a driver that there is room in another parking lot across the street and to go there. The driver does that, but to get to that other lot he must cross an intersection with a stop light.
The local parking lot would be a local network managed by a server represented by the parking lot booth. The other network is the Cisco network that manages the direction from one parking lot to another. This is represented by the traffic light, which under Cisco would be a router. Each parking lot would be a Microsoft network. The traffic between lots managed by traffic signals would be a Cisco network.
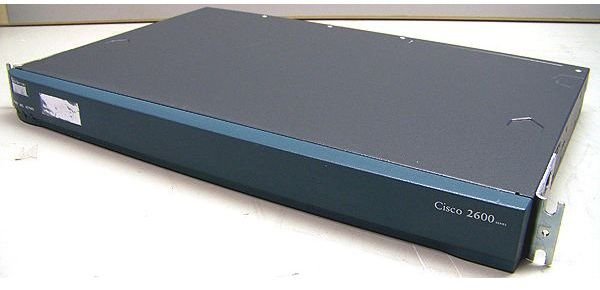
So here you have two different networks, a local one managed by a network server like Microsoft Server 2003 or Server 2008, and an internetwork managed by a router, like a 2600 series router.
Cisco Router Configuration Basics
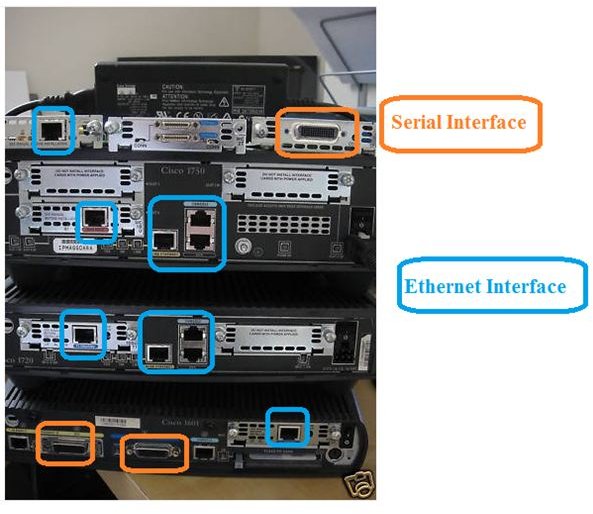
Configuration is done on the part of the router called an interface. There are two kinds of configuration interfaces on a Cisco router: Ethernet and Serial. Ethernet allows you to connect to your local network, to a switch, or to a server. The Serial connection allows you to connect to another Router.
The basics of Cisco Router setup and config are these:
You will need an IP address and a subnet mask. The IP address is like your home address number, and the subnet mask is like your street name. Combined, the two provide you with a unique location. A different street name is like a different subnet. Each network has it’s own subnet. Each IP address is made up of four octets with the values 0-255. An IP address will look like this: 10.55.200.3. The subnet mask also has four octets with only certain specified values allowed: 0, 128, 192, 224,240,248, 252,254, and 255. A subnet mask will look like this: 255.255.255.0. (The discussion of subnetting is the topic of another post.)
Before you can configure your router, you must connect to the router with a roll-over cable and connect its end to your PC com port and to the router’s console port.
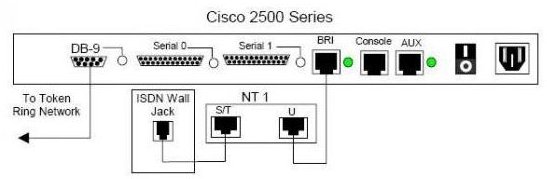
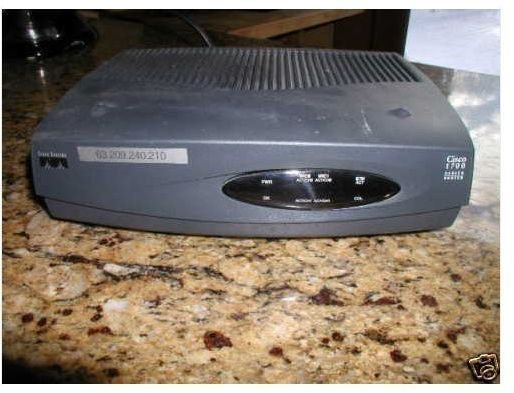
Image source :

How to Setup a Cisco Router
So with that in mind, let’s configure a router.
Turn on the router.
-
Enter the router: enable
Advertisement -
Enter the router global configuration mode: Configure-Terminal (config t)
-
Give the router a name: hostname Router1
Advertisement -
Enter the Interface that you want to configure: interface serial 0
-
Enter the IP address and subnet mask: ip address 192.168.2.1 255.255.255.0
Advertisement -
Turn on the interface: no shut
-
Then exit: exit
Advertisement -
Save the configuration to permanent memory: copy running-config starting-config
**************************************************
Now the setup is complete.
Does the Router Setup Work?
To see if your configuration worked, ping the ip address that you put in:
ping 192.168.2.1 [enter]
You should get four responses like this:
Reply from 192.168.2.1 bytes = 32 time-15ms TTL=255
Reply from 192.168.2.1 bytes = 32 time-15ms TTL=255
Reply from 192.168.2.1 bytes = 32 time-15ms TTL=255
Reply from 192.168.2.1 bytes = 32 time-15ms TTL=255
If you get those four replies, your configuration will be correct.
How to Create a Cisco Network with Two Routers
To create a Cisco Network with multiple routers, you would connect the two routers at the serial port interface.
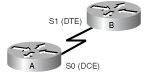
Connect the two Routers with a serial cable. Put one end on serial 0, and the other end on the second router also on serial 0. One end of the serial cable will be a DCE and the other end will be labeled DTE. It does not matter which end goes where, but for our purposes, put the one labeled DCE on this new router. There will be one other command that will be new, the clockrate command.
Set up the configuration again.
-
Enter the router: enable
-
Enter the router global configuration mode: Configure-Terminal (config t)
-
Give the router a name: hostname Router2
-
Enter the Interface that you want to configure: interface serial 0
-
Enter the IP address and subnet mask: ip address 192.168.2.2 255.255.255.0
-
Turn on the interface: no shut
-
Enter the clockrate: Clock rate 56000
-
Then exit: exit
-
Save the configuration to permanent memory: copy running-config starting-config
**************************************************
The Clock rate command is put on the DCE side, and it is used to mimic the telephone company clock rate speed of transmission.
The other difference is that on this configuration you have an IP address 192.168.2.2, whereas on the first configuration, the IP address is 192.168.2.1.
Now ping the other router to see if your configuration was correct:
ping 192.168.2.1
and from the first router ping the second
ping 192.168.2.2
If you get responses from both routers, your configuration is correct.
Cisco Router Firewall Configuration
Firewalls are designed to keep internet traffic out, or restrict internal network traffic. You want to use firewalls in order to prevent viruses, or worms, or more malicious attacks on your network.
To create a firewall on a Cisco router, you must use access lists. An access list allows or denies IP addresses from entering the network. Since the point of entry is the router, that is where you put the access list. You also put the access list on an interface, serial or Ethernet. Here is an example of a Cisco router firewall configuration.
-
deny ip 10.0.0.0 0.255.255.255 any log
-
deny ip 172.16.0.0 0.15.255.255 any log
-
deny ip 192.168.0.0 0.0.255.255 any log
-
remark: these three deny statements prevent internal private ip addresses from entering the router.
-
remark Deny Trial-Internet
-
deny ip 198.0.4.0 0.0.0.255 any log
-
remark Deny packets without an IP address
-
deny ip host 0.0.0.0 any log
-
remark Deny packets from the localhost, broadcast, and multicast addresses
-
deny ip 127.0.0.0 0.255.255.255 any log
-
deny ip 255.0.0.0 0.255.255.255 any log
**************************************************
The “any” command is used in place of 255.255.255.255
This configuration can be expanded with the use of a Cisco Pix Firewall, which only functions as a firewall, and does not double as a router.


