Wireless printers allow you the benefit of having a printer anywhere in your home or office without having to connect it directly to your computer. Fortunately, installation is straightforward as well.
Windows XP Installation
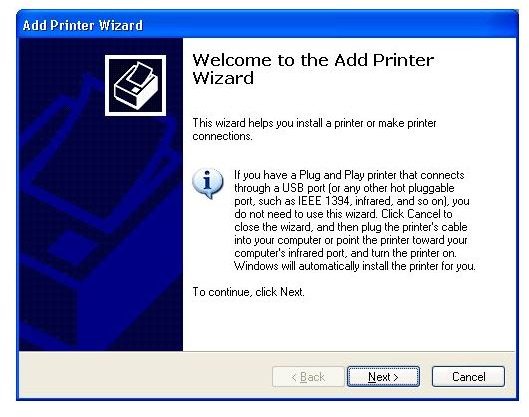
Set up the printer in the location you want it and connect the power supply, following the manufacturer’s instructions. Log on to the computer onto which you want to install the wireless printer. If you are using Windows XP, open Printers and Faxes from the Start menu. You can also open the Printers and Faxes window from the Control Panel. In the Printer Tasks pane on the left of the Printers and Faxes window, select Add a Printer to start the Add Printer wizard.
Click Next to start the wizard and then select A Network Printer, or Printer Attached to Another Computer. Click Next. Select Browse for Printer and click Next again. Select the wireless printer you want to install in the list of found printers and click Next. A Connect to Printer dialog box will open. Click Yes and finish the wizard.
If the wizard does not find the wireless printer you want to install when you browse for it, select Connect to This Printer, enter the wireless printer’s address as provided by the manufacturer**,** and complete the wizard.
Windows Vista Installation
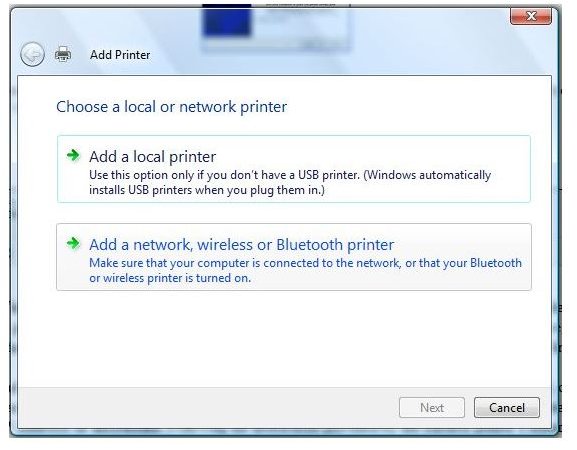
If you are using Windows Vista, go to the Start menu and type Printers into the Start Search field and then select Printers from the results list. You can also open the Printers window from the Control Panel. Click Add a Printer on the toolbar to start the Add Printer wizard.
Select Add a Network, Wireless or Bluetooth Printer. The wizard will search for any available printers. Under Select a Printer, click on the name of the wireless printer you want to install and click Next. You may be presented with a security warning regarding the wireless printer’s drivers. Click Install This Software Anyway. Print a test page onto the wireless printer if desired and then finish the wizard.
If the wizard is unable to find the wireless printer, you may be presented with the message No Printers Were Found, or the wireless printer will not be listed in the Select a Printer list. Click The Printer I Want Isn’t Listed. Choose Select a Shared Printer by Name or Add a Printer Using a TCP/IP Address or Hostname. Following the instructions provided by the wireless printer’s manufacturer, enter the name or location of the wireless printer and click Next. You may be prompted to install drivers for the wireless printer. If so, follow the prompts to complete installation and finish the wizard.
Troubleshooting
If you follow these steps and are still unable to install your wireless printer, check to make sure that the printer’s wireless adapter is plugged into the power supply and turned on, if applicable. If the printer is plugged in and the wireless adapter is connected, disconnect the power supply from the printer for several seconds. Plug it back in, turn the wireless printer back on and try to install it again. If the computer still does not detect the wireless printer when you try to install it, refer to the printer’s manual to make certain that it is correctly set up and that your computer meets the wireless printer’s system requirements.
For more help and information, check out Sharing a Printer Over a Wireless Network and Basic Facts about Wireless Printers and Wireless Printing .


