The first thing you’ll need to do when you buy an iPad is sync it to your computer, but for a lot of people, this is easier said than done - especially if you bought used. Here’s a quick guide so you can go back to the fun things the iPad can do.
Syncing: What is it? How is it done?
The act of syncing is something that gained popularity with the rise of the iPod, and initially it meant that you could automatically sync your iTunes library with your iPod so you wouldn’t have to drag and drop all of the songs you wanted to listen to. As time has gone on though, it has evolved to mean more than just music, because the iPods and iPads and iPhones of today can do much more than just listen to some tunes. They can read text files, watch movies, and play games as well.
Because of this, the automatic addition of files to your iDevice has expanded from the traditional audio-only approach to something more of an all-encompassing action. Here’s a quick guide on doing this with an iPad.
Step 1) Download iTunes
If you don’t already have the Mac application iTunes downloaded (for some reason; perhaps you bought a used computer and it wasn’t on there), make sure you download it right away. Even if you already have it downloaded, it’s important that you check to make sure it’s fully updated. Often times if your iPad’s software is newer than your iTunes software, the sync won’t be successful. To do this follow these steps:
- Open iTunes
- Click the ‘iTunes’ header in the top left of your screen
- Click “Check For Updates” from the drop down list
After you’ve made sure you’re totally up to date, move onto the next step!
Step 2) Open iTunes and Plug In
After iTunes has finished downloading or updating (depending on which you had to do in the previous step), click the icon that should be on your dock, or alternatively, search for it using the Spotlight feature in the upper right-hand corner of your screen. After it’s open, you’ll want to have your iPad and the cord ready!
Plus the fat end of the cord into your iPad, and prepare to plug the USB end into your computer, but take caution of a few things first:
- To avoid power and speed issues, make sure you plug into the highest speed USB port available (2.0 or higher is prefered).
- Unplug any other iOS devices that may be plugged into your computer to avoid mix ups or accidental song additions.
Once you’ve got those two things sorted out, feel free to plug your iPad in!
Step 3) Find Your Device In iTunes, Set Sync Settings
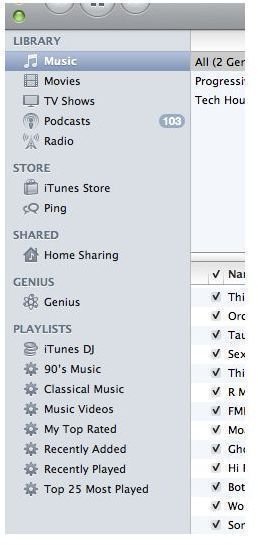
Wait a few moments after you plug-in your device and it should appear in the left-hand browser column of iTunes as whatever the iPad is named. Often times it will be something like “Austin’s iPad” or “MDD’s iPad”, but you can really name it whatever you want. After you see it in the left-hand browser, click on it. This should bring up a summary of your iPad including size, model, iOS version, etc, and at the top you should see a list of items including “Summary”, “Info”, “Apps”, “Movies”, “Music”, and other things.
If you click through all of these items, you can select the things you want to sync (ie, which things you want to be added to your iPad) and which you don’t, as well as the way that iTunes chooses which things to add and which things not to. It’s a pretty useful interface that you’re sure to be coming back to over and over again as you add more things and require different groups of files at different times.
Step 4) Begin the Sync
After all of your settings have been adjusted, you should see the “Apply” button in the bottom right of the window. Selecting this will cause the sync to happen, and this is generally where you want to go next. Hit this button, wait a few minutes, and your iPad should be ready to be ejected and used to your heart’s content!
Anecdotal Help: How to Manually Add Songs/Files
Often times an iPod will auto-sync to your iTunes and give you a bunch of songs you didn’t want to hear in the first place and files you never really wanted to see at all. If you want to prevent an iDevice from auto-syncing, follow this procedure:
- Open iTunes (make sure you have the latest version downloaded, of course)
- Plug in your iDevice
- Click on your iDevice in the left hand column browser
- Go to your device’s settings
- Look for the box that says “Automatically sync to my iTunes library”
- Uncheck the box and save settings
This should keep things from transferring unannounced from now on, and you can always switch it back if you prefer the other method.
References
Author Knowledge
Apple Support, Syncing with iTunes
Screenshot of iTunes taken by the author.
Other images provided by manufacturer press materials


