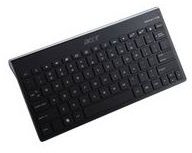
Fixing an Acer Wireless Keyboard
#4: Unplug and Restart
I want to get this one out of the way early, because it’s the most generic and also the most helpful in terms of its success rate. No matter what your hardware is, the number one rule for things that aren’t broken is to simply unplug them, wait a minute or two, and then restart them. With a wireless keyboard, there really isn’t anything to unplug, but simply turn off the device, shut down your computer, and then start it back up in a few minutes. Most of the time this will sort of jog the keyboard into “remembering” how to work, in a manner of speaking, and you should be free from issues.
It’s worth noting that this generally only works with devices that used to function properly but recently stopped working. If your problem is setting up the wireless or Bluetooth on your computer, you’re riding a different beast entirely.
#3: Make Sure You Have the Right Drivers
Going from the simplest to the most complex item on this list, we have the problem of having the wrong drivers installed. In order to remedy this, there are a lot of different things that you’ll have to do depending on what kind of computer you have. Now, unfortunately I can’t write out a driver guide for every computer out there in just this article, but if you head on over to the magnificent beast that is Google, you should have no trouble finding the right drivers if you follow this Google formula:
“[computer type (Dell/Inspiron/etc)] acer wireless keyboard drivers”
If you still have trouble for some reason, leave a comment on this article with your computer specs and I’ll find you the right drivers.
#2: “I Do Have the Right Drivers You Jerk, Why Isn’t It Working?”

If you did the above process just now, or sometime in the past, yet your keyboard is still not working, there is a pretty simple reason for it – sometimes, if you have two drivers installed that both control the same type of device, one will take predominance over another and subsequently stop the proper one from working. To figure out if this is the problem, all you have to do is ask yourself whether you’ve ever used another wireless keyboard on this computer in the past. If so, there’s a pretty high chance that you just found your culprit. Here’s what to do (it’s complicated, so take a deep breath):
1. Open up the command prompt window by going into the Start Menu>Programs>Accessories>Command Prompt. Make sure you’re running it as the administrator by right clicking and choosing that option.
2. Within this very confusing looking box (alternatively, the box that looks like it’s from the 1980s), type the following command prompt OR copy/paste it into the dialogue box: SET DEVMGR_SHOW_NONPRESENT_DEVICES=1
2a. What this does is it forces all of the hidden drivers (such as ones that are not being used and could be messing with your keyboard) to show up within the device manager**,** and subsequently allows you to remove them.
3. Close the command prompt and open up the Device Manager, located in Start>Control Panel>Device Manager.
4. When looking at the list of devices, you should see categories such as “Mouse”, “Keyboard”, etc, and if you expand the “Keyboards” section (by clicking the little “+” sign to the left of it) you’ll see a list of drivers. If you see two drivers appear underneath the header, you’ve found your problem.
5. To uninstall the unwanted driver, right-click on it and select “Uninstall”. After a few moments, you should be good to go!
6. Restart your computer.
7. Attempt to use your keyboard again by connecting it as you would if it were brand new. If you still have no luck, sometimes reinstalling the initial driver can be a big help.
#1: Try The Manual Connect Procedure
Though it’s a bit of a hassle, every wireless keyboard that is even half good comes with a back-up manual connect procedure that allows you to override the initial automatic connection in favor of a presumably sturdier one. This is helpful if the issue is that your automatic connection is faulty for whatever reason, and only takes a few seconds. Before beginning, it’s worth noting that this particular guide is for the wireless keyboard/mice combos that come with Acer computing products, but it’s presumed that it can work for any number of wireless keyboards.
- Push down on the connect button on the receiver and let go a few seconds later.
- Push down on the connect button on the keyboard and let go a few seconds later.
- Push, once again, on the connect button on the receiver.
- Push the connect button on the mouse.
A few seconds later you should see the confirmation lights blinking on the keyboard and then it should be working!
References
- [Information] Author’s own knowledge.
- [Information] MakeUseOf, How To Easily Remove Old Drivers, https://www.makeuseof.com/tag/how-to-easily-remove-old-drivers-from-windows/
- [Information] Acer Support, FAQ, https://acer.custhelp.com/app/answers/detail/a_id/384/~/how-do-i-troubleshoot-my-wireless-keyboard-and-mouse%3F
- [Image] Acer.com, https://www.acer.com/worldwide/selection.html
- [Image] Acer Wireless Keyboard Product Image, https://www.google.com/products/catalog?q=acer+keyboard&oe=utf-8&rls=org.mozilla:en-US:official&client=firefox-a&um=1&ie=UTF-8&tbm=shop&cid=9108225039262069754&sa=X&ei=F2cTTvSNG6KBsgL3-OnUDw&ved=0CF8Q8wIwAA
