How to Create Water Blue and Yellow Buttons in Adobe Illustrator CS3
These buttons are created with a water blue gradient color and then there is a yellow gradient rectangle added to the left side of the button. This tutorial will show you step by step how to create the water blue and yellow buttons.
Drawing the Rectangle
You will need to start by drawing the rectangle for the button. Select your rectangle tool from the toolbar and draw a rectangle on your document. Just draw one button and when we finish the button, we will duplicate the other ones that you need.

Applying the Gradient to the Rectangle
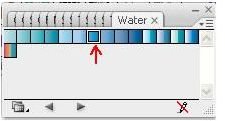
You will need to open the Water Gradient panel. Click Window > Swatch Libraries > Gradients > Water. Click your rectangle to select it and then click the Water 7 gradient. That is the seventh gradient in the Water Gradient box. Change the stroke color of the rectangle to # 007FC3. Change the gradient angle to 90.
Drawing the Small Rectangle
Now we will draw the small rectangle that goes on the left side. Select the rectangle tool again. Draw a narrow rectangle. How narrow is up to you. You can refer to the finished image that I have provided to see the small rectangle. After you have drawn the rectangle, slide it to the far left.

Applying the Gradient to the Small Rectangle
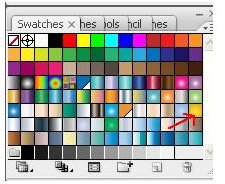
Next, we will apply the gradient to the small rectangle. Click the rectangle to select it. The gradient that we will be using for this rectangle is in the default swatches panel. So click the default swatches panel on the right side of your window. Look for the Autumn Yellow Radial gradient and click it to apply it. There is not stroke color applied to the small rectangle.
Grouping the Two Rectangles
Before you start duplicating the other buttons you will need to group them together. Grouping them together will turn the two rectangles into one graphic. Grab your black pointer. Hold down the Shift key and select both of the rectangles. Go to the top of your window and click Objects > Group. Your two rectangles are now one.
Duplicating Your Other Buttons
Now you can duplicate the other buttons that you need. To duplicate them, you will need to copy and paste them. Click the button and press CTRL C on your keyboard. Click off of the button and press CTRL V. That will paste a new button. Press CTRL V again to paste another button. Continue doing this until you have all of the buttons that you need. Then you can add your text to the buttons.
This post is part of the series: Adobe Illustrator CS3 Buttons
This series will show you how to create buttons in Adobe Illustrator.
- Introduction to Creating Web Buttons in Adobe Illustrator CS3
- Adobe Illustrator CS3 Buttons: Rose Faded Drop Shadow Button
- Applying a Chrome Effect to Web Buttons in Adobe Illustrator
- Adobe Illustrator CS3 Buttons: Pink Gradient Leaf Buttons
- Adobe Illustrator CS3 Buttons: Green Gradient Cross Buttons
- Creating Glass Buttons With Illustrator
- Adobe Illustrator CS3 Buttons: Pink and Silver Bullet Button
- Adobe Illustrators CS3 Buttons: Water Blue and Yellow Buttons
- Adobe Illustrator CS3 Buttons: Black and Silver Chrome Pill Button
- Creating Slanted Gold Web Buttons in Illustrator
- Adobe Illustrator CS3 Buttons: Blue Steel 3D Slanted Button
- Adobe Illustrator CS3 Buttons: Silver Plastic Pill Button with Spirals
- Adobe Illustrator CS3 Buttons: Silver Bullet Buttons
