You will need to know how to create a HTML document if you want to create a website. In this guide, you will learn how to create an HTML document, and I will show you how to save HTML documents using Dreamweaver.
In this beginner’s guide I will show you how to create a new HTML document in Dreamweaver. I will also show you how to save the HTML document in Dreamweaver. This is a step by step guide for beginners. To begin this guide, open your Dreamweaver program and let it load.
Creating a New HTML Document in Dreamweaver
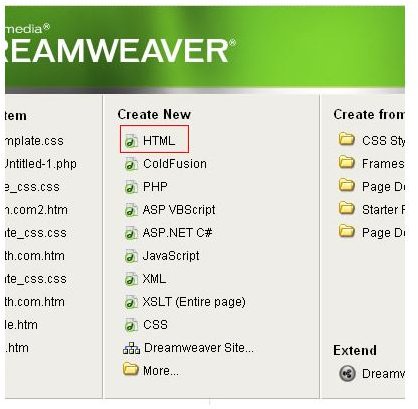
When your Dreamweaver Program loads, you will be presented with an interface. In the middle column of the interface, you will see the list of things that you can do. To create a new HTML Document, click the HTML link. Your new HTML document will open in your Dreamweaver window.

To create another HTML document, do the following. Go to the top of your Dreamweaver program and click File > New. A box will open and you will see two columns in this box. In the first column, you will need to choose Basic Page. So, click the Basic Page link. In the second column, you will need to click the HTML link. Then click the Create button at the bottom of the box. The new HTML document will open in your Dreamweaver window.
Saving an HTML Document in Dreamweaver
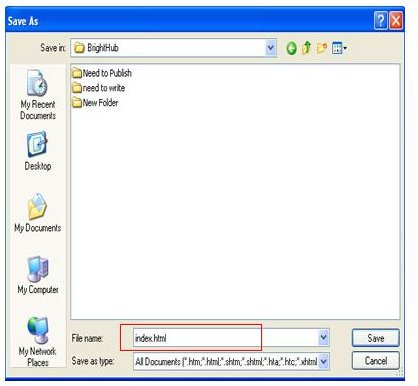
To save an HTML document, go to the top of your Dreamweaver window and click File > Save As. The Save As box will open and you will need to type the name of your document in the File Name field. At the end of the name, you will need to type .html. For example, if you are naming your document Index, you will need to enter it in the field like this, index.html. Then navigate to where you want to save the document. Click the Save button to save it.
Opening a Document That You Have Saved
You can easily open a document that you have saved. To open a document, go to the top of your Dreamweaver window and click File > Open. Locate the document on your computer that you want to open. Click the document and click the Open button. You can also double click the document to open it.
If you are just opening your Dreamweaver program, you can do the following to open a document. The first column of the interface is the open section. If you don’t see the document that you want to open in the recent files, click the Open folder at the bottom of the column. Then you can locate the document and open it the same way you did above.
If you are new to Dreamweaver, the above steps are very important to know. You will need to know how to create, save, and open HTML documents when using Dreamweaver.
This post is part of the series: Dreamweaver Tutorials
This collection of articles is aimed at providing education about the software program Dreamweaver.
- Beginner’s Guide to Creating and Saving an HTML Document in Dreamweaver
- Dreamweaver Tutorial: Tips for Link Management
- Creating a New CSS Text Style in Dreamweaver
- Creating a Jump Menu in Dreamweaver
- Create a Photo Album for Your Website in Dreamweaver
- Dreamweaver Tutorial: Mapping and Linking Images
- Use CSS Styles to Create Solid Color Rollover Buttons in Dreamweaver
- Incorporating Flash Buttons Into Your Dreamweaver Designs
- Creating a Rollover Button in Dreamweaver Without Using CSS
- Dreamweaver Tutorial: Creating and Inserting Flash Text into Your Document
- Dreamweaver Tutorial: Inserting and Editing a Horizontal Line
- How to Modify Your Page Properties in Dreamweaver
- Adding Guestbook to Your Site Using Dreamweaver
- Applying Pop Up Messages to Links In Dreamweaver
- A Guide to Understanding the Properties Panel in Dreamweaver
- Create a Tab Menu in Dreamweaver
- Creating a List Menu in Dreamweaver
- How to Create HTML Email with Dreamweaver


