
These aren’t very big and it just takes a minute, so don’t forget to put in your memory!
Dual Channel
We could use one large memory module (often called sticks) with all of the memory we need. It is, however, in most configurations, advantageous to run two smaller memory sticks in dual channel mode (e.g.: two 1G modules instead of one 2G stick). The concept is to balance the bandwidth (amount of data) coming from and going to the memory and CPU. The performance increase is largely tied to the chipset you are using. For more on chipsets, checkout other articles in this this series. Right now we are going to explain how to install memory in dual channel configuration.
To do this, you should place two identical sticks in two slots on the motherboard. Ideally, these memory modules are manufactured, tested, packaged and sold as pairs for the purpose. You can make a pair from sticks bought individually; but make sure they have the same size, speed, and latencies. Exactly which slots to use depends on your motherboard.
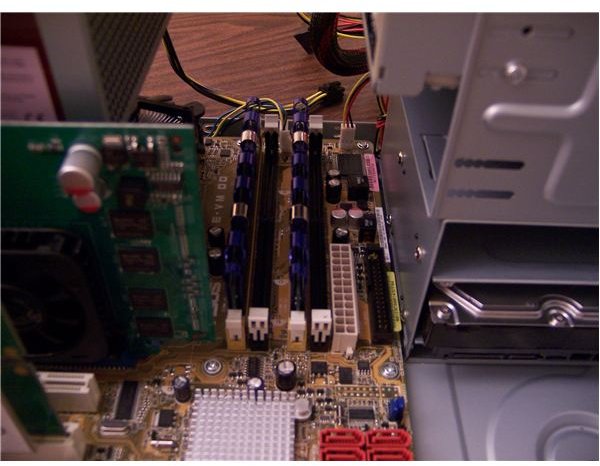
Our ASUS P5E-VM DO has a fairly common set up. We need to have a stick in slot A1 or A2, and the other stick should go in the equivalent B slot. Choose the pair you prefer based on which are easiest to get at. The picture shows, with yellow rectangles, which slots will be used.
Note that cutting-edge DDR3 memory, with the appropriate motherboard, can be set to run in triple channel mode.
Cheap or Top-of-the-Line, the Installation Goes As Follows
Your new computer will likely use DDR2 memory. DDR3 is still pretty expensive for what it offers performance-increase-wise, and just plain DDR is an older standard - pretty long in the tooth.
DDR2 Memory installs only one way. Memory sticks have a notch along the bottom which is not centered. Make sure you aren’t trying to put the memory in facing the wrong way.
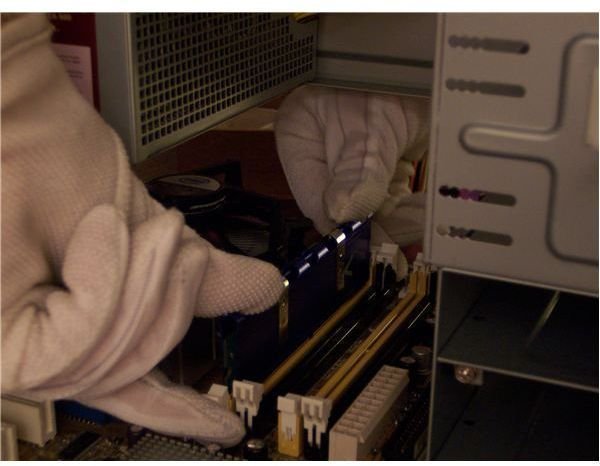
Installation is a two step procedure: push the plastic tabs at both ends of the slot outwards; then push in the memory stick, straight downwards, until the tabs snap closed into the little divots at both ends of the stick. That can require quite a bit of force, so I like to apply a bit of inward pressure on the tabs while I push downward, as shown in the picture at left. Note that I am wearing special gloves to help protect the components from static electricity. Most of the force should be downwards however; otherwise the tabs will close before the memory is seated correctly. Repeat this process for each stick, in our case, twice, as shown in the picture below.
Good News
People following the articles in order are in pretty good shape. You have your mobo, CPU, PSU, and memory in. All you need to do now is install your cards and drives, then wire everything together. We get cracking on the optical drive in the next article.
This post is part of the series: Building a PC
We show you how to build PC, step by step, with pictures.
- Building a PC: Open Your Case and Get to Work!
- Building a PC: Time to Install the Motherboard
- Building a PC: Installing a Core 2 CPU
- Building a PC: How to Install a Power Supply Unit
- Building a PC: Installing Memory
- Building a PC: Installing an Optical Device
- Building a PC: Installing a Hard Drive
- Building a PC: Installing Graphics and Other Expansion Cards
- Building a PC: Installing Fans
- Building a PC: Power Connections for the Motherboard and Fans
- Building a PC: Connecting the Hard Disk and Burner
- Building a PC: Connecting the Case’s Switches and Audio
- Building a PC: Connecting the Case’s Front Panel Ports – USB, Firewire, and eSATA
- Building a PC: Closing the Case
- Building a PC: Connecting Peripherals


