Dreamweaver Properties Panel Guide
Locating Your Properties Panel in Dreamweaver
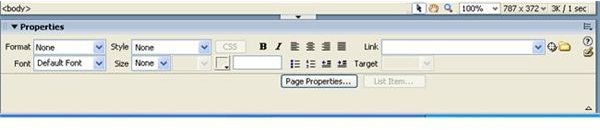
The Properties Panel in Dreamweaver is located at the bottom of your window. In the panel you can do different things like change your text, create links, and apply CSS Styles. If you are just getting started with Dreamweaver, this guide will help familiarize you with the properties panel. You will need to know how to use the properties panel in order to create websites. We will take a look at each section in the properties panel of Dreamweaver.
Text Section of the Properties Panel
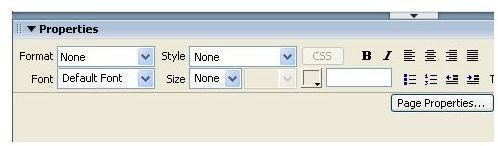
There are two sections to the properties panel. You have the Text Section and then you have the Link Section. We will go over the text section first. The image to your left shows the text section.
Format – The format box allows you to quickly change titles, headers, and more. Type some text on your document. Highlight the text and drop the format box down and select a format. See how the text changed.
Font – This is the box that you drop down to select the font style that you want to apply to the text. If you do not see the font style that you want to use. Click the Edit Font List link in the bottom of the drop down box. When the box opens, click the font that you want to add in the Available Fonts window. Then click the arrow pointing to the left. That will add the font. Click OK to close the box.
Style – If you have created a CSS Style to use on text or links, you can highlight the text and drop the style box down. In the style box you will see the CSS Style that you created. Clicking the name of the style will apply the style to the text.
Size – This is the size of your text. Highlight the text, drop the box down, and select the size of your choice.
Color Box – You can click the color box and select the color that you want to use or you can enter the hex code for the color in the field beside the color box. Either way you want to do it is fine.
Bold and Italic Icons – You will see the B icon and the I icon. This is how you change the text to bold and italic. Highlight the text and click one of the icons to apply it.
Alignment Icons – The alignment icons allow you to align the text to the left, right, center, or justify it. You can highlight the text and then click the icon of your choice.
List Icons – You can create a bullet list or a number list using these icons. Type a list, highlight the list and click one of the icons.
Link Section of the Properties Panel
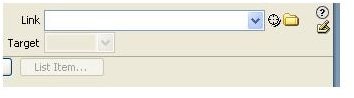
Now we will take a look at the link section of the properties panel.
Link – This is the field where you enter your link. If you are linking to inside the site, you can click the folder at the end of the field. When the box opens, you will need to locate the page that you want to link too. Click the page and click the OK button.
Target – Target allows you to select how your link will open. You can choose for it to open in a new window or in the same window. Drop the box down and make your selection.
That’s the properties panel explained. In the properties panel, you can quickly change your text, links, and create links.
Image Credits
All screenshots were taken by the author and are for educational purposes only.
This post is part of the series: Dreamweaver Tutorials
This collection of articles is aimed at providing education about the software program Dreamweaver.
- Beginner’s Guide to Creating and Saving an HTML Document in Dreamweaver
- Dreamweaver Tutorial: Tips for Link Management
- Creating a New CSS Text Style in Dreamweaver
- Creating a Jump Menu in Dreamweaver
- Create a Photo Album for Your Website in Dreamweaver
- Dreamweaver Tutorial: Mapping and Linking Images
- Use CSS Styles to Create Solid Color Rollover Buttons in Dreamweaver
- Incorporating Flash Buttons Into Your Dreamweaver Designs
- Creating a Rollover Button in Dreamweaver Without Using CSS
- Dreamweaver Tutorial: Creating and Inserting Flash Text into Your Document
- Dreamweaver Tutorial: Inserting and Editing a Horizontal Line
- How to Modify Your Page Properties in Dreamweaver
- Adding Guestbook to Your Site Using Dreamweaver
- Applying Pop Up Messages to Links In Dreamweaver
- A Guide to Understanding the Properties Panel in Dreamweaver
- Create a Tab Menu in Dreamweaver
- Creating a List Menu in Dreamweaver
- How to Create HTML Email with Dreamweaver