This article describes the various options and tools available in the Print and Web Modules of Adobe Lightroom. It describes the process of printing photos for offline use and publishing photos online.
The Print Module
The Print Module within Adobe Lightroom is used to print photos. The tools available within the print module are explained below
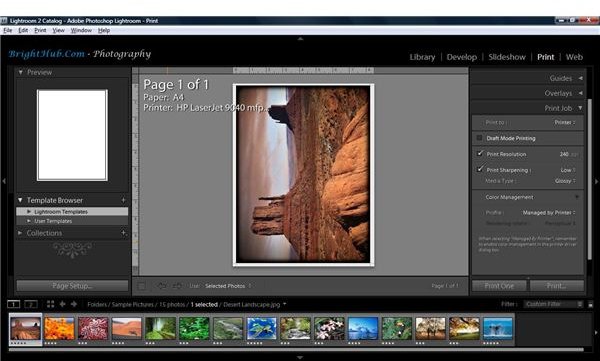
The Left Panel of the Print Module has the following sections
Preview - This shows a preview of the selected layout options as it can be seen from the below screenshot
Template Browser - This displays a list of Lightroom and user-defined templates of various page-types/layouts for printing
Collections - Collections are similar to “Photo Albums ” and normally, collections are used to organize photos .
The Right Panel of the Print Module has the following sections
Layout Engine - This has two options, namely “Contact Sheet/Grid” (used to print 1 copy of the photo) and “Picture Package” (used to print multiple copies of the photo)
Image Settings - This section has “Zoom to Fit” and “Rotate to Fill” options and the ability to add a stroke (border) to the photo.
Layout - This section is used to adjust page margins (top, bottom, left and right), the page grid in terms of rows and columns and the cell size (height and width)
Guides - This section is used to show or hide guides such as rulers, margins etc.
Overlays - The overlays section can be used to add an identity plate overlay, page options such as page numbers etc. and photo information.
Print Job - This section is used to select printing options such as which printer, print resolution (in DPI) , color management profile etc.
The Web Module
The Print Module within Adobe Lightroom is used to print photos. The tools available within the print module are explained below.
The Left Panel of the Web Module has the following sections
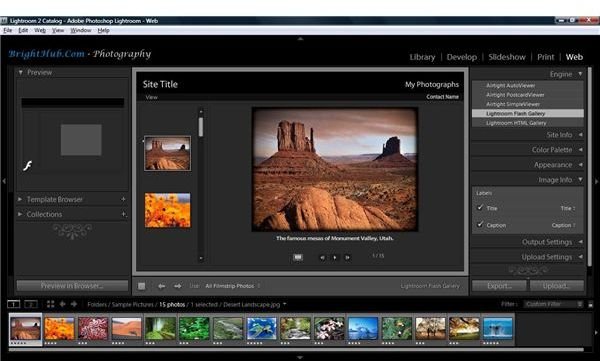
Preview - This shows a preview of the selected layout options similar to the Print Module
Template Browser - Lightroom and user-defined templates similar to the Print Module
Collections - Collections can be used to organize / classify photos as explained above
The Right Panel of the Web Module has the following sections
Engine - Select from 5 options available, which includes Web Photo galleries such as a Lightroom Flash gallery and a Lightroom HTML gallery
Site Info - This section can be used to add information about the site such as Site Title, Collection Title & Description, Contact Information, Link etc.
Color Palette - This is used to select the colours of text, cells, gridlines, numbers, rollovers etc.
Appearance - This section can be used to modify the appearance by adding drop shadows , section borders, nature of the grid, cell numbers etc.
Image Info - This is used to add image information such as a title and a caption
Output Settings - This is used to determine the quality of the output files for the web and additionally copyright information can be added to the photos
Upload Settings - This can be used to add the images to a web-host by uploading using FTP
The photo gallery can also be exported as a web page when required.
Summary
The 5 modules within Adobe Lightroom represent the ideal photographic workflow for any photo. Most photographers use Adobe Lightroom and follow such a workflow in order to effectively perform all the tasks from organizing images to post-processing, printing and publishing on the web.
Reading this article series, playing around with the existing options, and obtaining a good understanding of Lightroom will add to one’s repertoire of skills and will improve and enhance one’s photography.
This post is part of the series: Beginner’s Guide to Adobe Lightroom
This article series is a beginner’s guide to Adobe Lightroom and the various modules within Adobe Lightroom. It discusses the Lightroom interface, the five modules and the various tools available within Adobe Lightroom and is a must-read for all photographers interested in using Adobe Lightroom


