This concise but thorough beginner photography guide will provide the fledgling photographer with a firm grasp on some of the fundamentals without delving deeply into all the technical nuances that they will have plenty of time to learn later. And never forget that it’s supposed to be fun too.
Your Gateway to Photography Knowledge
Looking for a beginner photography guide that fills your head with just enough information about the fundamentals without inundating you with too many technical details? You don’t want to get too bogged down in the beginning; otherwise you’ll be less amped up about this alluring and cerebral hobby that gets you to see the world in a different way. By the same token, you might want more information about a particular subject. Since there’s a bevy of terms, acronyms, and abbreviations you’ll come across, refer to this glossary of common photography abbreviations and acronyms any time you need to. We’ve arranged this helpful guide to give you a brief overview of the basics while giving you the opportunity to click on other more detailed articles about that subject written by our experts and enthusiasts. Then, from those articles, you have access to many more pieces relating to that subject; so you’re in effect unpeeling the onion of photography knowledge to get to the core. Your first directive would be to snap away, take as many pictures as you can with as many different settings, trying to keep track of which settings you used. That way you can start learning what works best in taking the kind of pictures you desire, such as capturing photographs of winter landscapes , for example. Whatever you’re shooting, don’t underestimate the wonders of dumb luck.
How a Camera Works
Let’s start at the beginning by explaining how a camera works. Before the digital breakthrough, three essential elements in a camera - optical, chemical, and mechanical - operated in conjunction to produce the image developed on film. The lens, film, and the physical components represent those elements respectively. When just the right amount of light is allowed into the camera through the lens, it forms an image and creates a chemical reaction on the film which gives you you’re picture. The lens is responsible for focusing the image in that it organizes the light and delivers it to the film.
With great strides made in technology, the digital age has made photography much easier. You want to miss the way Larry Lynch explains in great detail about how a digital camera works . You can see the result of your picture-taking almost immediately on your camera or computer. Gone are the days when you have to send away film for development. If you’re in the market for a new camera, we’ve got so many great reviews for the best and most popular makes and models that you’re bound to find the one you’re interested in using our search feature.
But while we’re still on the subject of particular cameras, in the beginning it’s not so important that you have the most expensive feature-laden camera because the photographer takes the picture, and developing that “eye” for taking pictures is a key to learning. Any camera is really just the tool to get that done. By the same token, today’s point and shoot cameras take a lot of guess work out because in “Auto” mode, many camera setting options are taken care for you before you click away. This means the beginner photograph has less to worry about while taking pictures and can learn more technical aspects about their camera later. Because even the point and shoot offerings have a good amount of settings beyond “Auto” that require a bit of study. It’s also a standard evolution in photography (when it becomes a passion) to move on from the point and shoot camera and buy one of the best digital single lens reflex cameras available when you’re ready for the plunge.
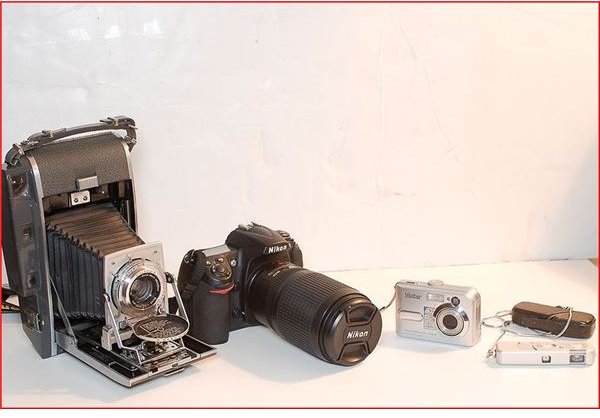
Image courtesy of https://commons.wikimedia.org/wiki/File:Cameras.jpg
Photographic Composition
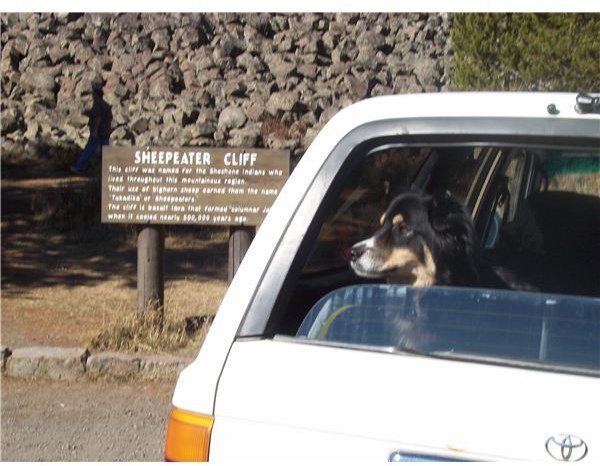
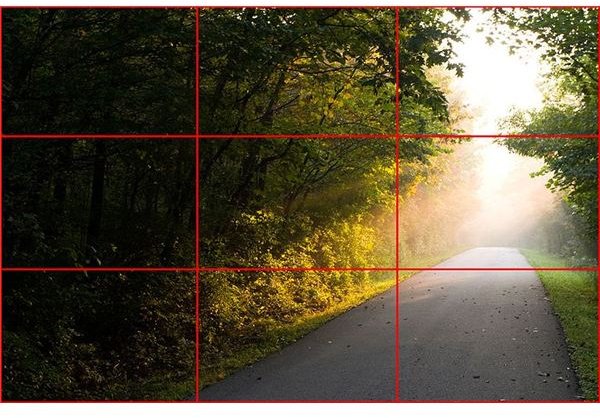
Composition relates to the arrangement and framing of your image and the background to convey a message or feeling. In some ways, it’s like how a writer decides what to put in and what to leave out of a story. The many choices and philosophies regarding this important are laid out succinctly in Framing your Subject –Composition Techniques . One of the big guidelines is referred to as the Rule of Thirds which means you look at the image you want to capture into nine equal segments. You then want to place what you deem as the important elements in your picture along these lines or where they intersect. For instance, my dedicated sheep dog was not happy with the potential catastrophe this cliff might present to her charges. Consider placing your subject off center if it makes for an important picture. Sometimes too much space will make for an emptiness that isn’t desirable, so it largely depends upon whether you find that creating space as a composition technique is appealing and befitting to your chosen subject matter.
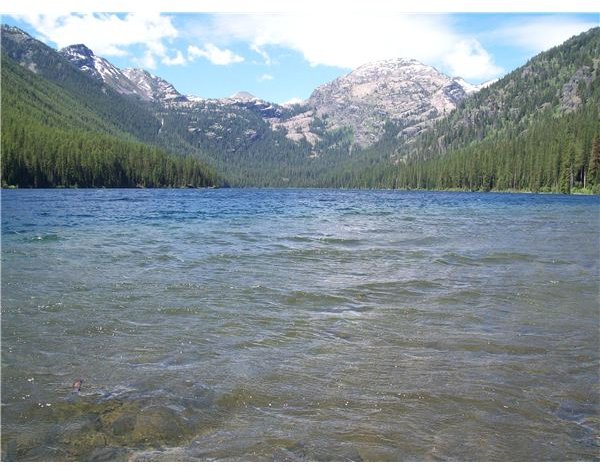
Symmetry of the subject matter or eye-catching patterns can make for an intriguing photo. In vast landscapes you’ll want to create depth by having objects in the foreground, middle ground, and deep in the distance. For tiny subjects, different viewpoints can be played with. The human eye is naturally drawn to lines. There’s a whole world full of lines out there and fortunately, in photography, you can capture and cross them anyway you please. Whether it’s horizontal, vertical, diagonal, or S curves, you should understand the tips and tricks for working with them laid out in Making Use of Lines . Framing your photos by taking them through an architectural feature like an arch or the gap in tree branches (any of the countless things you can make a frame with) makes for a very interesting picture.
First Image courtesy of https://commons.wikimedia.org/wiki/File:Rule_of_thirds_photo.jpg
Second image courtesy of the author
Exposure
By immersing yourself in all the conditions, colors, lighting and the other factors that go into determining understanding all the elements of exposure , you will be on your way to producing images that grasp the full attention of your audience. This knowledge is needed when you take the “Auto” training wheels off and go about the business of manually setting the exposure . For a basic understanding, you’ll have to know what shutter speed, f-stop, and ISO settings (all are in glossary link above and looking them up will help you learn them as all of our 4th grade teachers explained) mean in relation to your photography endeavors. These three essential elements, when they work in conjunction and in harmony, create a photo that is properly exposed photo.
You didn’t listen to your teacher back then either; alright then, we’ll demystify f-stop and aperture photography techniques by explaining that f-stop is the ratio of the focal length to the aperture. The distance between you’re cameras sensor to the element in your lens that focuses is the focal length. Aperture is defined as the size of the opening in the lens when you take a picture. If the hole is set to be larger before taking pictures, than more light is let in when you activate your shutter release. If you set it to be a smaller hole, less light gets in. F-stop is a measure of that aperture and usually moving from one f-stop to the next either doubles or halves the amount of opening in your lens and hence; the amount of light let in.
Since digital photography is somewhat of a world unto its own, there’s understandably a lot of specialized knowledge to soak up in that particular picture-taking arena. Since we’ve already got an excellent resource for that, I’ll refer you to the top tips for digital photography beginners to set you on your way.
Subject Matter & Types of Photography – Distant Galaxies Are Today’s Limit
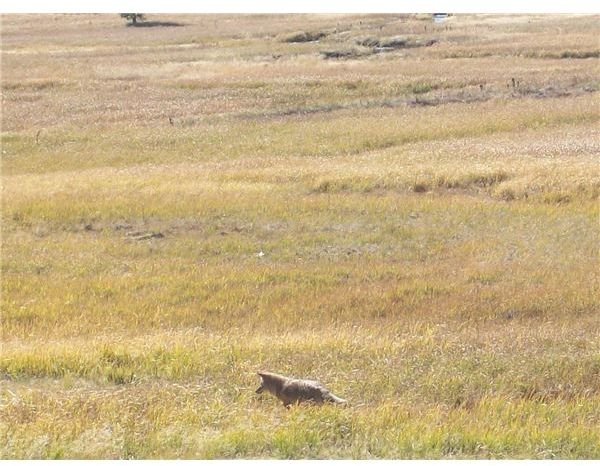
Finally, a good beginner photography guide should include the vast array of types of photography you can specialize in. There are so many choices depending upon your tastes and preferences as to what to take pictures of, a whole world full actually. In the beginning you might have an idea of what you want to take pictures of. Usually that corresponds to your passions whether it’s nature or people. For the former we’re talking about pastoral settings and landscape photography . Many photographers were originally hikers, bird-watchers, and generally the biggest fans of the outdoors. At some point, some folks realize that capturing those stunning and vibrant scenes on film is naturally the next step in their evolution. Part and parcel with that is wildlife photography. You’ll need some powerful zoom lenses if you want to take pictures of animals in the wild. You’ll need to be out there at dawn and dusk when critters are most active playing out their roles as predators and prey. You’ll need to be patient; they’re on their schedule, not yours. Finally, you’ll need to be as steady as can be to capture wildlife with your camera . If you don’t have a tripod (recommended), steady yourself against a tree, the car or any stationary object. If you’re a wildlife photographer, then you’re not afraid to get a little dirty so lay down on the ground to steady yourself in the prone position, just like those animals do. To make a human tripod while standing, bring your elbows and wrists together really tightly against your chest in order to keep shaking to a minimum (lay off the booze).
Many fledgling photographers are interested in making people the subject matter of their hobby. Portrait photography is immensely popular and we have articles featuring many of the most famous artists in that category. Reading the biography of the portrait master Yousef Karsh will enlighten you as to the manner in which he captured the last centuries most renowned public figures (his Winston Churchill portrait revealed the feisty bulldog within the prime minister, for example) with almost reverent solemnity due to his signature lighting techniques. By the way, this hobby can morph into a career as passion and interest develop and the person is willing to take the plunge. We have articles on how to make it a business too. There’s never a shortage of people wanting their pictures taken professionally, whether it’s a family, class photos, or the fun-loving wedding photographer.
If you’re interested in any of the following types of photography, aerial, architectural, beach, black and white, fashion, infrared, night, real estate, sports, travel, or winter, we’ve got great information and tutorial that you can access just by typing those keywords into our search function. This wraps up this beginner photography guide designed to give you access to all you need to know when get to that beautifully framed bridge to more picture-taking knowledge that you’ll see after developing your photographer’s eye . I know we covered a lot fast so I’ll leave you with one of the most important rules regarding photography lest you feel inundated with technical jargon. And that is, there are no rules; it’s an art form, so you’re free to blaze your own trail.
Image courtesy of the author


