This tutorial will teach you how to use Sansa Clip and Clip+ devices with the iTunes file structure, so you can transfer playlists and songs originally designed for iTunes to the Clip as well.
Sansa Clip and iTunes
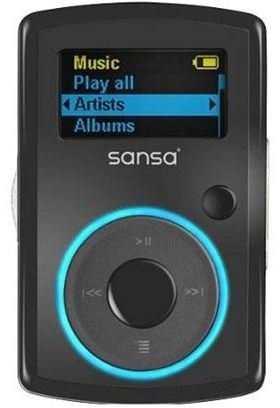
The SanDisk Sansa Clip and Clip+ range of MP3 players allow you to carry music with you on the go, and allow music to be organized by playlist, artist or album. If the music on your computer is organized into iPod playlists, though, you may have noticed that the Clip won’t synchronize with Apple’s iTunes software. This is because iTunes is built to function with iPod devices: because the makers of the software also make the iPod, they have a vested interest in encouraging you to use their player as well. However a freely-available application for iTunes allows you to connect Sansa Clip and Clip+ to the iTunes file list, letting you send iTunes playlists originally intended for an iPod to the Clip with ease. Adding iPod playlist to Sansa Clip and Clip+ MP3 players is possible.
Installing and Using the Software
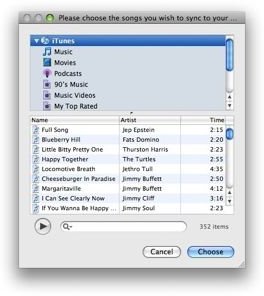
To install the Sansa Clip software for iTunes , go to the download page on Apple’s site. Click “Download” to download the plugin. When it’s finished downloading, close iTunes. Double-click the downloaded file and drag “Sync iTunes To Sansa Device” to your “Applications” folder. Re-open iTunes and double-click the “Sync iTunes To Sansa Device” item in your “Applications” folder. Connect your Sansa Clip or Clip+ to your computer via USB and highlight the playlist you wish to send to the player within the sync application. Click “Choose” to send the selected playlist(s) to your player. Don’t disconnect the iPod before the progress bar has disappeared, indicating that your playlist has finished transferring.
Transferring Playlists on PC
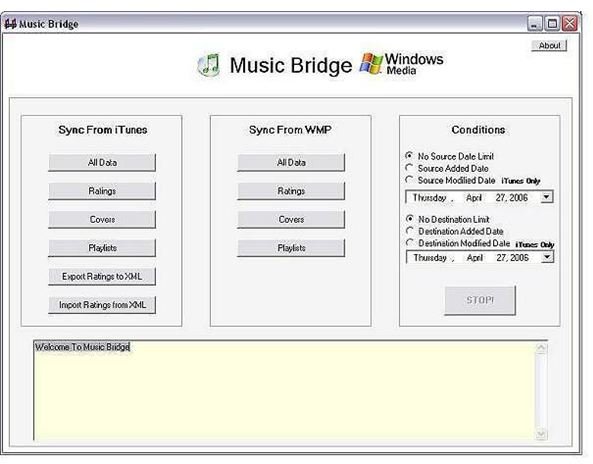
At time of writing, the Sansa software only works with the Mac version of iTunes. If you have a PC with your music organized in iTunes, adding iPod playlist to Sansa Clip or Sansa Clip+ is a little more complicated but can still be done. The easiest way is to use Windows Media Player , which is automatically available on all Windows PCs, and a free program called Music Bridge. To use these programs to send iTunes playlists to your Clip, start by downloading Music Bridge. Double-click the downloaded file to unzip, then open the downloaded file to get started. Click “Playlists” in the left-hand columns to send your iTunes playlists to Windows Media Player, then open Windows Media Player (if you’ve never used this program before, it’s found in the “Programs” section of your “Start” menu).
Connect your Clip to the USB port of your computer. It should show up automatically in Windows Media Player, making the “Sync” option available at the top of all playlist windows. In the left pane of Windows Media Player, click the playlist you want to send to the player. Click the “Sync” button at the top of the window to send the playlist to your Sansa Clip or Clip+. It’s a bit of a workaround, but your iTunes playlists will now be available on your Clip, with all songs available for individual listening or as part of the playlist.


