Here is a Final Cut Pro tutorial outlining how to add different glow effects to your video images.
Glow Bright
Video images rarely appear in a final film project as they did when they were first filmed. The reason for this is that a film project is not usually a matter of replicating the exact colors and images that it captured, but instead putting it into a different visual context to express ideas, story, or even certain facts. What this means is that during the post-production process there is usually some kind of alterations done to the images themselves, which can be as simple as color correction or as complicated as involved video effects. One video effect that you see quite often is the application of a little bit of glow in the image. This can be used to indicate an alternative moment in the story like the past or a dream, can add a certain visual flare to the images, or can express some type of energy that does not have a quantitative explanation. Here is an easy tutorial on how to apply a glow to images in Final Cut Pro .
The Glow Effect
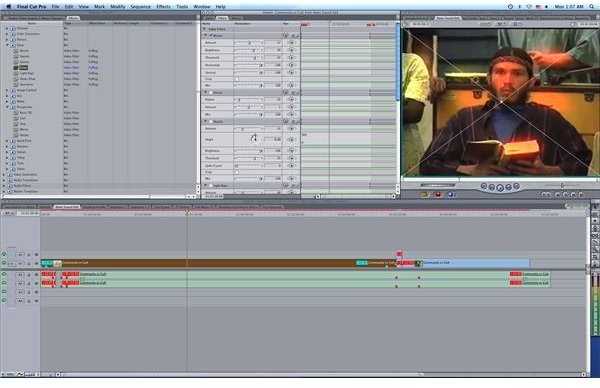
Start out by isolating a clip, or series of clips, in your Timeline. You should only apply visual effects to video as they are in the Timeline and not on the base clips. Go to the Browser and then the Effects tab. Go to the Video Filters folder and go down and select Glow. Here you are going to have a variety of different glow options, each
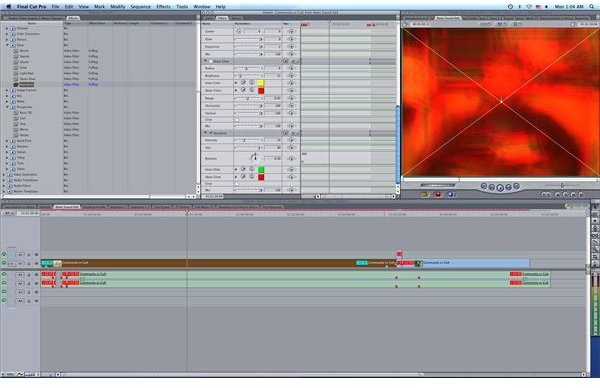
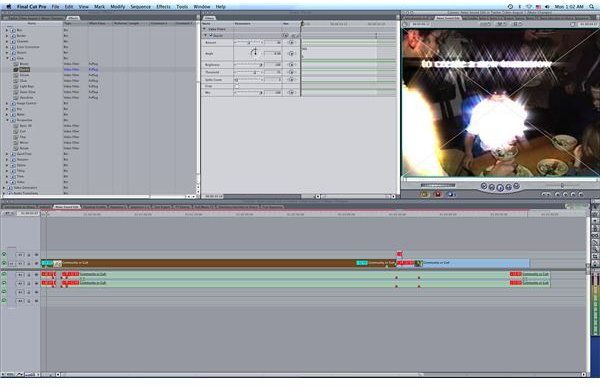
one reflecting a different type of glow that could be on the image. The standard Final Cut Pro glow effect is just called Glow, and will give an even glow over the image and will lower the overall detail in the image. Bloom is a more obvious glow effect, and as it comes out from the source objects both vertically and horizontally. Dazzle is a much more dramatic glow effect and you will see it almost have a sparkle or shine off of images. Light Rays is also a dramatic glow effect, and has the look of literal rays coming off of the image and distorting the surroundings. Outer Glow comes from the outside with specified colors you can alter, and Overdrive is probably the most distorting of all the Final Cut Pro glow effects as it actually shades over other colors and makes it look as though you were staring at the image through a number of colored video filters.
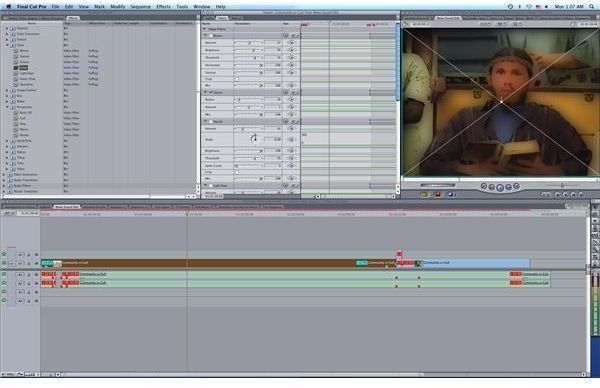
When you are applying Final Cut Pro glow effects, you are going to want to alter their intensity and specifics in the Effects tab in the Viewer, yet this is true of most of the Final Cut Pro video effects. If it is intended to be subtle you are going to want to stick with Final Cut Pro glow effects like Glow or Bloom, as Dazzle and Overdriv
e are going to dominate the image. You may want to even try applying several at once, lowering their intensity and playing with the mix until you find the exact image you are looking to use. This is kind of like mixing paints, but with non-linear video editing you have the ability to try video effects out as it is non-destructive digital video editing .
This post is part of the series: Final Cut Pro Video Effects
Here are articles dealing with Final Cut Pro and available video effects.


