
Learn how to feather in Photoshop by following these easy to follow illustrated instructions. Readers will find that the new skill of creating feathered edges in Photoshop will be one that is used repeatedly during the course of routine work.
Feathered Edges in Photoshop
By feathering edges, designers can make photos and other images fade into the background or other layers on a Photoshop
canvas. Other programs like Inkscape can be used to create feathered edges as well, so readers are cautioned not to limit themselves or their skill to just Photoshop.
To begin this Photoshop tutorial , users should have Photoshop installed on their computer. Those who do not have Photoshop installed can download an evaluation copy from Adobe.com.
Another thing readers should have before learning this new skill is an image to use as an example. This example uses an image of an Alpha Romeo automobile, but virtually any image will be good to use for this tutorial.
Image Credit: Wikimedia Commons/Magnus Manske
How to Feather in Photoshop
Open Adobe Photoshop and create a canvass. Users should go ahead and create a background layer into which the feathered edges of the image will fade.
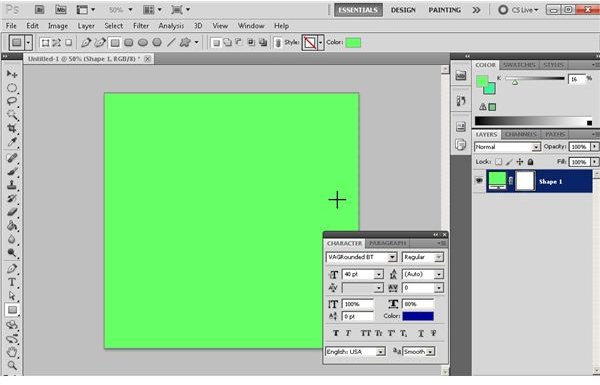
Now the user should create a new layer into which the image to be feathered will be inserted. Now would be a good time to touch up the image and the background in preparation for the final product.
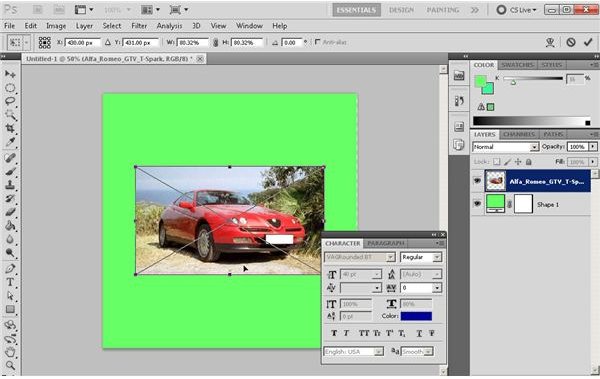
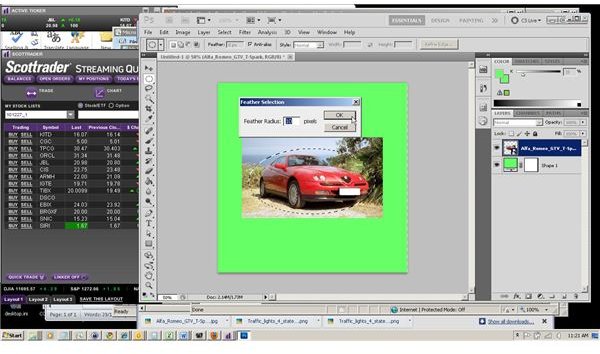
Next, the elliptical marquee or other selection tool should be used to select an area of the photo to define the area of the photo that will be feathered.

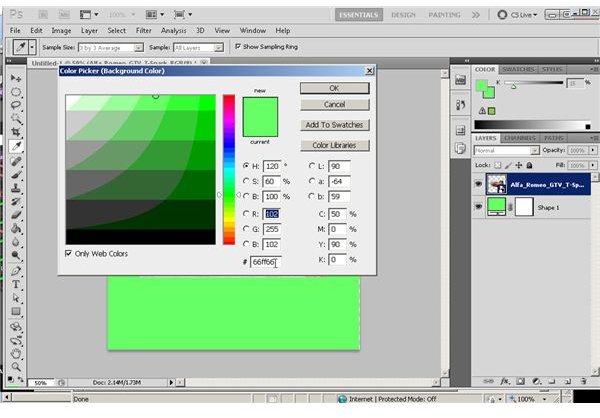
Now, the background color should be set. This probably works best as one that matches the background, but this may not be the case in every design.
The next step is to click “Select” and then “Modify” and then “Feather” from the main menu. The same result can be obtained by pressing
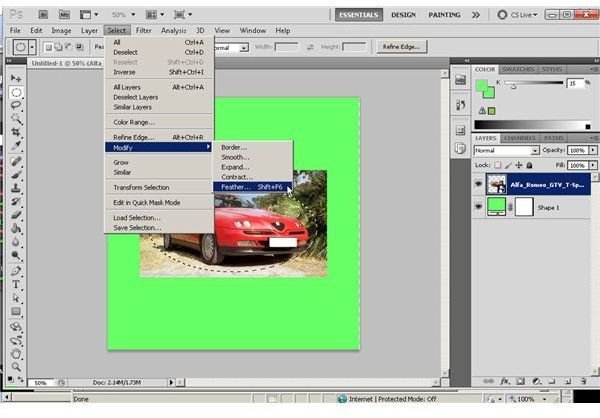
Now, the “Feather Radius” should be set. A value between 4 and 12 pixels should be used, depending on personal preference.
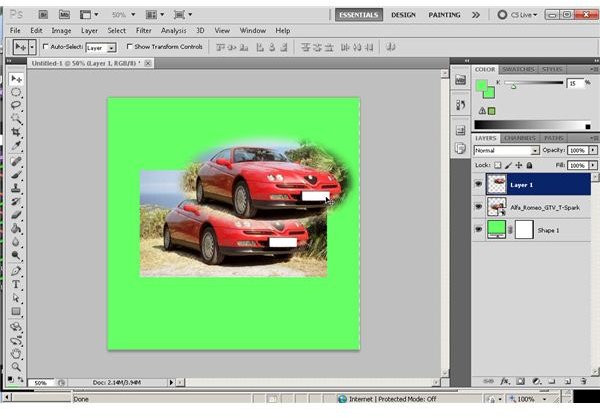
Now, click “Edit” and then “Copy” (or press “C” while holding down the
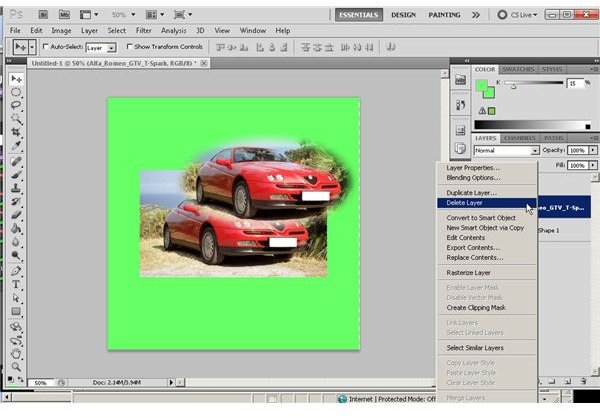
Now, users should remove the original image layer by right-clicking on the layer in the “Layers” palette and choosing “Delete.”
The feathered image can now be placed in its stead, or in another desirable location.
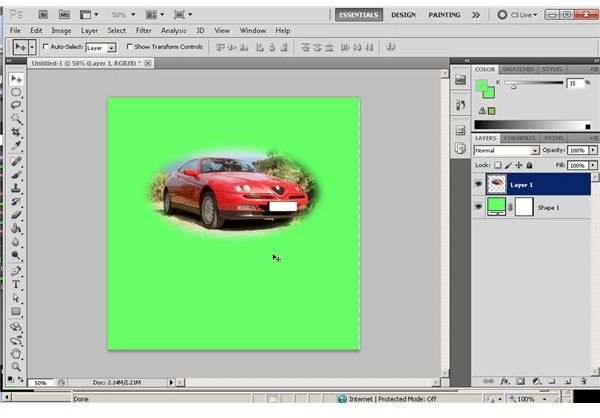
Adobe Photoshop users should not hesitate to use multiple feathered objects on the same canvass. Time spent experimenting with different ways to use this technique usually pay off in the form of more unique and creative products.
Conclusion
Readers who have just followed this Adobe Photoshop tutorial now know how to feather in Photoshop. They should look for new ways to incorporate this new skill in their daily work.
Image Credits: Screen shots taken by Bruce Tyson


