If you want to print photos onto canvas, there are a number of options available online. Picnik offers a simple, easy way to edit your photos and print them on canvas. Follow these simple steps to learn how to print photos on canvas with Picnik.
Step 1: Edit Your Photos to Create a Beautiful Canvas
If you haven’t created an account on Picnik, do that first. Picnik is free and all they require is a username, password and your email address. You may also want to consider upgrading to Picnik Premium to take advantage of even more photo editing features.
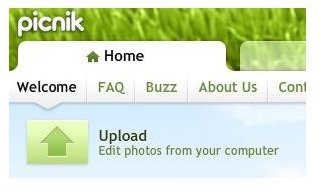
Before you go to the template to print photo onto canvas, edit your image in Picnik’s free editing program. First, upload your photo by selecting the option from the Home tab when you log in. The picture should upload within a few seconds, after which you’ll be taken to an editing page. At this page, you can crop the photo , sharpen it and remove red eye.
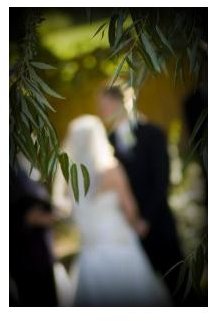
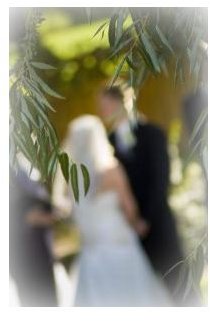
To do more with your photos, click on the Create tab and you’ll get another set of options. One great effect for canvas photos is the vignette feature. This puts a gentle dark border around the edge of your photo. The matte effect, which puts a lighter border around the photo, also looks great on canvas. Both effects can be seen below.
Step 2: Select to Canvas Creator
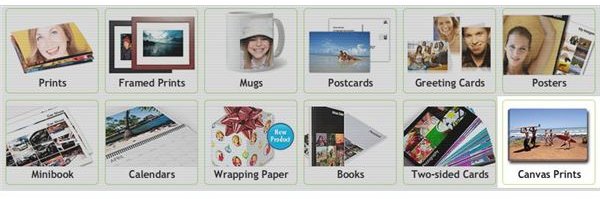
Once your photo is ready, go to the “Save and Share” tab to select the Canvas creator from a variety of available custom photo products. This will allow you to print photo onto canvas in a few easy steps. On the first page, you’ll see your recently edited photos appear at the top of the screen. Just drag and drop the photo you want into the box, and click the “Next” button to move onto the next page.
Step 3: Size and Display Options
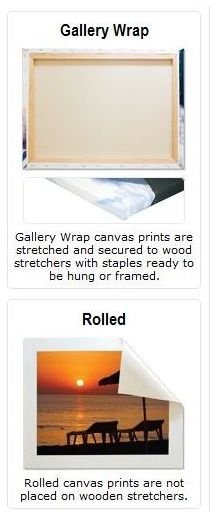
The next page prompts you to select a canvas size. Depending on the quality of your image, you may be able to select a canvas as large as 30x40 inches. You’ll also need to choose which display option you want. If you want the canvas to be stretched around and adhered to a wooden frame, choose the Gallery Wrap option. This is more costly, but it looks great when hanging on a wall in your home. For a more affordable option, you can choose to have your photo printed on canvas rolled for a much lower price.
Step 4: Order Your Canvas Print
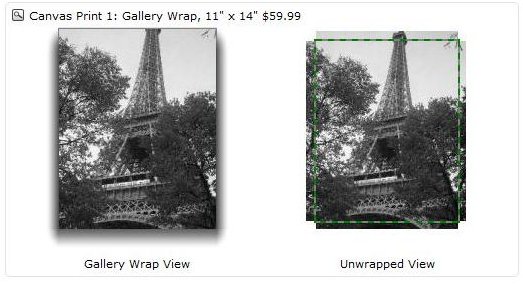
A preview of your image shows up before you confirm your order. This preview shows you what your image looks like when rolled or put on a canvas. For example, when you print photo onto canvas and you want it made with the gallery wrap option, the framers must make cuts to the canvas in order for it to fit the frame.
Click through to finalize your order. If you’ve never placed an order with QOOP, you’ll need to create an account.
Now that you have learned how to print photo on canvas with Picnik, you can do it for a variety of digital images. It makes a great gift for someone, especially when you already have the canvas stretched on a wooden frame ready to be hung up in their home.


