
Capturing texture in photographs is often overlooked, as it can prove to be a challenge if you don’t know what you’re doing. You don’t need expensive software to create textures in your photographs – your camera can do that for you! Read on to find out how…
Why Photograph Textures?
A dash of texture can add dimensions to any image. The human eye is trained to be attracted to textured objects, like a rough wall deflecting sunlight from an odd angle or sparkling grains of sand and ripples of water in the sea. There are several ways to create texture in photographs without help from photo editing software . Of course, editing software can help you apply texture to photos , but it’s much more fulfilling to accomplish this from the get-go. Once you learn to work around your camera settings and exploit its potential to the hilt, photographing texture will come as easy as a piece of cake.
The hallmark of a “good” photograph is a highlighted element – it may be the light, the subject, the composition or simply the texture of an object. Texture photography involves a sense of tactile stimulation rather than simply a visual one.
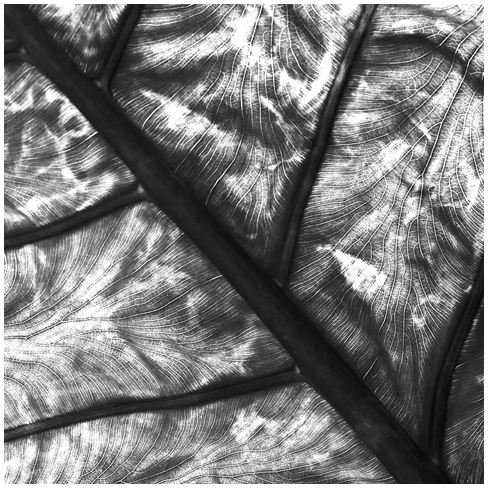
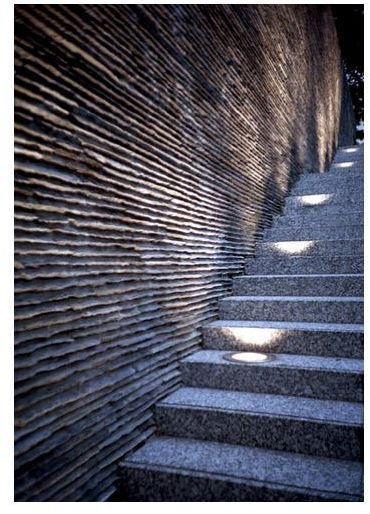
Examples of Good Texture Photography
Tips on How to Photograph Texture Successfully
Close in on the object: The aim here is to fill the frame with the subject so that minute details can be captured vividly without losing dimension. If possible, place your camera lens at a point where it almost touches the surface. Zooming in often compromises the sharpness and clarity – the two most important aspects in texture photography. A camera lens with a short minimum focusing distance will help you achieve the desired effect. With larger subjects however, you can shoot from a distance.
Camera settings: Pictures taken at a high ISO setting can have noise or grain in them. Noise and grain can interfere with the clarity and depth of a textured composition. Keep your ISO settings at a low level and increase your aperture size for the sharpest possible image. Use a tripod if lighting conditions ask for shutter speeds below 1/60th of a second. Alternatively, you could use artificial illumination.
Work the lights: Lights at different levels and oblique angles can enhance textures wonderfully. The lighting technique will depend upon the nature of the surface you wish to capture. Sharp and harsh illumination works well in most conditions.
Variety: If you don’t want to end up with too many pictures that look similar, experiment with vertical, horizontal and diagonal frames, try different angles and even different filters (if your camera is equipped with the provision). Black and white, sepia, cyan or reddish tints look interesting and may even bring out certain textures more clearly.
Lenses: Various lenses can be used to achieve special effects.
-
Star Effect lenses are used to create a sparkling effect with reflected light rays.
Advertisement -
Center Spot is used to keep the main subject in focus while everything around it is blurred.
-
Fog lenses create a foggy effect in the image area.
Advertisement -
Diffusers are great for portraits as they soften the margins and impart a “soft focus”.


