Need to make your digital photographs smaller so you can email them to friends or load them to a web site? The JPEG compression tool in Paint Shop Pro can help you achieve a substantial reduction in file size with a minimal loss of quality.
Pros and Cons of Compressing Photos
As the capabilities of digital cameras continue to increase, so does the quality of the photographs taken by them. The only real unfortunate side effect of this is that higher quality digital photos are much larger in file size. It’s not uncommon for a single digital photo to take up 20 MB or more of storage on your hard drive.
This large file size can prove to be quite a problem if you want to email a photograph or post one on the web. It’s not that email programs and web site directories can’t accommodate these large files. Rather, the problem resides in the length of time it takes to upload and download the photos over your internet connection.
To help combat this problem, there are many ways that you can compress a digital photograph to reduce its file size. However, most of these methods involve some type of loss of quality of the photograph, especially if you’re using JPEG compression – the standard type of compression used for digital photos.
If you’re looking for a lossless form of JPEG compression , you may want to check out a product like WinZip 12 . This is a great utility to use if you just want to free up some room on your hard drive. However, this form of compression usually only results in a 20-25% reduction in file size, which isn’t enough for most photos that you want to send through email or upload to the web.
Corel Paint Shop Pro Photo X2 offers a more traditional type of JPEG compression that greatly reduces the file size of a digital photograph. While there is some loss of quality when using this method, it can be optimized to the extent that is not even noticeable to the naked eye when applied to photos you want to use as web images or email to friends. In the next section, we’ll show how to compress a photo in this manner.
How to Compress a Photo
Step 1: Open the digital photograph that you want to compress in Paint Shop Pro.
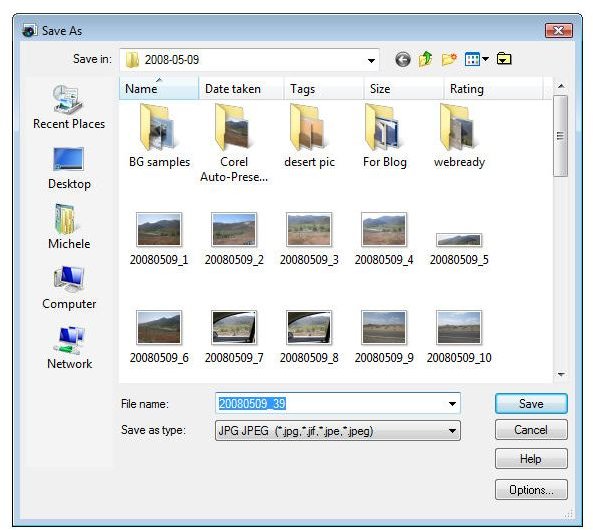
Step 2: From the File menu on Paint Shop Pro’s main toolbar, choose Save As. In the Save As window that appears on your screen, navigate to the folder where you want to save your compressed photograph. Select JPG JPEG from the Save as type drop down list. You can also specify a new name for the photo in the File name field if you like. (Click the image below for a larger view.)
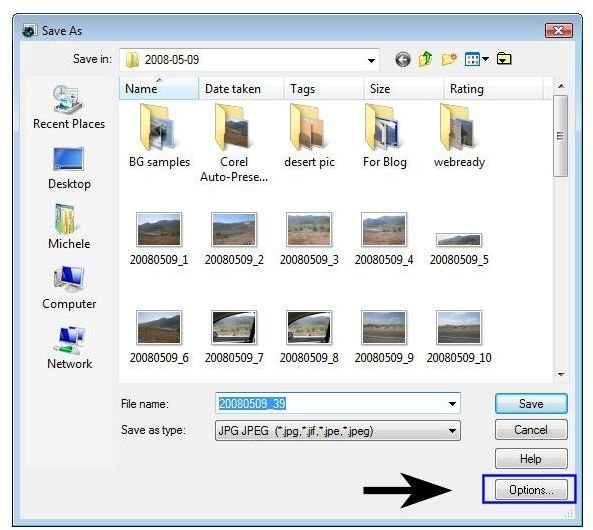
Step 3: Next, click the Options button.
Step 4: In the Save Options window, first choose which Compression Factor you would like to use. You can do this by sliding the bar in this area of the screen or by typing in the exact factor. Note here that higher values will result in smaller files sizes, but the quality of the compressed file will suffer. It’s standard to use a compression factor of 20. This figure will result in a very noticeable size reduction of the file while maintaining a fairly high level of quality.
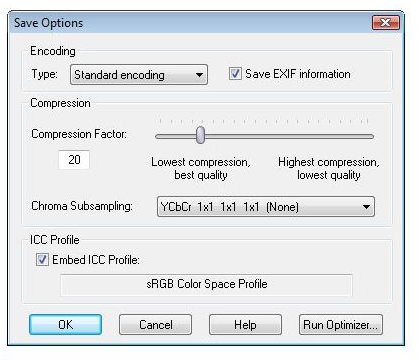
There are other options that you can modify in this window, but for now let’s keep the defaults for these categories. Click Run Optimizer to continue.
Step 5: Next, the JPEG Optimizer window will appear on your screen. There are a lot of options that you can modify in this window, but for the most part, we’re just going to accept Paint Shop Pro’s defaults. One thing that is helpful is that you can see a Before and After image of the photo in the Preview area. You can use this as a guide to make sure that your compression factor isn’t too high by judging the quality of the preview. If it is, you can still make adjustments in this window.
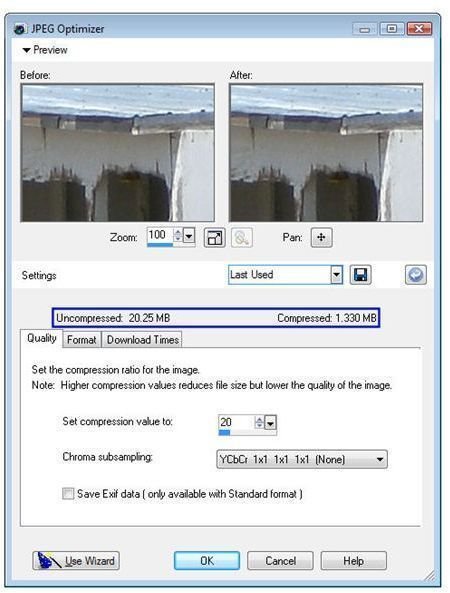
Another thing to note here are the file sizes given for both the Uncompressed and Compressed versions of the photograph. If you’re trying to get the photo to be under a certain size, you can use these numbers to help determine if you need to set the compression factor a little higher. As you can see in the screenshot above, using a compression factor of 20 doesn’t seem to change the visible quality of our photo much at all, yet it will shrink the file from over 20 MB to one just over 1 MB in size.
When you’ve finished here, click OK to continue. You’ll be returned to the Save As window where you’ll once again have a chance to enter a different name for the compressed version of the file. Click Save when finished, and you’ll be returned to the original photo in Paint Shop Pro.
Looking for more tips and tricks? Browse through the Digital Photography Channel’s collection of Paint Shop Pro tutorials , designed for users of all levels.
This post is part of the series: Beginner’s Guides for Corel Paint Shop Pro Photo X2
New to Paint Shop Pro and looking for some quick tips and tricks for getting started on your digital photo editing projects? In this set of guides, we’ll cover some of the basic tools available in Corel Paint Shop Pro Photo X2.


