Importing data from Excel to SQL Server is not difficult as you might think. If you have data in an Excel spreadsheet that you want to import into SQL Server, this article will walk you through all the steps required to perform this job, easily.
Importing Excel Spreadsheet into SQL Server
Want SQL read Excel data? No problem! Importing Excel spreadsheet data into your SQL Server database is not difficult. The Import and Export Wizard in SQL Server 2008 is a very quick and easy way of importing data from an Excel spreadsheet into SQL Server. The Import and Export Wizard was also available in SQL Sever 2000 and SQL Server 2003. If you use SQL Server 2008 and looking for instructions to convert an Excel spreadsheet to a SQL Server database, then read ahead…
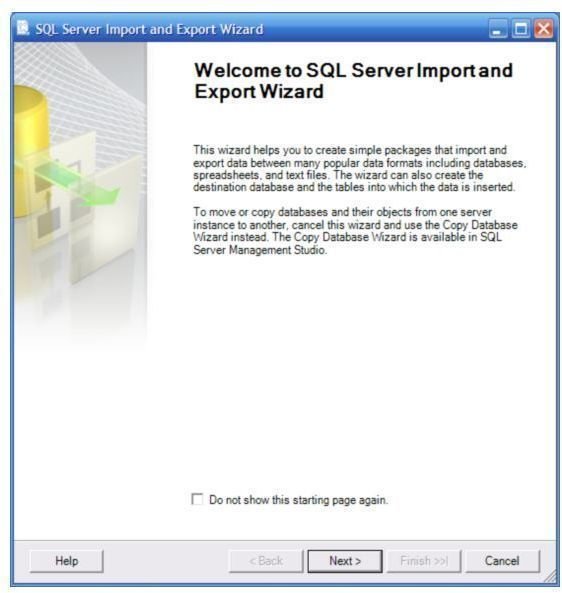
Step 1: Open Import & Export Wizard
The first step in the process of importing data from Excel into SQL Server is bringing up the SQL Server’s Import and Export wizard. Open up the wizard by going to Start -> All Programs -> Microsoft SQL Server 2008. Click on Import and Export Data, and this will bring up the Welcome Wizard, as shown at right. When the wizard opens, click Next to go to the next screen.
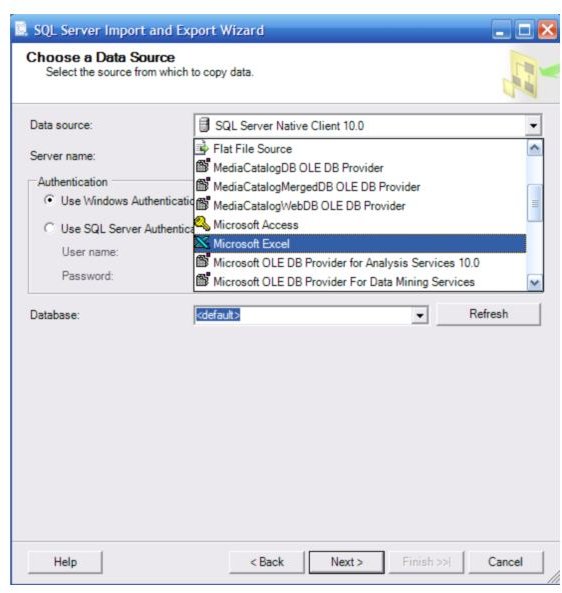
Step 2: Choose Source Data Type
In the Choose a Data Source page, click on the Data source drop-down menu, and choose Microsoft Excel.
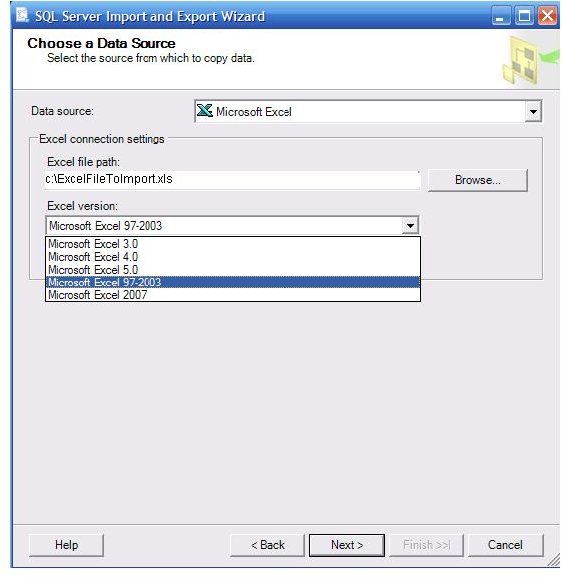
Step 3: Select Excel File
Click Next. In the next page, use the Browse button under Excel connection settings and select the Excel file which you want to import data from. Under Excel version, select the version of your Excel file.
Step 4: Choose Destination
Click Next, and in the next page, choose a destination where you want to import your data. The default destination is SQL Server Native Client 10.0. You may accept the default destination, and also the default authentication method.
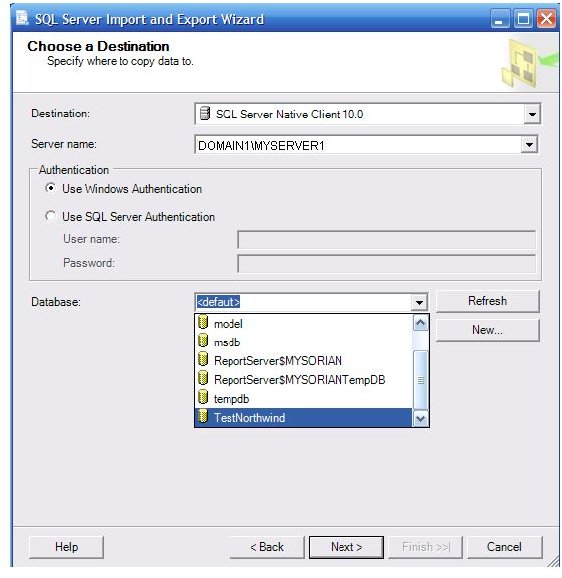
The database is displaying
Step 5: Select To Import All or Specific Data
Click Next. In the next page, select the Copy data from one or more tables or views option (if not already selected). If you want to transfer just the specific data from the Excel file, choose the other option - Write a query to specify the data to transfer, and write a SQL query to import only data that meets a specified condition.
Step 6: Select Source Excel Sheet
Click Next, and in the next page you will see that the sheets in the Excel file that have data are shown and already selected. Here you can select the Excel sheet that you want to import, and you can also modify the destination table
Step 7: Set Final Wizard Options
Click Next. In the next page, select the Run Immediately option, and click the Next button. The last Complete the Wizard page is displayed. The wizard shows information about the source and some other info. Verify that the information is correct. If not, use the Back button to move back to the previous pages, and correct the settings.
Finally, click the Finish button, and the wizard starts running, and you will see a progress window, displaying the status of the import process. When the operation completes, you will see a window telling you that the job has been successful.
If theirs is an error, there will be a hyperlink to the message in the Message column that you can click to read about the problem.
Conclusion
This article described how to copy data in Excel to SQL Server 2008. The Import and Export wizard of SQL Server 2008 is a very useful tool. Besides Excel, you can use it to import data from various other files too.
Now that you have the instructions to convert Excel data to SQL Server, you can bring data from all your Excel files to a SQL Server database in minutes.
Hope you found this article useful; you may also be interested in learning:


