Importing tables of data to a new FileMakerPro 10 database is a straightforward and intuitive process. However, it does require some advance planning both at the data export and import phases. Read this article before you attempt to import a table of data into a new FileMaker database.
Migrating to FileMaker Pro 10 from MS Access via Excel
FileMaker Pro 10 (hereinafter referred to as FileMaker) is a dual-platform database that can be used by both PC and Mac users. Like Microsoft Access 2007, FileMaker has an intuitive and not terribly complicated method for importing large amounts of data from a variety of sources. You could, for example, import a text file that is separated by commas or tabs; a Microsoft Excel spreadsheet, or even a “.dbf” file from another database base. The main challenge is matching up the imported fields with the empty FileMaker database.
This article will demonstrate how to import a large MS Excel spreadsheet table into a new FileMaker database. Our spreadsheet table will be exported from a Microsoft Access 2007 database, saved as a new MS Excel file and then imported to the new FileMaker database.
Follow these steps to import data into FileMaker:
Preliminary Steps - Do these first!
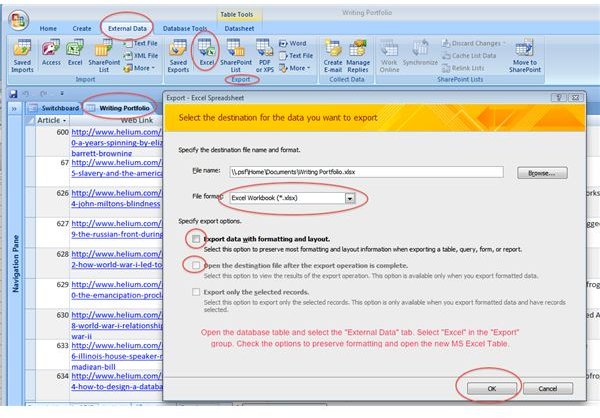
♦ Export data from MS Access 2007 to an MS Excel spreadsheet table:
♦ Design FileMaker Database Fields into a “Ready-to-Receive” Table
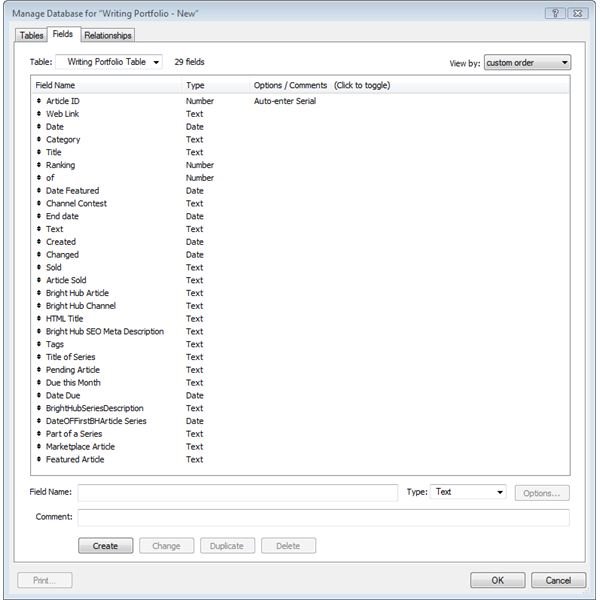
◊ You cannot simply dump a spreadsheet table into FileMaker. Before you can import the spreadsheet into FileMaker, you must have a blank FileMaker table with designed fields ready and waiting. For ease in importing, it is advisable to give the fields in the new FileMaker database the same names and types (text, numerical, date, etc.) as the column headings in the MS Excel spreadsheet you are importing.
◊ Also, before importing the spreadsheet, make sure you have no duplicate column headings in the Excel spreadsheet. (Column headings of the spread sheet become field names in FileMaker. Field names in FileMaker cannot be duplicates.)
See the Bright Hub article “FileMaker: Designing Fields and Data Tables ” for more information.
Importing Steps
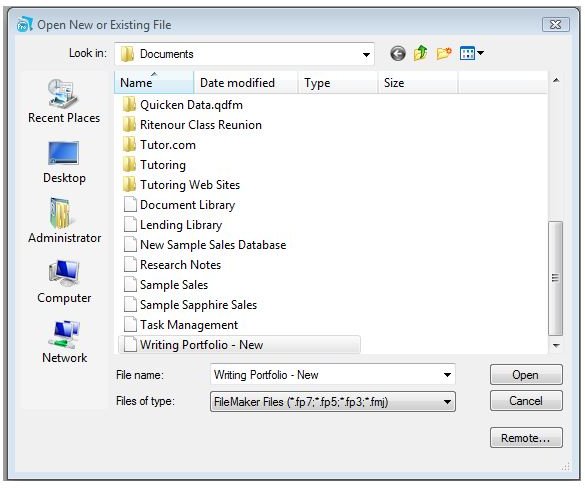
♦ Make sure the FileMaker database is open and the table fields are designed.
♦ Select File/Import Records/File…, and open the spreadsheet file to be imported.
◊ The FileMaker Import Field Mapping Dialog Box will open.
♦ If your spreadsheet columns and FileMaker fields match up, you’re just about finished. If they do not, try selecting any misaligned “Target Fields” (on the right column) and match them up with your “Source Fields.”
♦ Once you are satisfied that your fields are matched up, select the import button on the bottom right of the dialog box. The screenshot below shows a completed “Import Field Mapping” dialog box with it’s matching FileMaker fields.
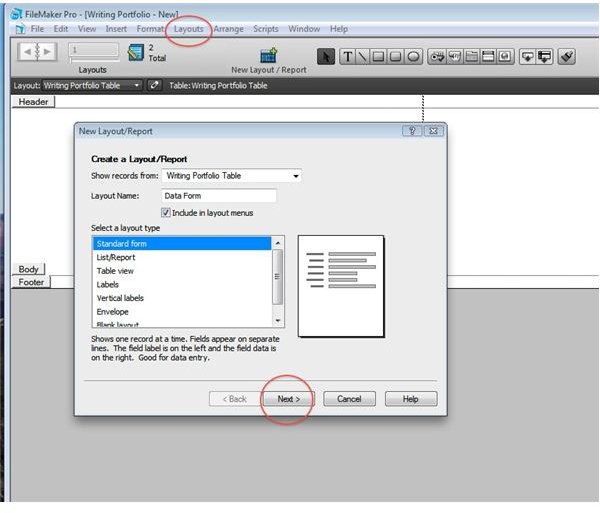
◊ When the new table is filled with the important data, you can proceed to designing the layouts you need to display your data.
Importing Steps for FileMaker

This post is part of the series: Using FileMaker Pro 10 for Windows
FileMaker Pro 10 for Windows is a database design application that works on the Windows and Mac computers. Microsoft Access users will have no difficulty learning FileMaker and will quickly learn to create robust database applications. This series presents FileMaker basics, from fields to layouts.


