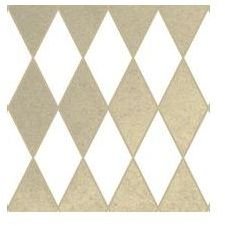
If you’re a fan of those striking diamond patterns that you may have seen (also known as the harlequin design), you may be pleased to learn how to create this fun and simple design. It’s great for everything from scrapbooking to web design in Photoshop, with very little effort!
Harlequin is a design that originated from the concept of characters in French and Italian plays. These characters often wore suits of red, black, and white with striking diamond patterns. Court jesters have also been depicted wearing similar outfits in illustrations. This popular design has been seen throughout time, and is easily achievable in a few simple steps.
Creating the Base
One of the easiest things to do is create a reusable diamond base for creating harlequin design patterns over and over. By creating this base, you make it easy to simply click and fill in your patterns with whatever you would like without having to create a new base every time. The easiest way to do that is take advantage of the pattern fill option in Photoshop, and I’ll show you how to do just that!
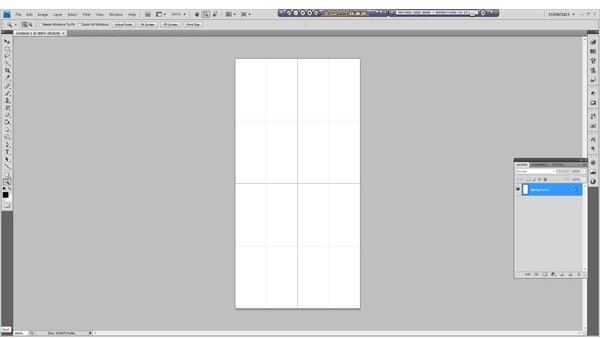
Create a new document 50 pixels wide by 100 pixels wide. This will give you the classic elongated diamonds that are part of the harlequin style. Ideally you will want to do this on a transparent canvas (no background) but for ease of viewing, I’m going to use a white background so you can see my lines very clearly.

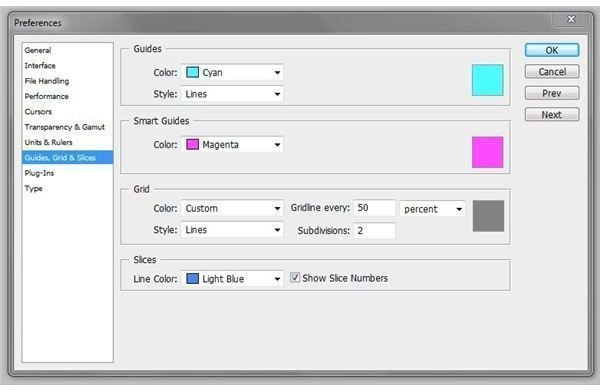
Now we’re going to need a little guidance here, so this is where we set up Photoshop’s grid to give us a little bonus help. Simply go up to Edit > Preferences > Guides, Grid & Slices. Your window should look similar to this.
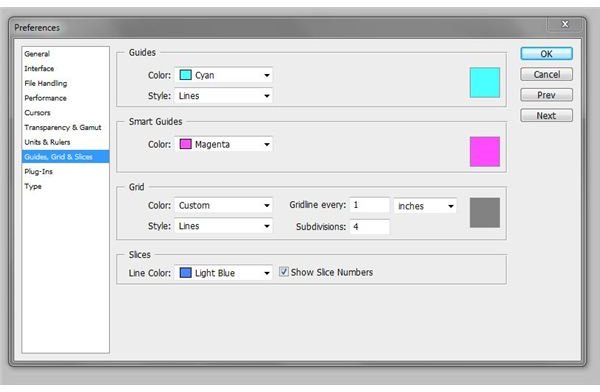
Now you simply have to change the options in grid to:
Gridlines every: 50 percent
Subdivisions: 2
Press OK when finished.
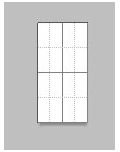
Now go to View > Extras > Grid. Your canvas should now look like this!
Zoom into your canvas a decent amount - trust me on this one, you’re going to want to see as much as you can. I’ve zoomed in to about 800%. Here’s what it looks like compared to the rest of my workspace.
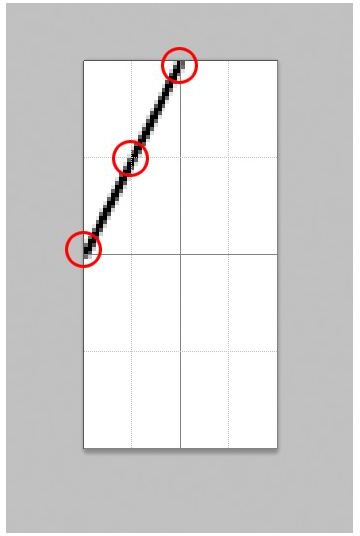
Now grab yourself your line tool - it shares the same tab as your custom shape tool and your shape tools - set the line width to 2px, and begin to create a diamond shape. I’ll show you the easiest way to do that with this quick diagram.
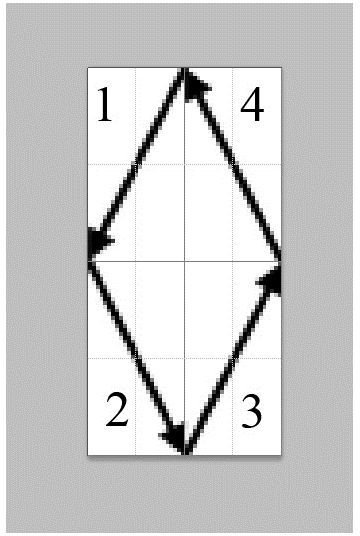
Simply drag your line tool from area to area, making sure to pay attention to the three specific key areas when you do so:
Now you have a completed diamonds that should look similar to this!
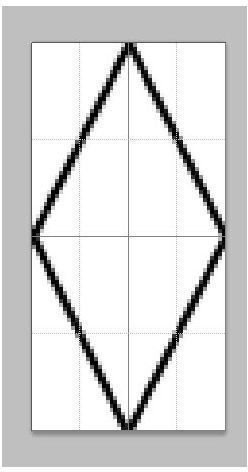
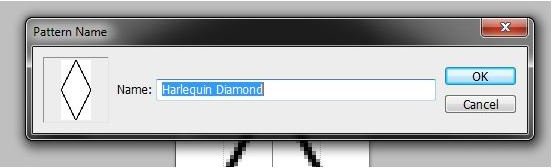
Now to define it as a pattern, simply go up to Edit > Define Pattern… It will open a window and ask you to save your pattern. Name it something like “diamond” or “harlequin pattern” – organization counts, after all.
Creating your Harlequin Pattern in a Few Simple Steps!
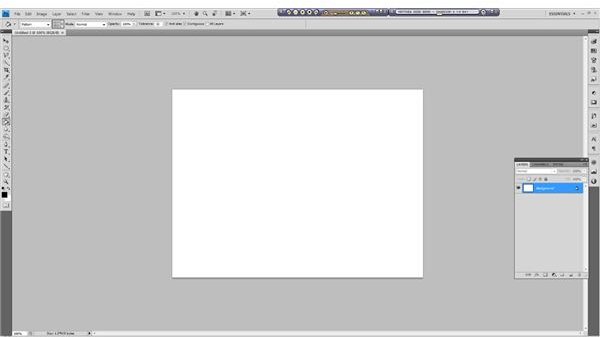
Now open a new document. For this example I’m just going to use 800 pixels wide by 600 pixels tall, but it really could be any size you would like.
Now find your paintbucket tool and go to your top toolbar. It will look like this:

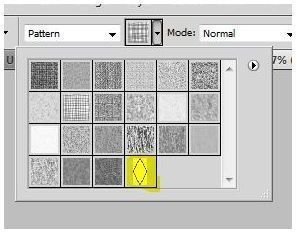
Simply click the pulldown tap that says “Foreground” and select “Pattern” instead.

Now in the box next to your pattern, click the small downward arrow and look for your harlequin diamond within the patterns. Here’s where mine is:
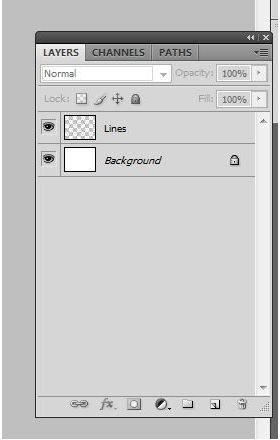
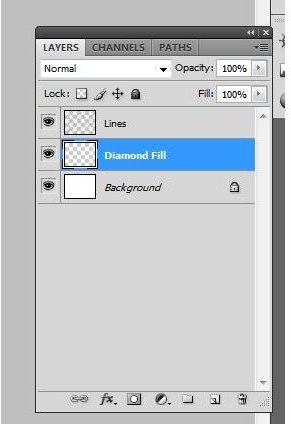
Now create a new layer for your diamond base and name it something like “Lines.”
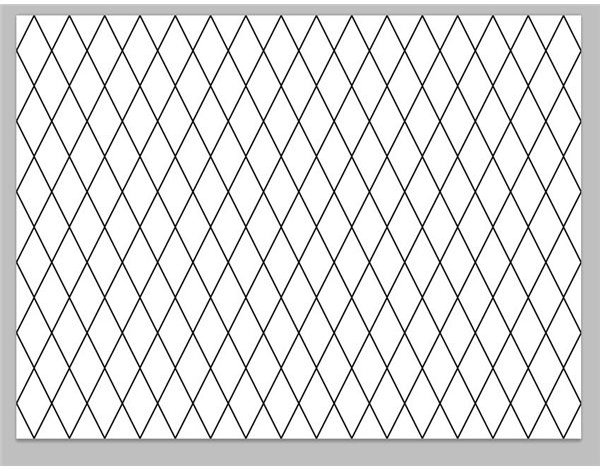
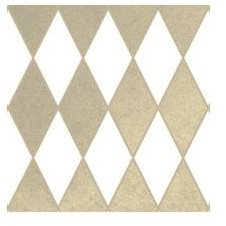
Now fill your canvas with your pattern. When you’re finished, you should have something like this.
Create a new layer under your lines layer and title it “diamond fill.” Remember, an organized Photoshop document is a happy Photoshop document!
Now to create the harlequin effect, grab your magic wand tool and begin selecting the diamonds I have highlighted in the red.
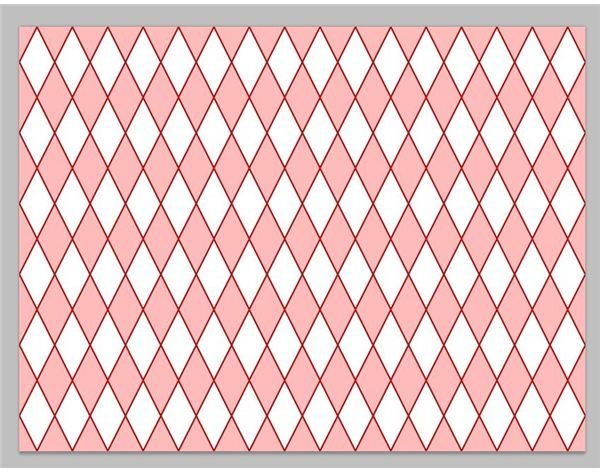
Quick Tip: To make more than one selection at the time, hold down the shift button.
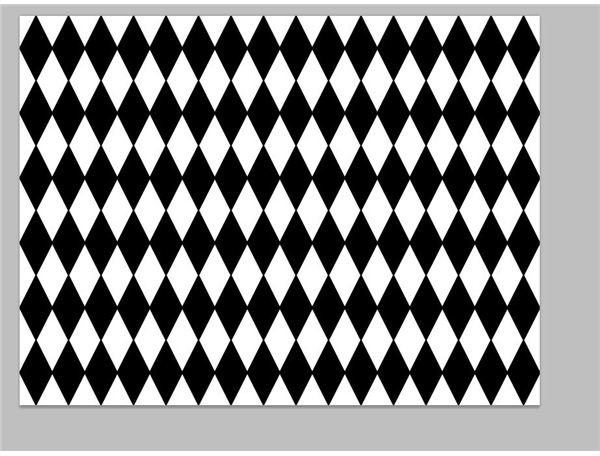
Now fill your diamonds with whatever color you would like. I’m going to use black in this example because it blends well with the lines, but you can really use whatever you would like. Here’s the simple finished version of the harlequin design pattern!
Of course, you don’t have to stop there. By playing around with layer styles and the addition of textures in Photoshop , you can create some striking effects that can fit all kinds of different projects. This effect really does lend itself to just about any project.
References & Image Credits
All information and images provided by Amber Neely.


