Photography Basics: Camera Settings You Should Understand
Camera Setting Modes
Mastering photography basics camera settings is the first step toward taking great pictures. Virtually all digital cameras sold these days from high-end DSLRs to tiny pocket-sized point and shoot digital cameras come with several different modes that can be used by the photographer to tweak the camera’s settings for almost any occasion. The various shooting modes have made the choice between auto and manual mode more difficult.
Over time, these different shooting modes have become standardized to a certain degree among all camera manufacturers. Even cameras designed for beginner photography have most of these settings.
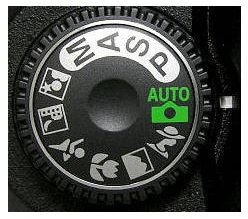
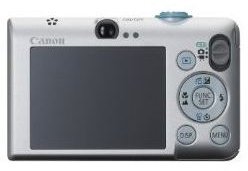
Camera modes are set on most DSLRs via dial on top of the camera body. On smaller point and shoot cameras, modes are selected via buttons and menus on the back or on a touchscreen.
Fully Automatic Mode
The most common of all digital camera settings is full auto. The fully automatic mode allows all of the technologies and sensors built into the camera to do all of the work. Everything from exposure to aperture to shutter speed to ISO are set automatically according the camera’s sensor readings and software. One might think that the results from automatic mode would be worse than more manual camera settings, but that is often not the case. Particularly during those events when snapshots come fast and fleeting, automatic mode can be the best option for even professional photographers looking to capture everything from adorable kids giggling to four generations of women toasting the moon.
Semi-Automatic Modes
When the photographic composition calls for more discretion on the part of the photographer, a camera’s semi-automatic modes become the best options for taking pictures. The two keys to every photograph are how wide the shutter opens and how long the shutter stays open.
While several combinations of shutter speed and aperture give the same exposure, they do not give the same photo. Faster shutter speeds can freeze the action resulting in crystal clear kiddos flying a kite. Wider apertures reduce the depth of field resulting in blurry backgrounds that allow the viewer to focus on what the picture was actually taken of.
For situations where stopping the action is required or more or less depth of field is necessary, setting the camera to one of these modes results in the best pictures. For photographing sporting events or other fast moving subjects, set the camera to its manual shutter speed mode, usually called shutter priority mode. Camera settings for taking portraits or other up close and personal shots with busy backgrounds use aperture priority mode.
Digital Camera Menu Settings Options
Full Manual Mode
Most digital cameras also come with a full manual mode. In this mode, photographers can set both the aperture and shutter speed, usually with the help of a display that blinks if one or both numbers will result in what the camera’s sensors determine will be an over or under exposure. The nature of manual mode requires the photographer to have enough time to setup their shots. Using the camera’s manual settings for taking portraits on a tripod is a useful technique, for example.
Auto Flash, Flash On, and Flash Off
Different pictures call for different flash settings, and today’s cameras are happy to help. Cameras can be set to automatically flash when the detected light is too low or they can be set to always flash (useful for fill flash or when bright backgrounds will throw off the camera’s light sensor). Cameras can also be set to not flash no matter what. This is useful for places where flash photography is not allowed, as well as anywhere one will be photographing through glass or other reflective materials. Also, turning off the flash when doing wildlife photography is useful since the long zoom lenses typically are taking photos of subjects well beyond the flash’s range.
Some cameras set the flash via the same menus and buttons as camera modes, while other, typically larger cameras, may have a dedicated button, often indicated with a lightning bolt.
Camera File Type Setting and RAW Mode
Finally, most cameras allow the photographer some options regarding the actual file that is stored when a picture gets taken. File settings and RAW mode (as well as advanced settings like white balance and ISO settings) are almost always set via the camera’s menus, even on more expensive DSLR cameras.
Higher-end cameras offer the ability to shoot in RAW mode, a setting that results in the biggest file sizes but also preserves every bit of data captured by the camera. This setting is the choice of professionals and also for those shooting in a home based photography studio or other environment where “little things” like white balance can make all the difference between an amazing photograph and an OK picture.
Cameras with and without a RAW mode option often offer the ability to choose a smaller file size to store pictures in. Although this results in a lower quality image and may limit the options available via photo editing software, it is a necessary compromise for photographers with limited space available on their storage devices and a need to shoot numerous shots. Better a lower quality picture of an amazing moment than no picture at all. However, photographers shooting in the studio with plenty of time to download files to new memory cards or to a laptop will be better off taking advantage of big high-quality files offered by the top digital cameras for portrait photography.