How to Use Picture Tubes in Corel Paint Shop Pro Photo X2 Ultimate – Dress Up Your Digital Photos with Paint Shop Pro Picture Tubes

What are Picture Tubes?
Picture tubes are collections of objects in Corel Paint Shop Pro Photo X2 Ultimate that can be used to add artistic effects to your digital photographs. There are numerous groups of picture tubes that come prepackaged with Paint Shop Pro, but you can also download more from third-party sources or even create your own!
Each picture tube contains several images from one central theme. For example, the St. Patrick’s picture tube that comes packaged with Corel Paint Shop Pro Photo X2 Ultimate includes six different images, all related to Ireland and St. Patrick’s Day celebrations. The number of images in each picture tube varies. While the St. Patrick’s picture tube only has six images, the Autumn Leaves tube has nine.
How to Use Picture Tubes
There are two basic ways that you can use picture tubes to embellish a digital photograph. The first way is to add images from the tube, one by one, to specific areas on the photo. To do this, follow these steps.
Adding Individual Picture Tube Images
Step One: Open your photo in Paint Shop Pro and click on the Picture Tube tool.
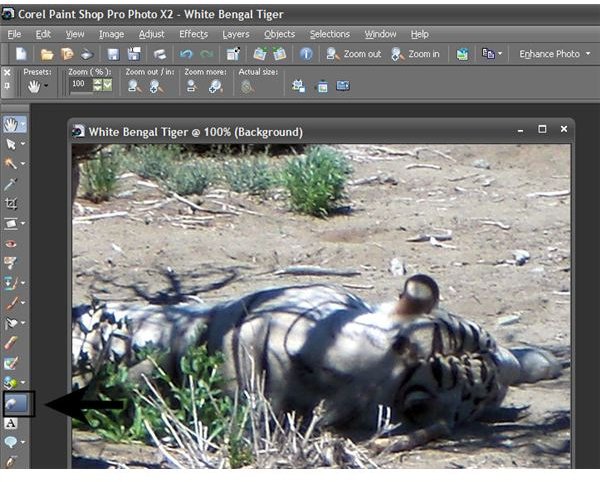
Step Two: The Picture Tube toolbar will now be present underneath the main toolbar at the top of the Paint Shop Pro screen. By default, the last picture tube used will be visible in this menu. To select a new tube, click on the arrow next to the default image as shown in the screenshot below.
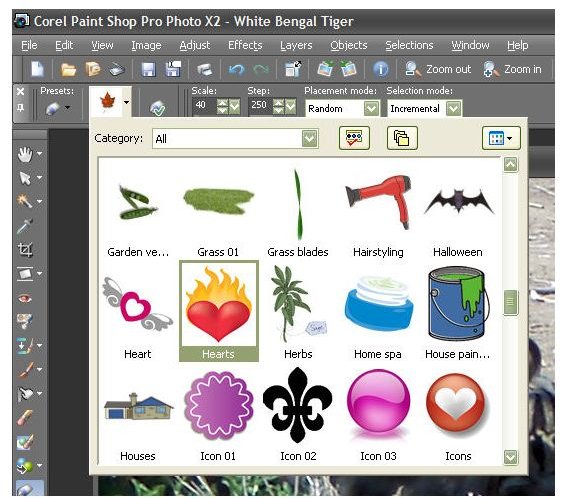
Step Three: Scroll through the available options and pick the picture tube you want to use to embellish your digital photo. You can narrow down your selection choices by first picking a category if you like. For this example, we’ll choose the Hearts picture tube.
Step Four: Before you start placing images from the picture tube on the photo, it’s a good idea to select what options you want to use for the tube. There are four different items you can customize here: Scale, Step, Placement Mode, and Selection Mode.
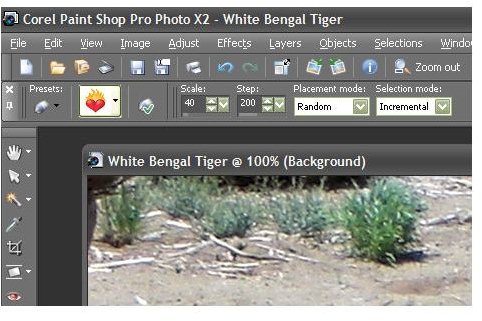
The Scale will determine how large the image from the picture tube will be when you place it in your photo. You may have to play around with this a little bit to get the exact size you want. Since we’re only adding individual images from the tube in this example, we don’t have to worry about the Step option, and we’ll ignore that for now. We’ll pick Random for Placement Mode and Incremental for Selection Mode.
Step Five: Click on the area of the digital photo where you want the image to appear.

Tip: If you don’t like the image from the picture tube or if you want to change the scale and start over, just click the Undo button and try again.
Painting with Picture Tubes
The second method of using picture tubes to dress up your digital photos involves using the tube as a paintbrush. Instead of simply clicking on one spot in the photo, you can drag the mouse across an area of the photograph and create a continuous effect. This process of doing this is much the same as using the first method, so we’ll just point out the differences.
The Step option becomes very important when using picture tubes in this manner. It will determine how close together the continuous images will be as you are “painting” them on the photo. Larger step values correspond to images being placed further apart. For this example, we’ll change the Step value to 50.
Now, just pick the area of the digital photo where you want your stream of images to begin, and drag the cursor across the photograph with your mouse. We’ve used the X3_Stars picture tube to illustrate this in the photo shown below.

Experiment!
As with many features of Corel Paint Shop Pro Photo X2 Ultimate, you’ll have to practice and experiment a little to realize all the versatility that working with picture tubes has to offer. Have some fun exploring the tubes that come packaged with the software, and then check out the other articles in this series when you’re ready to start looking for more picture tubes to add to your collection.
If you’re looking for information on other features found in Paint Shop Pro, browse through the library of tutorials found here on Bright Hub’s Digital Photography Channel.
This post is part of the series: Picture Tubes in Corel Paint Shop Pro Photo X2 Ultimate Series
Ready to find out how you can use the picture tubes of Corel Paint Shop Pro Photo X2 Ultimate to jazz up your digital photographs? In this series, we’ll start with the basics and work ourselves up to learning how to create our own custom picture tubes for the photo-editing software.