Here is a HandBrake tutorial outlining how to change the basic settings in your video during conversion.
HandBrake Video Compression
The HandBrake video compression program can be used for things like ripping DVDs , but it actually gives you a lot of control over different video files. HandBrake can be used to compress and convert a video file, and within that framework you can then also make changes to the way that file ends up appearing. The way that HandBrake does this during video compression is by allowing you to specify the display and compression settings so that the exported video file is fundamentally different than the original file. The HandBrake settings are built perfectly for designing the final video as long as you know how to apply the best HandBrake video settings. Here is a step by step tutorial on how to change the video perspectives for your video file with HandBrake.
Picture Settings
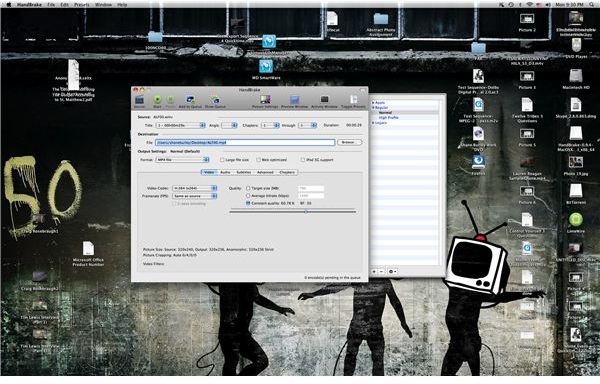
When you begin you will either have HandBrake open up a window where you will choose the source media, or you will select the Source button in the upper left hand corner. Here is where you will identify the video that you want to alter, but it will not be a destructive alteration. Instead it will produce a new video file with the selected changes in HandBrake settings, which you can then accept or delete upon viewing.
Go into the Picture Settings option, which is one of the HandBrake settings that deals with video output, that is directly to the left of the Preview Window option. In these HandBrake settings you will be able to specify the width and height in the aspect ratio, what type of anamorphic you want, any cropping you want done to the video image during video compression, as well as if you want filters like denoise added to the video during
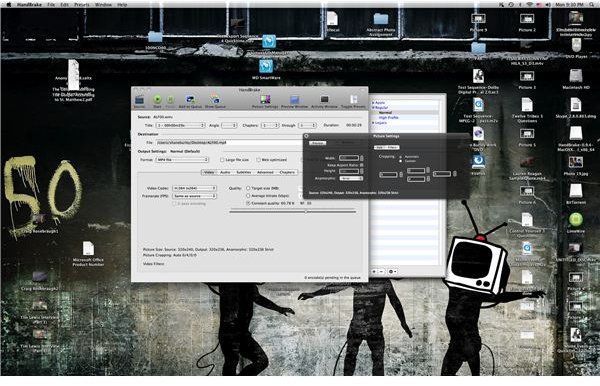
this compression process. In the upper left hand corner of this black window will be a Preview button where you can preview what the final video image will look like once the video perspective changes have been made.
In the main HandBrake window you can make even further changes to the HandBrake settings and quality of the final video. You have the option to change the frame rate of the video, which can be an interesting way for you to change video shot in 30 FPS to 24 FPS for a more filmic look. You will also decide how much video compression you want HandBrake to apply by altering the HandBrake settings around either the size of the video you want, the average bitrate, or the quality loss by percentage. The best Handbrake settings are going to be those that remain the most accurate transfer as possible, so maintaining the original frame rate and working to compress the video as little as you possibly can.
At the bottom it will list the dimensions of your video so that you can check to make sure that it matches the HandBrake settings and changes you made during the preparation of the video compression. Here you can then hit the Start button and the video compression process will begin, applying the Picture Settings that you chose to your final video output. This video should then be viewed in the same way as the original so that the changes are identified and accepted by the person initiating the perspective change.
This post is part of the series: HandBrake Tutorials
Here are some detailed tutorials for different functions in the video conversion software, HandBrake.


